
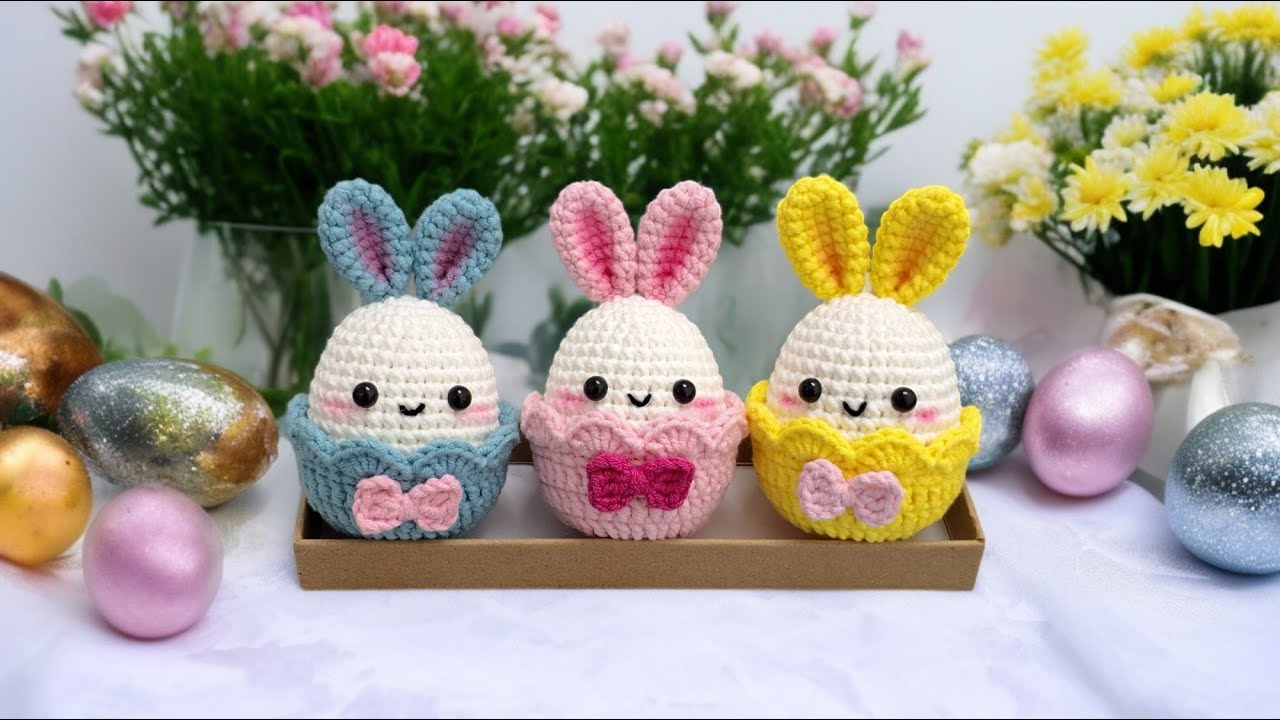
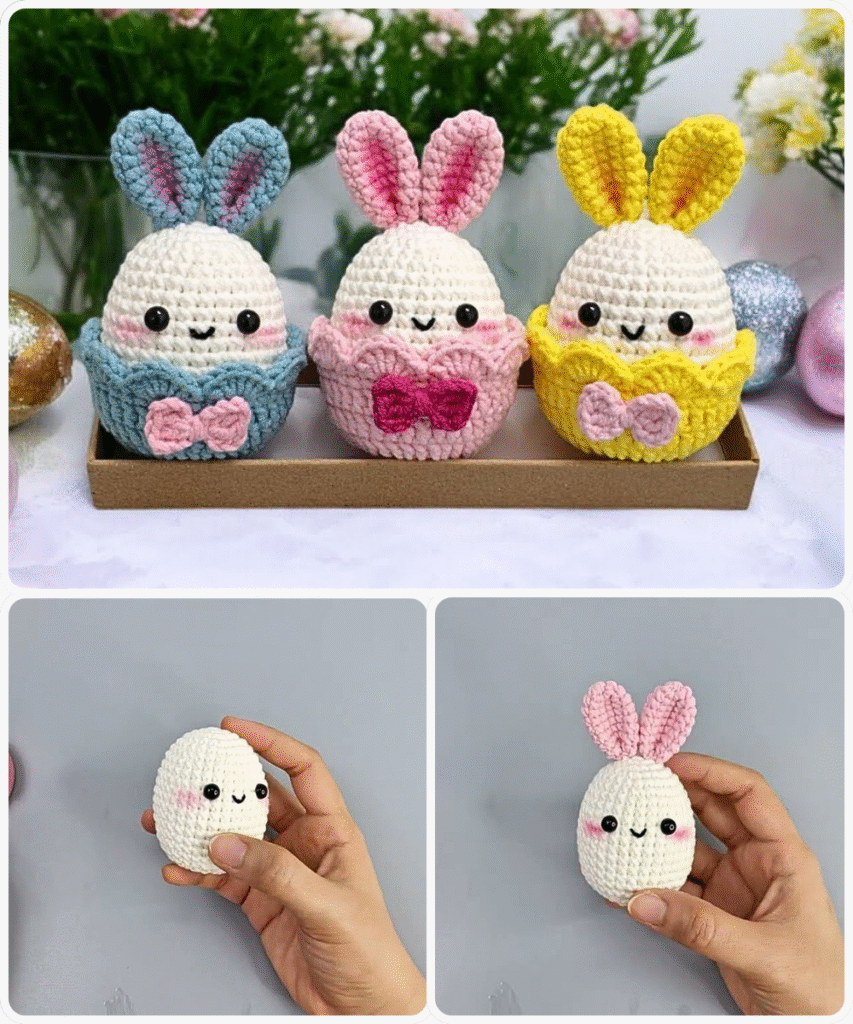
Crochet Easter Egg Pattern (Amigurumi Style)
Skill Level: Confident Beginner to Intermediate
Techniques Used: Magic ring, single crochet, invisible decrease, color changes, stuffing
Materials Needed
To crochet a lovely, firm, and vibrant Easter Egg, you’ll want to gather the following materials:
- Yarn: Worsted weight (size 4) cotton or acrylic yarn. Cotton is great for stitch definition, but acrylic offers a little more stretch and squish. Choose spring-themed colors like pastel pink, lavender, mint, lemon, and baby blue. You’ll want 2–3 complementary colors for stripes or patterns.
- Hook: 3.5 mm (E) crochet hook. This size works well to keep the stitches tight so stuffing doesn’t peek through.
- Stuffing: Polyester fiberfill for a soft but structured shape.
- Tapestry needle: For sewing and weaving in ends.
- Stitch markers: To keep track of rounds.
- Scissors: For trimming yarn.
- Optional: Safety eyes, embroidery thread, ribbons, beads for embellishments.
Stitch Abbreviations (US Terms)
- MR – Magic Ring
- ch – Chain
- sc – Single crochet
- inc – Increase (2 sc in one stitch)
- dec – Decrease (invisible preferred)
- sl st – Slip stitch
- st(s) – Stitch(es)
- BLO – Back loop only
- FLO – Front loop only
- () – Total stitches in round
- x n – Repeat the instructions within brackets n times

Gauge & Size
Exact gauge isn’t critical, but you want tight, uniform stitches. If your egg is too loose, go down a hook size.
Finished size (with worsted weight yarn and 3.5 mm hook): ~3.5″ (9 cm) tall, ~2.5″ (6.5 cm) wide.
Special Notes Before You Start
- You’ll be working in continuous rounds. Do not join unless stated.
- Always mark the first stitch of the round with a stitch marker and move it up as you go.
- Use invisible decreases (working in front loops only of two stitches) to avoid gaps.
🧵Pattern: Basic Easter Egg Shape
Base and Middle Section (Worked in the round)
Round 1: Start with a MR, 6 sc into the ring. (6 sts)
Round 2: Inc in each stitch around. (12 sts)
Round 3: [Sc 1, inc] x 6. (18 sts)
Round 4: [Sc 2, inc] x 6. (24 sts)
Round 5: [Sc 3, inc] x 6. (30 sts)
Round 6: [Sc 4, inc] x 6. (36 sts)
Round 7: Sc in each stitch around. (36 sts)
Round 8–12: Continue sc in each stitch around for 5 rounds. (36 sts)
Here, you can introduce stripes or colorwork. For example, switch to a second color on Round 9 and alternate every 2 rows. Carry the yarn inside or cut and weave in ends if preferred.
Round 13: [Sc 4, dec] x 6. (30 sts)
Round 14: Sc in each stitch around. (30 sts)
Round 15: [Sc 3, dec] x 6. (24 sts)
Round 16: Sc in each stitch around. (24 sts)
Round 17: [Sc 2, dec] x 6. (18 sts)
Start stuffing your egg now!
Push small tufts of fiberfill inside, shaping as you go. You want a firm but squishy fill that doesn’t bulge.
Round 18: [Sc 1, dec] x 6. (12 sts)
Round 19: Dec around. (6 sts)
Fasten off, thread tail onto a needle, and weave through the front loops of the final 6 stitches. Pull tight to close. Weave in the end securely.

Striped Easter Egg Variation
To create a striped version, change colors every two rounds from Round 6–17.
- Use pastel pink, lemon yellow, and sky blue.
- To change color: At the last yarn-over of the last stitch of the round, switch to the new color and complete the stitch.
This gives you clean color transitions with no jagged edges.
Decorative Colorwork Patterns
Try working simple fair isle-style patterns by alternating colors in stitches. Example:
Round 8 (Hearts):
Work [sc in MC, sc in CC (contrast color)] around. This creates a polka dot or heart illusion depending on placement.
To chart your own motifs, draw a 36-stitch wide and 20-row tall grid and plot your design before stitching.
Textured Egg Variation (Shell Stitch Band)
Add a decorative band mid-egg:
- Begin the egg as normal up to Round 8.
- Round 9: Change to a new color. Work in FLO: Skip 1 st, 5 dc in next, skip 1 st, sl st in next – repeat around for shell band.
- Round 10: Return to working in both loops with main color. Resume normal pattern.
This adds a lovely flower-petal-like midsection.
Embellishment Ideas
Once your basic egg is complete, you can go wild with decorations:
- Mini flowers: Crochet tiny 5-petal blossoms and sew them on.
- Bows: Make a small chain (ch 30), fasten off, tie in a bow and attach.
- Embroidery: Stitch daisies, vines, or names using a tapestry needle and embroidery floss.
- Faces: Add safety eyes, blush cheeks, and a smile for a kawaii egg.
- Beads & Sequins: Sew on for a sparkle effect.
- Hanging loop: Ch 15, form a loop, attach to top before closing last round.

🧵Pattern: Mini Flat Easter Egg Appliqué
Want a flat version for garlands or cards?
Round 1: MR, 6 sc. (6 sts)
Round 2: Inc around. (12 sts)
Round 3: [Sc 1, inc] x 6. (18 sts)
Round 4: [Sc 2, inc] x 6. (24 sts)
Round 5: [Sc 3, inc] x 6. (30 sts)
Round 6: [Sc 4, inc] x 6. (36 sts)
Round 7: Work in FLO: [Sc 1, hdc 1, dc 1, hdc 1, sc 1] repeat pattern around. Fasten off, weave in ends.
Use embroidery to decorate or stitch several together for a festive garland.
Stuffed Egg with Surprise Inside
Like a Kinder Egg, you can modify the pattern to insert a treat or toy inside!
- Follow base pattern up to Round 15.
- Insert a small toy (like a mini chick, charm, or wrapped candy).
- Continue stuffing around the object and close as normal.
To make it reopenable, sew a small zipper or attach with snap buttons along Round 13-18. Create a flap with extra rows of sc or dc.
🧵Pattern Variation: Crochet Egg with Stand
Make a nest-style base:
Round 1: MR, 6 sc
Round 2: Inc around. (12)
Round 3: [Sc 1, inc] x 6. (18)
Round 4: [Sc 2, inc] x 6. (24)
Round 5: [Sc 3, inc] x 6. (30)
Round 6: BLO – sc around.
Round 7–10: Sc around to form walls. Fasten off.
Nest the egg inside – great for tabletop display!
Advanced Idea: Mosaic Crochet Easter Egg
Using tapestry technique, chart and work complex designs into your egg: chicks, tulips, zigzags. Use graph paper or software to plan stitch-by-stitch motifs.
Carry unused yarn behind stitches or switch to color dominance techniques.
You may be interested:
- Tulip crochet basket for a beginner
- Crochet Coaster Motif: A Step-by-Step Guide to Creating Beautiful Coasters
- How to Crochet a Charming Daisy Motif: A Step-by-Step Pattern
- How to Crochet a Simple & Easy Crochet Flower | Free pattern for Absolute Beginners


