
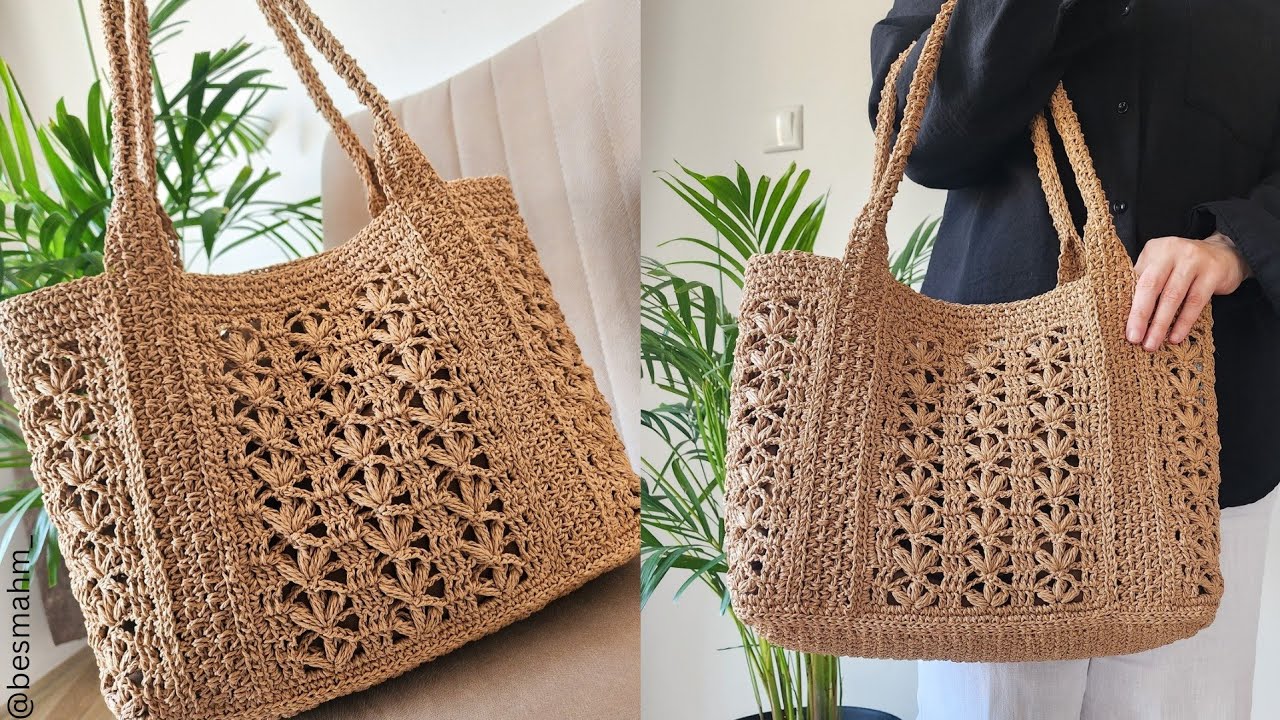
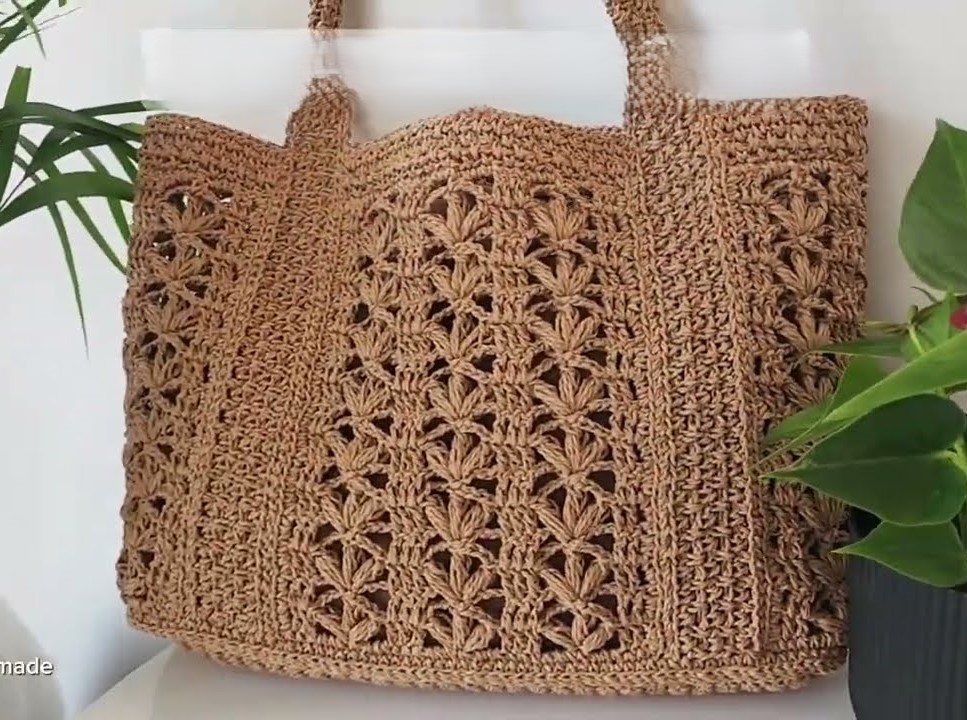
Crochet tote bags are one of the most rewarding projects a maker can undertake. They’re practical, endlessly customizable, stylish, and a perfect way to showcase your love for texture and design. Whether you’re dreaming of beachy summer outings or want a reusable bag for the farmer’s market, an easy crochet tote bag is the answer.
The best part? You don’t need to be an expert to make one. With a handful of stitches, a few skeins of yarn, and this guide in hand, you’ll be able to craft your very own tote bag from start to finish. This blog post walks you through everything: from selecting your yarn to the last finishing touches, with plenty of tips, stitch explanations, and customization ideas along the way.
Grab your hook—we’re going to make something beautiful, functional, and totally you.
Why Make a Crochet Tote Bag?
Before we dive into the how, let’s explore the why. There are so many reasons to crochet your own tote bag:
- Eco-Friendly – Say goodbye to single-use plastic bags with a sturdy, washable tote.
- Handmade Style – Your crochet tote reflects your personality, colors, and creativity.
- Skill-Building – This project is a great way to practice foundation chains, working in rounds, stitch consistency, and shaping.
- Great Gift – A crochet tote makes a thoughtful, handmade gift that people will actually use.
- Stash-Busting – Use up leftover yarns to make a colorful patchwork tote or color-blocked design.
Ready to get started? Let’s talk supplies.
Materials You’ll Need
This tote bag pattern is flexible and friendly—you can use almost any worsted or bulky-weight yarn and adapt the size easily. Here’s a basic list of what you’ll need to complete your bag:
Yarn
- Yarn Weight: Worsted weight (#4) or Bulky weight (#5) yarn works best. Cotton yarn is highly recommended for durability and easy cleaning.
- Yardage: Approximately 350–450 yards depending on bag size and yarn thickness.
- Color Options: Solid, striped, color-blocked, or multicolor yarns work well.
Some great yarn choices:
- Lily Sugar’n Cream (100% cotton)
- Lion Brand 24/7 Cotton
- Bernat Maker Home Dec (bulky cotton blend)
- Recycled cotton or T-shirt yarn for a sustainable twist
Hook
- Recommended Size: Use the hook size suggested on your yarn label. For worsted weight, a 5.0 mm (H-8) or 5.5 mm (I-9) is standard.
- Tip: If you crochet tightly, go up a size to keep your fabric flexible.
Notions
- Scissors
- Yarn needle (for weaving in ends)
- Stitch markers (to help track your rounds and handle placement)
- Optional: Button, magnetic clasp, or lining fabric
Now that your tools are ready, let’s take a look at the stitches we’ll use.
Basic Stitches and Techniques
This pattern sticks to simple stitches, but there are a few techniques you’ll want to get comfortable with first.
Foundation Chain (ch)
The base of your bag starts with a chain that you’ll work into for the bottom panel. Make sure it’s not too tight—loose chains help avoid puckering.
Single Crochet (sc)
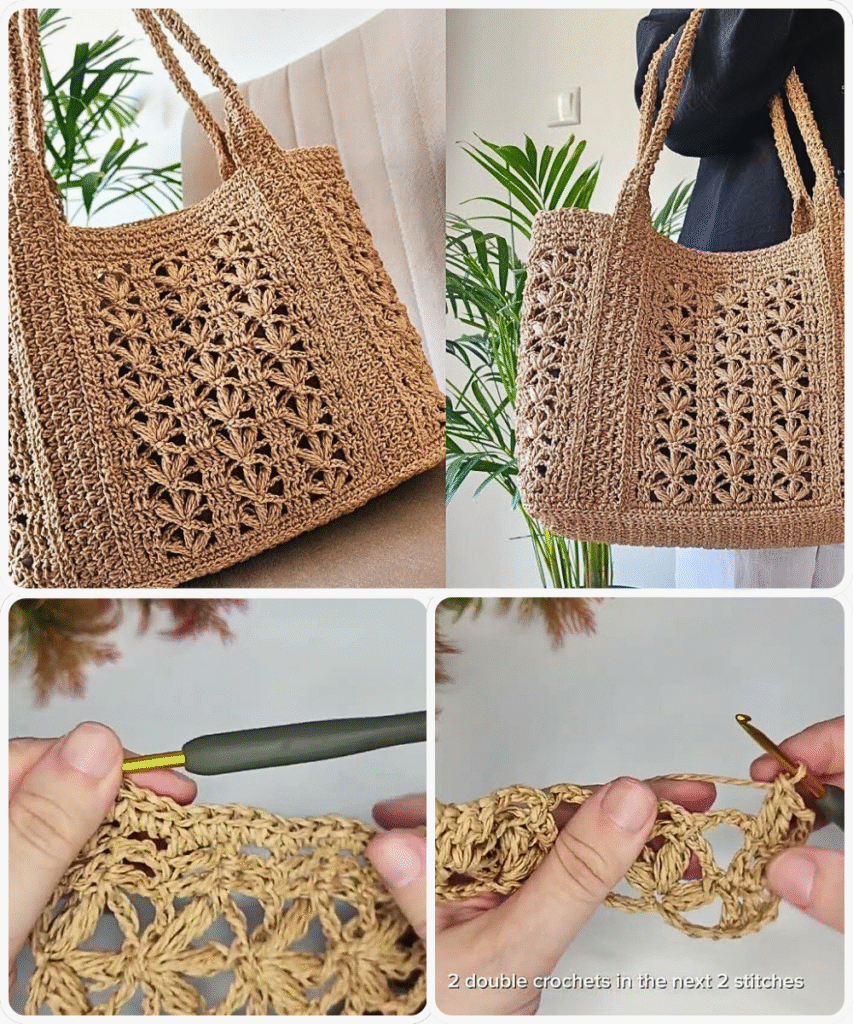
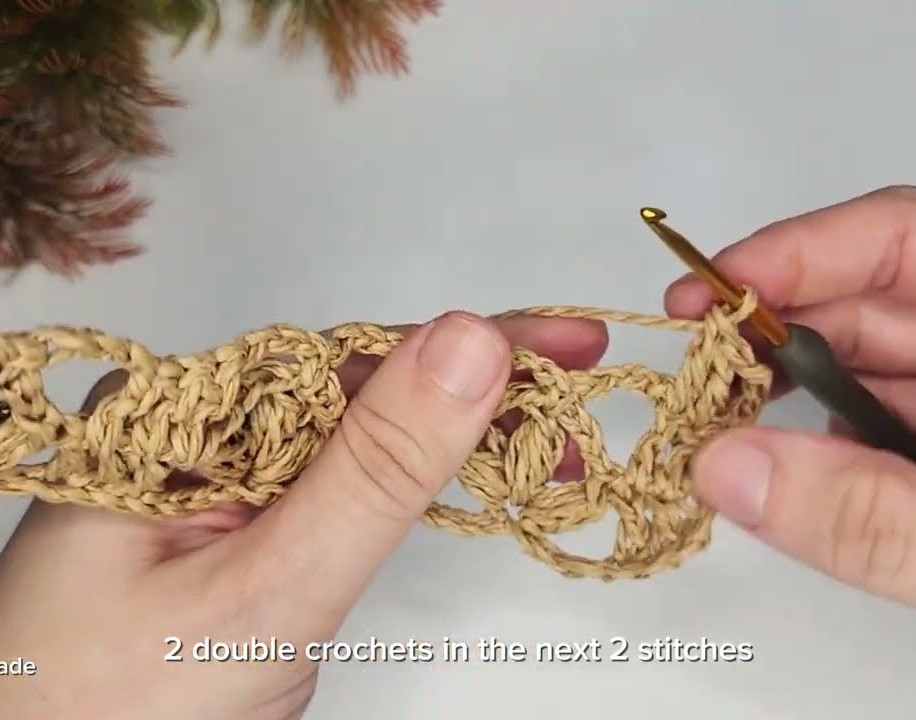
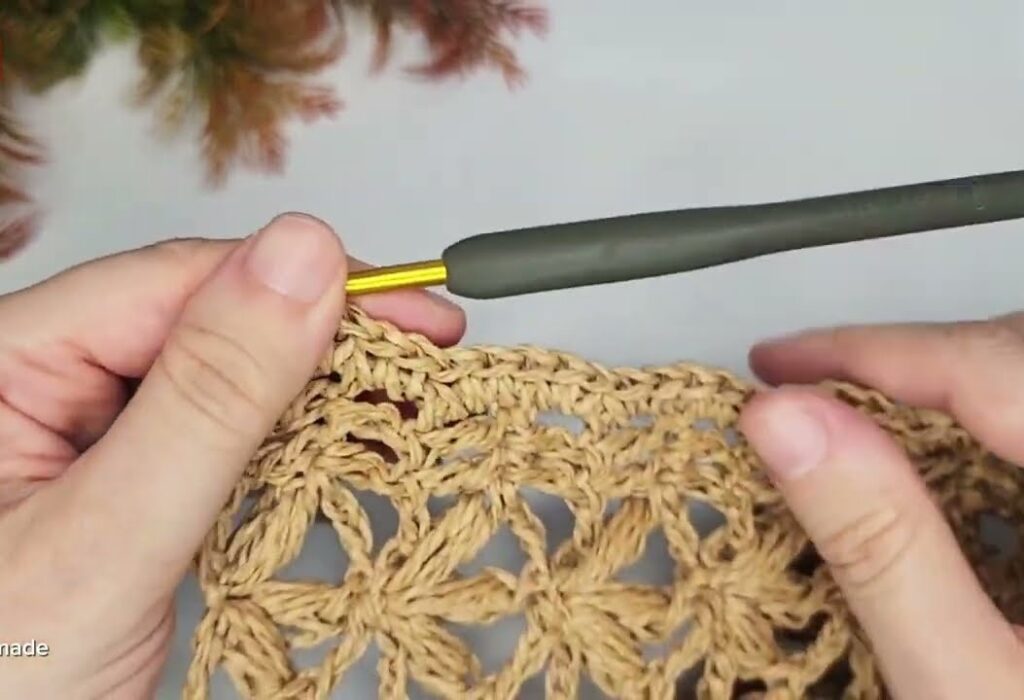
The single crochet creates a tight, dense fabric—great for bag bottoms and handles.
Insert hook into stitch, yarn over, pull through (2 loops on hook), yarn over, pull through both loops.
Half Double Crochet (hdc)
A beautiful in-between stitch—taller than sc but tighter than dc. We’ll use it for the main body of the bag.
Yarn over, insert hook, yarn over, pull through (3 loops), yarn over, pull through all 3.
Slip Stitch (sl st)
Used for joining rounds or finishing clean edges.
Working in the Round/Oval
The tote is started with an oval base created by working around both sides of a foundation chain. This technique gives your bag a flat, symmetrical bottom.
Optional: Front/Back Loop Only (FLO/BLO)
Crocheting into only one loop creates beautiful ridges and textures. We’ll use this technique in the handle section if desired.
Pattern: Easy Oval-Base Crochet Tote Bag
This easy tote bag measures about 14” wide x 12” tall with two sturdy handles. It’s built from the bottom up, starting with an oval base, working the sides in the round, then shaping and attaching the handles.
You can scale the pattern up or down easily by adjusting the starting chain and round count.
Step 1: The Oval Base
Foundation Chain:
Ch 31
Round 1: 1 sc in second ch from hook, 1 sc in next 28 sts, 3 sc in last ch. Rotate to work on the opposite side of the chain. 1 sc in each of the next 28 sts, 2 sc in same space as the first stitch. Join with sl st. (62 sts)
Round 2: Ch 1. 1 sc in next 28 sts, 2 sc in each of next 3 sts (corner), 1 sc in next 28 sts, 2 sc in next 2 sts, 1 sc in last st. Join with sl st. (68 sts)
Round 3: Repeat the pattern, increasing at both ends to shape the oval. You can do 1 or 2 more rounds depending on how wide you want the base.
Pro Tip: The wider your base, the roomier your bag.
Step 2: The Body of the Tote
Switch to hdc for the body.
Round 4: Ch 1. Work 1 hdc in each st around. Do not increase. This helps the bag curve upward from the base. Join with sl st.
Rounds 5–20 (or desired height): Repeat Round 4 until the bag reaches your preferred height (usually 10–12 inches).
Optional: For a textured look, try alternating between hdc and sc every 2 rounds. For a color block bag, change yarn color every 5 rounds.
Customization Tip: Want a mesh tote? Work some rounds in “ch 1, skip 1, dc in next” for a breathable open pattern.
Step 3: Shaping and Creating the Handles
We’re going to create two handles by skipping stitches and chaining over the gaps.
Mark the handle positions: Flatten your bag and place markers about 4” apart on each side (or wherever you want your handles).
Handle Round: Work hdc to first marker, then ch 20 (or desired handle length), skip 10–12 sts, hdc to next marker, ch 20 again, skip the same number of sts, finish the round.
Next Round: Work hdc around, placing 1 hdc in each ch from the previous row. This locks the handles in place.
Final 2 Rounds: Sc around the entire bag opening and handles for a clean, sturdy finish. Fasten off and weave in all ends.
Optional Enhancements and Styling
Now that the main bag is complete, consider these upgrades:
Add a Lining
Use fabric to sew a simple lining for the inside. It can help prevent stretching, add pockets, or protect contents.
Add a Closure
Use a large wooden button and crochet a loop closure. Or sew in a magnetic clasp for a modern touch.
Embellishments
Add tassels, pom-poms, or even granny square pockets. You can surface crochet flowers, initials, or shapes right onto the bag.
Adjustable Strap
Crochet a longer strap with adjustable buckle holes for a crossbody variation.
Yarn Substitutes and Texture Ideas
Explore different yarn types to change the feel and style of the bag:
- Cotton: Durable and stiff. Perfect for everyday use.
- T-shirt Yarn: Great for a chunky, structured tote.
- Raffia Yarn: Lightweight and beachy.
- Acrylic: Soft and colorful, but may stretch over time.
Experiment with these stitch variations:
- Camel Stitch (hdc in third loop) for ribbed texture
- Grit Stitch (alternating sc and dc)
- Basketweave (fpdc and bpdc)
Troubleshooting and Tips
Here are common issues you might run into and how to fix them:
Bag Flops or Sags: Use tighter stitches or a firmer yarn. You can also line the inside to reinforce shape.
Base Curls: Make sure to use enough increases during the oval rounds.
Handles Stretch Too Much: Add extra sc rounds, line the strap, or use a firmer yarn like cotton.
Bag Too Small/Big: Adjust the initial chain for the base and work fewer or more height rounds accordingly.
Cleaning and Caring for Your Tote
A big benefit of handmade bags is reusability—but they do need a little care.
- If using cotton yarn, hand wash in cold water and lay flat to dry.
- Acrylic bags can usually be machine washed on delicate but check the yarn label.
- Avoid hot water and dryers—they may shrink or distort the shape.
For deep cleaning, soak in mild detergent and reshape while drying.
Final Thoughts
Making a crochet tote bag is a journey—one that teaches you patience, builds your skills, and rewards you with something useful and beautiful. The best part? Every single one is unique. From the yarn you choose to the way you shape your handles, your tote becomes a reflection of your creativity.
And once you make your first, we can almost guarantee you’ll be hooked. Make one for every season, gift them to friends, or sell them at local markets—these bags are always in demand.
Now it’s your turn. Pick your colors, grab your hook, and crochet a bag that you’ll carry with pride. Functional, fashionable, and totally handmade—your crochet tote will go wherever you do.
You may be interested:
- Crochet Multicolor Granny Squares
- Crochet Coaster Motif: A Step-by-Step Guide to Creating Beautiful Coasters
- How to Crochet a Charming Daisy Motif: A Step-by-Step Pattern
- How to Crochet a Simple & Easy Crochet Flower | Free pattern for Absolute Beginners


