There’s something incredibly satisfying about creating your own clothes, especially when the result is as stylish, comfortable, and customizable as a crochet square blouse. Whether you’re new to garment-making or a seasoned yarn lover, this project combines simplicity with sophistication, making it a rewarding piece to craft and wear.
In this extensive guide, we’ll walk you through everything you need to know to make your own easy crochet square blouse—from selecting the right yarn and tools, to crafting your squares, joining them seamlessly, and styling your finished blouse. This tutorial uses basic crochet stitches and squares as building blocks, which makes it approachable even for beginners, yet versatile enough to impress the most experienced crocheters.
So grab your favorite hooks, settle in with your yarn, and let’s dive into a fashionable journey to creating your very own wearable art piece.
Why Make a Crochet Square Blouse?
Crochet garments have made a massive comeback in recent years. Fashion runways, social media influencers, and everyday crafters are embracing the handmade aesthetic. Square blouses, in particular, stand out for several reasons:
1. Beginner-Friendly Construction:
The square blouse is made up of multiple simple squares joined together, which makes the construction intuitive and accessible to beginners. If you can crochet a square, you can crochet this blouse.
2. Highly Customizable:
You choose the square design, size, color palette, and even the shape of the sleeves or neckline. It’s a creative playground where no two pieces ever have to look alike.
3. All-Season Wearability:
Use cotton yarn for a breathable summer top or go with wool blends for a cozy winter pullover. The stitch pattern and yarn weight determine how light or dense the final blouse becomes.
4. Eco-Friendly Fashion:
Making your own clothes from sustainable yarns is a step toward slow fashion and reduces your wardrobe’s environmental impact.
5. A Statement Piece:
With big visual appeal and a handmade feel, a crochet square blouse adds charm and personality to any outfit.
Ready to make your own? Let’s get started!
What You’ll Learn in This Blog
In this comprehensive tutorial, we’ll cover:
- Materials and tools required for the project
- Choosing the right square motif
- Understanding blouse construction using squares
- Detailed step-by-step instructions
- Customization tips for fit and flair
- Styling and care tips
- Answers to frequently asked questions
By the end of this blog, you’ll not only have a stylish new top but also the knowledge and confidence to create your own crochet garments.
Materials and Tools You’ll Need
Before diving into the actual pattern, let’s set the stage by gathering our supplies. Here’s what you need to make a basic crochet square blouse:
Yarn
Choosing the right yarn is key to ensuring your blouse is comfortable, flattering, and suited to the season.
Recommended Types:
- Cotton yarn: Great for warm weather and breathable blouses.
- Cotton blends: Add stretch and softness.
- Acrylic yarn: Budget-friendly and easy to work with.
- Bamboo or silk blends: Offer a luxurious drape and soft texture.
Yarn Weight:
For a lightweight, flowy blouse, go with DK (light worsted) or sport weight yarn. For a chunkier look, use worsted or Aran weight.
Yardage Estimate:
- Small to Medium size: 700–900 yards
- Large to XL: 1000–1200 yards
- 2XL+: 1300–1500 yards
Have a little extra on hand, especially if you’re making long sleeves or a longer body.
Crochet Hook
Choose a hook size that matches your yarn’s recommendation. For most DK-weight yarns, this will be 4.0 mm to 5.0 mm. You might want to go up a size if you prefer a looser, lacier fabric.
Note: Always make a gauge swatch to test your tension before committing to the full blouse.
Notions
- Yarn needle for weaving in ends
- Stitch markers for layout and seam alignment
- Scissors
- Blocking mat and pins (optional but recommended)
- Measuring tape
- Buttons or ties (optional for embellishment)
With your materials ready, let’s dive into choosing your square motif.

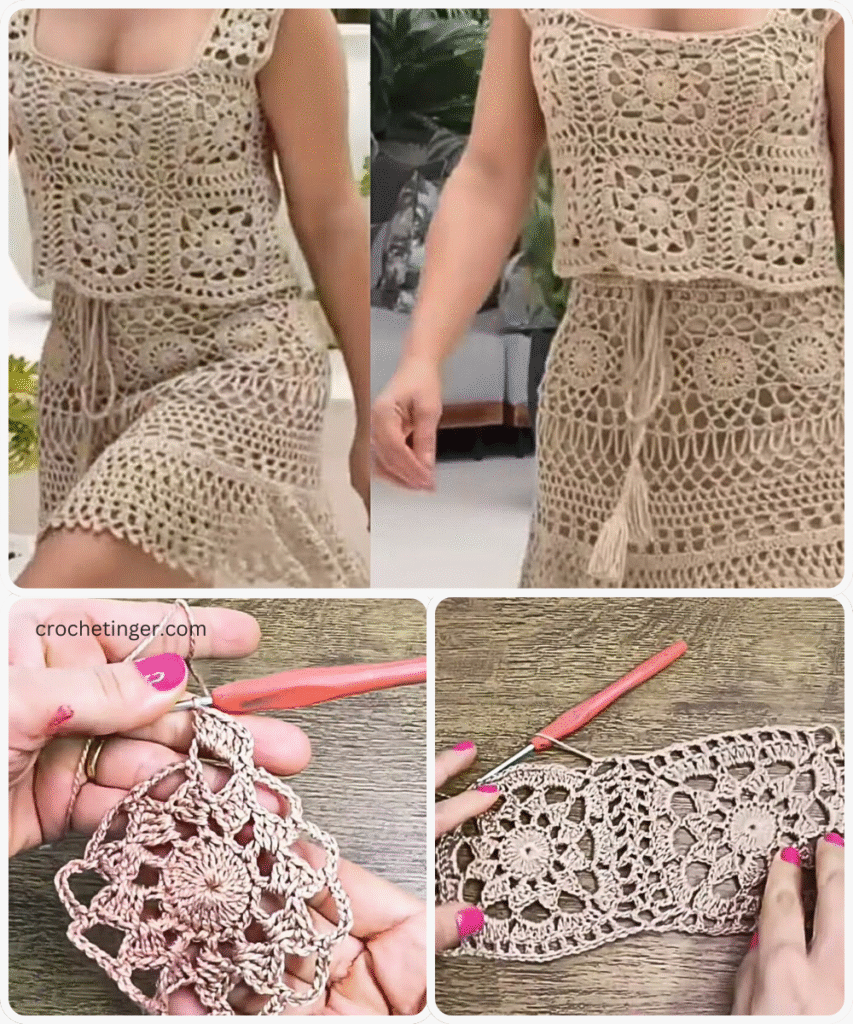
Choosing a Square Motif for the Blouse
The beauty of a crochet square blouse lies in its modular design. Each square is a building block of your final garment. You can choose a variety of square styles, such as:
1. Solid Granny Square
This is the simplest and most beginner-friendly option. It’s made entirely with double crochet stitches and forms a dense, neat square that offers more coverage.
2. Classic Granny Square
The classic open-style granny square uses clusters of double crochets and chain spaces. It’s more breathable and gives your blouse a boho vibe.
3. Lacy Square Motif
These feature chain spaces, picots, or other lacy stitch patterns. They look delicate and elegant—great for dressy wear.
4. Flower-Inspired Squares
These squares feature floral centers with colorful petals. Perfect for a spring or summer blouse.
Choose your square based on how open you want your fabric to be. For this tutorial, we’ll use a simple solid granny square pattern, which balances structure and coverage.
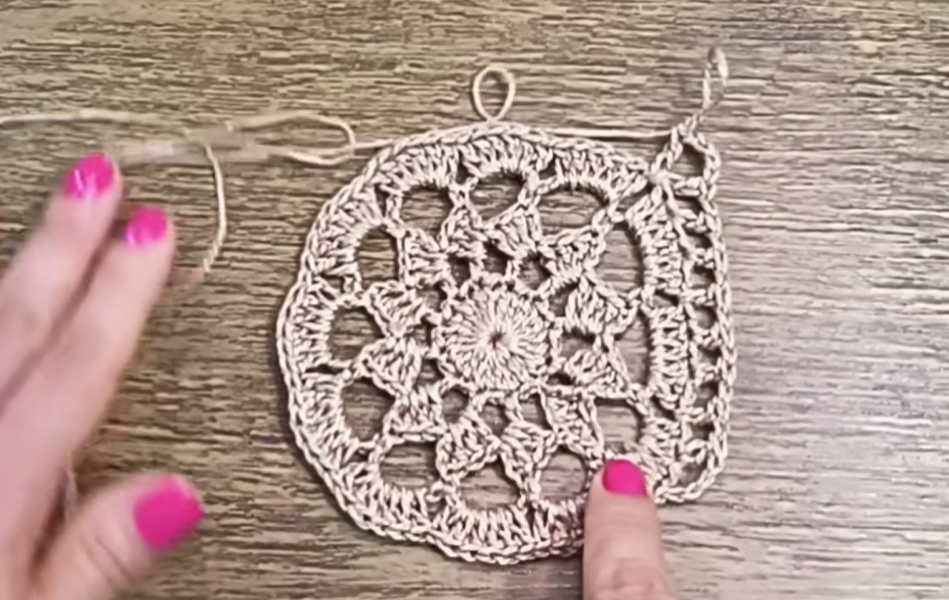
The Basic Square Pattern
Here’s how to crochet a solid granny square that you can use to build your blouse.
Abbreviations:
- ch = chain
- dc = double crochet
- sl st = slip stitch
- st(s) = stitch(es)
Round 1:
Start with a magic ring.
Ch 3 (counts as dc), 2 dc in ring, ch 2. 3 dc, ch 2 – repeat 3 more times. Sl st to top of ch-3. (4 corners of 3 dc)
Round 2:
Sl st in next 2 dc to corner space. Ch 3, 2 dc, ch 2, 3 dc in same corner. 3 dc in space between clusters, in next corner: 3 dc, ch 2, 3 dc. Repeat around. Sl st to top of ch-3.
Round 3-6:
Continue pattern by placing 3 dc in each space between clusters, and 3 dc, ch 2, 3 dc in each corner.
Make enough rounds to reach 5 to 6 inches per square. You’ll need about 16 to 20 squares total, depending on your size and design.

Sizing and Layout: How Many Squares Do You Need?
Here’s a rough breakdown of square numbers for different blouse sizes, assuming 6” squares:
- Small (S): 4 squares for front, 4 for back, 2 per sleeve (10 total)
- Medium (M): 6 front, 6 back, 2-3 per sleeve (14-16 total)
- Large (L): 6-8 front, 6-8 back, 3-4 per sleeve (18-20 total)
- XL and up: 8+ front, 8+ back, 4+ sleeves (24+ total)
To get a good fit:
- Measure your bust and length preferences.
- Use that to calculate how many squares you need across and down.
- Don’t forget to add ease (1–2 inches) for a relaxed fit.
Joining the Squares
Once all your squares are complete and blocked, it’s time to piece them together.
Joining Methods:
- Whip Stitch: Lay squares flat, wrong sides together, and stitch through the loops across the edges.
- Slip Stitch Join: Join with slip stitch through back loops for a flat seam.
- Join-As-You-Go: Saves time and reduces seaming.
Lay your squares out on a flat surface before joining. Use stitch markers to arrange them into:
- Front panel
- Back panel
- Optional sleeves (1 or 2 rows of squares)
- Optional shoulder shaping (angled join)
Join front and back at the shoulders first, then the sides. Leave armholes and neck openings based on your preference.

Adding Sleeves (Optional)
Want a sleeved blouse? Great! You can use square rows to build your sleeves.
- For short sleeves, add 1–2 rows of squares from the shoulder.
- For 3/4 sleeves, go for 3 rows.
- For long sleeves, make separate strips of squares, then attach them around the armhole.
You can also crochet ribbed cuffs or lace edging for extra style.
Edging and Neckline Finishing
Once the blouse panels and sleeves are assembled, it’s time to clean up those raw edges.
Edging Options:
- Single Crochet Border: Basic but clean.
- Shell Stitch: Feminine and elegant.
- Picot Edging: Decorative with a vintage touch.
For the neckline:
- Single crochet evenly around.
- Add a drawstring or button closure at the back if needed.
Blocking the Final Blouse
Blocking sets the shape and helps the squares lay flat.
- Wet block using a spray bottle or soak.
- Pin to shape on a blocking board or towel.
- Let dry completely.
This step makes a huge difference in how the blouse drapes and fits.
Customization Ideas
Want to add a personal flair? Here are some ideas:
- Color-blocked squares
- Gradient or ombré yarn
- Tassels or fringe on the hem
- Add a peplum or ruffle
- Use different square designs for sleeves
The possibilities are endless.
How to Style Your Crochet Square Blouse
Here’s how to style it like a fashion icon:
Casual: Pair with jeans, sneakers, and minimal jewelry.
Boho: Layer over a maxi skirt or shorts with boots and bangles.
Chic: Tuck into high-waisted trousers and wear with heels.
Layered: Wear over a collared shirt or under a denim jacket in cooler weather.
Washing and Care Tips
To make your blouse last:
- Hand wash in cold water or use delicate machine setting.
- Use gentle detergent.
- Lay flat to dry.
- Store folded, not hung, to avoid stretching.
Video Tutorial:
Frequently Asked Questions
Can I use different square designs?
Yes! Mix and match squares for a patchwork look, or use the same square with different colors.
How do I adjust the size?
Add or subtract squares, or adjust the square size by adding/removing rounds.
Can I make this blouse with bulky yarn?
You can, but it may become heavier and less breathable.
Can I sell my finished blouses?
Definitely! Just be sure to credit any designers if you used a specific pattern.
Final Thoughts: Your Handmade Style Staple
Making a crochet square blouse is the perfect blend of creativity, style, and function. Each square you make is a step toward a garment that’s completely your own. Whether you wear it for a picnic, a night out, or just to show off your handiwork, you’ll feel proud of every stitch.
The beauty of this project lies not only in the finished product but in the meditative, satisfying process of building something wearable from your own hands. So don’t wait—gather your yarn, pick your palette, and start stitching your way to a brand-new blouse.
You may be interested:
- Crochet Women Cardigan: A Complete Step-by-Step Guide
- Crochet Coaster Motif: A Step-by-Step Guide to Creating Beautiful Coasters
- Crochet Big Flower Bag – A Complete Step-by-Step Guide
- Crochet Lace Waves Motif