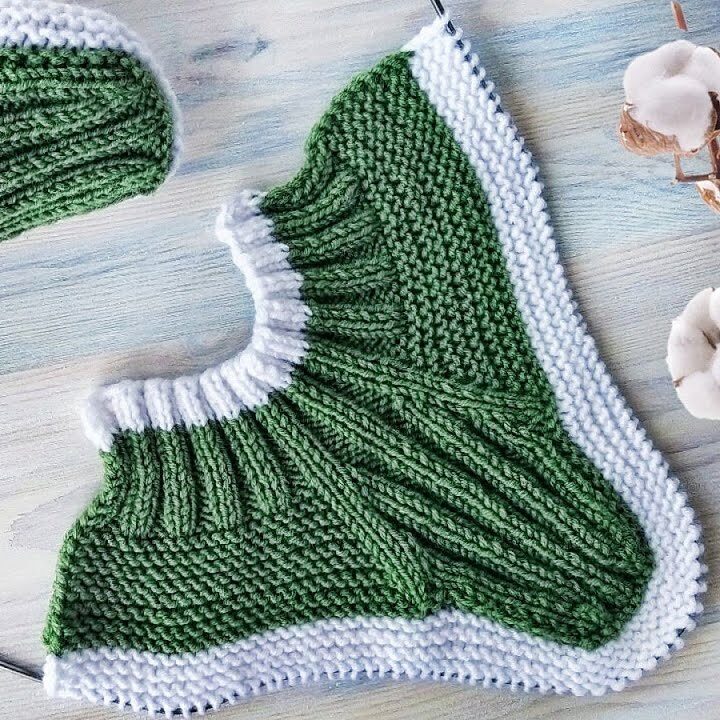
There’s something incredibly satisfying about slipping your feet into a pair of cozy, handmade socks on a chilly day. But what if those socks were not just any socks, but beautifully knitted slipper socks made by your own hands? Whether you’re an experienced knitter or picking up needles for the first time, making your own slipper socks can be an enjoyable and fulfilling project that yields both comfort and style.
Knitted slipper socks are the perfect blend of practical and charming. They’re more than just foot warmers — they’re wearable expressions of creativity. They’re great for gift-giving, personal pampering, or even as a launchpad product for your handmade business. The best part? You don’t need to be an expert to make them. In this comprehensive guide, we’ll walk through everything you need to know to knit your own pair of easy slipper socks, from choosing the right yarn and needles to understanding construction and finishing techniques.
This blog is structured to support knitters at all levels. We’ll cover not just the how-to, but the why, helping you build both your skills and your confidence with every step. Whether you want to knit these for a loved one or yourself, you’ll come away with something beautiful and functional.
Let’s get started on your cozy adventure!
Why Knit Slipper Socks?
Knitting slipper socks might seem like a small project, but their impact is surprisingly big. Let’s take a look at why they’re such a perfect project for beginners and seasoned knitters alike.
1. Quick and Satisfying Project
Unlike sweaters or blankets, slipper socks can often be completed in a single weekend. They’re quick enough to give you that satisfying feeling of accomplishment without weeks of commitment.
2. Ideal for Gifting
Handmade socks scream thoughtfulness. They’re a go-to gift for birthdays, holidays, or even as a heartfelt thank-you. Plus, you can customize them with favorite colors or cozy fibers.
3. Perfect for Leftover Yarn
Slipper socks are a wonderful way to use up leftover skeins from previous projects. Mix and match colors for a funky look or keep them simple and classic.
4. Great First Garment
If you’ve only knitted flat pieces like scarves or dishcloths, socks are a logical next step. You’ll practice shaping techniques like increases and decreases without the complexity of larger garments.
5. Stylish and Functional
With the right yarn and a few creative flourishes, slipper socks can be both a fashion statement and a toasty necessity.
Now that we’ve covered the why, let’s look at what you’ll need to get started.
Materials You’ll Need
Getting the right tools and yarn is key to knitting a successful pair of slipper socks. Here’s a rundown of what you’ll need:
Yarn
Choose a yarn that’s soft, durable, and warm. Since socks will endure a lot of friction, make sure your yarn can hold up.
Recommended Yarn Types:
- Wool or wool-blend (for warmth and elasticity)
- Acrylic (budget-friendly and durable)
- Cotton-wool blends (cooler, breathable socks)
Yarn Weight:
- Worsted weight is great for beginners because it knits up quickly and gives you a thicker, warmer sock.
- DK weight is another good option for slightly lighter socks.
Yardage Needed:
- Around 150 to 200 yards depending on foot size and sock height.
Knitting Needles
You can knit slipper socks either flat (on straight needles) or in the round (on double-pointed needles or circular needles). For beginners, flat knitting might be simpler.
Recommended Sizes:
- US Size 6 to 8 (4.0–5.0 mm), depending on your yarn choice
- Use the needle size that matches the gauge recommended on your yarn label
Other Supplies
- Yarn needle for weaving in ends
- Stitch markers (optional)
- Tape measure
- Scissors
- Row counter (optional)
Knitting Skills You’ll Learn and Use
If you’re a beginner, this project will help you learn or practice several fundamental knitting techniques:
- Casting on
- Knit stitch
- Purl stitch
- Ribbing (for stretch)
- Increases and decreases
- Seaming
- Binding off
Even if you’ve only done basic knitting, this is a great opportunity to level up.

Slipper Sock Construction: Understanding the Anatomy
Slipper socks can be constructed in a few different ways, but the two most beginner-friendly methods are:
1. Flat Construction (Sewn)
You knit a flat piece, usually shaped like a “T” or rectangle, then fold and seam it into a slipper sock.
Pros:
- No need to learn knitting in the round
- Easier to adjust for different foot sizes
2. Circular Construction (Seamless)
You knit in the round using double-pointed needles (DPNs) or circulars, shaping the heel and toe as you go.
Pros:
- Seamless, professional finish
- More advanced but worth the practice
For this guide, we’ll focus on a flat-knit version that’s beginner-friendly, adaptable, and customizable.

Step-by-Step Pattern: Flat Knit Slipper Socks
Now, let’s dive into the step-by-step instructions for a pair of cozy, simple slipper socks knit flat and seamed.
Sizing
This pattern will work for an average adult foot (US size 7–9). To make smaller or larger socks, simply adjust the number of stitches cast on and the number of rows.
Gauge
4.5 stitches per inch in stockinette stitch (adjust needle size if needed)
Abbreviations
- CO = Cast on
- K = Knit
- P = Purl
- St(s) = Stitch(es)
- K2tog = Knit two stitches together
- P2tog = Purl two stitches together
- BO = Bind off
Pattern
Step 1: Cast On
Using your preferred method, CO 40 stitches.
Step 2: Cuff Ribbing
Work in K2, P2 ribbing for 10 rows. This creates a snug cuff that holds the slipper sock in place.
Step 3: Upper Foot
Switch to stockinette stitch (K on right side, P on wrong side) and knit for 20 rows.
Step 4: Toe Shaping
Begin decreasing to shape the toe.
Row 1 (Right Side): K1, K2tog, knit to last 3 sts, K2tog, K1
Row 2: Purl
Repeat Rows 1 and 2 until 20 stitches remain.
Step 5: Finishing the Toe
BO all stitches.
Step 6: Seaming
Fold the piece in half lengthwise. Use mattress stitch or whip stitch to seam:
- The toe end together
- The foot sides, leaving the top open for the ankle
- Optionally, seam the back edge halfway for a snugger heel
Step 7: Make the Second Sock
Repeat the process for the second slipper sock.
And just like that, you have a pair of handmade cozy socks ready to be worn!

Customization and Variations
Once you’ve mastered the basic pattern, try out these variations to make your slipper socks unique.
1. Add a Cuff
Knit extra rows at the top for a fold-over cuff or add faux fur yarn for a wintery twist.
2. Use Color Blocks
Alternate colors every few rows or create stripes using leftover yarn.
3. Add Non-Slip Soles
Use fabric paint or hot glue on the soles in dots or patterns for grip.
4. Embellish
Sew on buttons, add pom-poms, or embroider names or initials for personalization.
5. Try Different Stitches
Replace the stockinette with seed stitch, garter, or basketweave for texture.
Caring for Your Slipper Socks
To make your socks last longer, follow these simple care tips:
- Hand wash or use a gentle machine cycle with mild detergent
- Air dry flat to maintain shape
- Store folded, not hung, to prevent stretching
Avoid high heat and rough surfaces to keep your stitches neat and tight.
Common Issues and How to Fix Them
1. My socks are too tight.
Try using larger needles or casting on more stitches.
2. They slip off my feet.
Adjust your cuff height or switch to ribbing for a better grip.
3. One sock is longer than the other.
Double-check your row count and tension; always measure as you go.
4. My seams are bulky.
Use mattress stitch for flat seams or try seamless patterns once you’re comfortable.
Video Tutorial:
Conclusion: Every Step Brings Warmth
Knitting your own slipper socks is not just a hobby — it’s a cozy, heartwarming experience that turns simple yarn into a daily luxury. Whether you’re relaxing after a long day or surprising a friend with a handmade gift, these socks deliver warmth in more ways than one. As you continue to knit, you’ll find new ways to customize and improve your design, making each pair better than the last.
So grab your needles, choose your favorite yarn, and make a pair (or three). Your feet — and your soul — will thank you.
You may be interested:
- Easy Crochet Book Cover from a Heart Granny Square
- Crochet Coaster Motif: A Step-by-Step Guide to Creating Beautiful Coasters
- How to Crochet a Charming Daisy Motif: A Step-by-Step Pattern
- Crochet Lace Waves Motif