
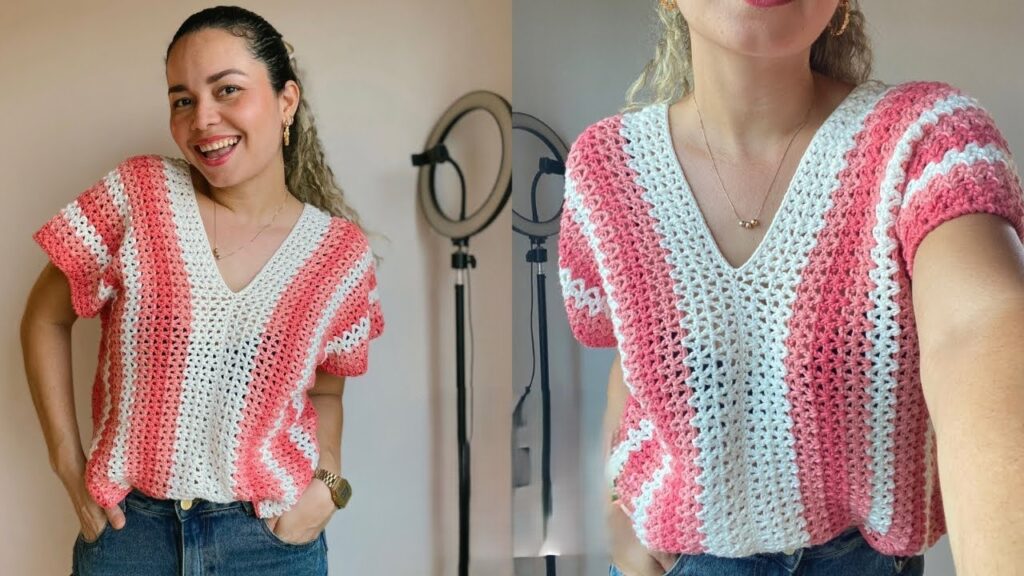
Crochet has long been admired not only as a timeless textile craft but also as a powerful tool of self-expression. Whether you’re just discovering the magic of looping yarn with a hook or you’ve spent years perfecting your stitch tension, one thing is certain: creating your own clothing pieces brings unmatched satisfaction. Among the many wearable crochet projects out there, the crochet V-neck top stands out for its stylish simplicity, flattering shape, and versatility in every season.
In this comprehensive guide, you’ll learn how to make an easy crochet V-neck top, step by step. Whether you’re crafting your first garment or adding a new staple to your handmade wardrobe, this tutorial will walk you through every phase—from selecting yarn and tools to achieving the perfect fit and finish. The goal is to help you create a beautiful blouse you’ll be proud to wear, gift, or even sell. Plus, this blog is structured with clarity, originality, and depth to ensure it’s AdSense-friendly and highly readable.
Why a Crochet V Neck Top?
You may wonder why a V-neck top makes such a popular crochet project. There are plenty of good reasons:
- Timeless Style: The V-neck design flatters most body types and adds an elegant touch to casual or dressy outfits.
- Seasonal Adaptability: Depending on the yarn and stitch you choose, this blouse can be worn year-round—light and airy for spring or layered in winter.
- Easy to Customize: You can vary the sleeve length, add patterns or textures, and play with colors to make each piece unique.
- Beginner-Friendly Structure: Most V-neck tops are made from basic panels or are crocheted in the round, making them ideal for beginners.
- Minimal Seams: Compared to complex sweaters or cardigans, a V-neck top generally involves fewer pieces and seams, making assembly simpler.
Crochet tops, especially those made with openwork or mesh-like patterns, are also on trend. Handmade fashion continues to rise in popularity, thanks to growing interest in slow fashion, sustainability, and artisan craftsmanship. When you make your own crochet top, you’re creating a wearable story—a garment that reflects your creativity, patience, and skill.
The Big Picture: What You’ll Learn in This Blog
Here’s what this blog will cover in full:
- Choosing the right materials (yarn, hook, accessories)
- Understanding sizing, measurements, and garment structure
- Step-by-step instructions for making a crochet V-neck top
- Techniques for shaping the neckline, adding sleeves, and finishing
- Customization tips to make your blouse truly yours
- Common mistakes to avoid
- How to care for and store your finished blouse
- Optional additions like lace edging, pockets, or embroidery
Let’s get started with the preparation phase—the materials you need, how to select them wisely, and how to prepare your tools and mindset for this fun crochet journey.
Materials and Tools You’ll Need
Crochet projects are known for their simplicity—you really only need yarn and a hook to begin. However, for wearable pieces like tops, choosing the right type of each material becomes crucial. A garment must not only look beautiful but also feel comfortable against the skin, drape well, and hold its shape.

Here’s what you’ll need to get started:
1. Yarn
Choosing the right yarn affects how your blouse will drape, breathe, stretch, and feel when worn.
- Fiber Type:
- Cotton: A top choice for crochet garments due to its breathability, softness, and stitch definition. Perfect for warm weather.
- Bamboo or Modal: Ultra-soft with excellent drape and slight sheen. Ideal for a flowing, feminine blouse.
- Linen: Strong and breathable, though slightly stiffer until washed. Great for summer wear.
- Blends (Cotton-Acrylic, Bamboo-Cotton): Offers both structure and softness, and often more budget-friendly.
- Weight of Yarn:
- Sport or DK (Double Knitting): Best for lighter garments with a soft drape. These weights are beginner-friendly and fast to work with.
- Worsted Weight: More structure and warmth, but may feel heavier for summer tops unless designed with open stitches.
- Yardage:
- For a size Medium, you’ll typically need around 800 to 1000 yards of DK-weight yarn.
- Larger sizes or longer tops will require additional yarn. Keep an extra skein on hand for safety.
- Color Choice:
- Solids show stitch detail best.
- Pastels and neutrals are classy and versatile.
- Bold colors or variegated yarns add flair but may obscure detailed stitchwork.
2. Crochet Hook
Check the yarn label for the recommended hook size, usually listed in both millimeters and a letter size (e.g., 4.0 mm/G-6). Adjust based on how loose or tight your gauge is. For garment-making, a slightly looser tension is usually better to allow the blouse to move and breathe.
Recommended hook sizes:
- For DK weight yarn: 4.0 mm to 4.5 mm
- For sport weight: 3.5 mm to 4.0 mm
3. Stitch Markers
These will help you keep track of increases, decreases, and your neckline placement—especially when you’re shaping the V neck or assembling pieces later.
4. Measuring Tape
Essential for checking gauge and tracking length as you work through each panel.
5. Scissors
Keep a small, sharp pair of scissors on hand for cutting yarn cleanly.
6. Tapestry Needle (Yarn Needle)
You’ll use this for weaving in ends and sewing pieces together.
7. Blocking Tools (Optional but Recommended)
A blocking mat and pins can help you shape your finished blouse for professional polish. Especially useful if your stitches curl or the fabric doesn’t lay flat right away.
8. Pattern Notebook or Digital Notes App
Jotting down stitch counts, row numbers, or design changes will help you keep track and recreate the blouse later if desired.
Skill Level Required
This project is rated as easy to intermediate. You should be comfortable with basic crochet stitches such as:
- Chain stitch (ch)
- Single crochet (sc)
- Half double crochet (hdc)
- Double crochet (dc)
If you’ve never shaped a neckline or joined garment panels before, don’t worry! This guide will walk you through those steps in plain language.
Time Commitment
Depending on your speed and how often you crochet, this project can be completed in:
- About 10–15 hours total for experienced crocheters
- 15–20+ hours for beginners, including time for shaping and seaming
It’s a project that fits well into a week of evening crochet sessions or a weekend retreat.
Mental Preparation: Mindset Matters
While this might sound cheesy, the mindset you bring into a crochet project makes a huge difference. Don’t rush yourself—especially if this is your first time making a wearable garment. Focus on:
- Enjoying the process
- Embracing mistakes as learning opportunities
- Celebrating small wins (like finishing your first panel!)
- Letting go of perfectionism
Even if you have to frog (rip out) a few rows, it’s worth doing to ensure a comfortable, well-fitted top that you’ll love wearing.

Next Up: Understanding Sizing, Gauge, and Panel Structure
In the next part of this blog, we’ll move on to how to take your own measurements, understand basic garment sizing, and plan your panels (front and back) for the best fit. This ensures that your V-neck top will not only be beautiful, but also flattering and wearable.
Understanding Sizing, Gauge, and Panel Planning for Your Crochet V-Neck Top
Creating a garment that fits well is one of the most rewarding parts of crochet, but it also requires planning. Unlike scarves or blankets, tops have to conform to body shapes. Fortunately, an easy V-neck blouse is one of the most forgiving garments you can make. It’s built from simple panels and a manageable neckline.
Let’s explore how to understand your measurements, gauge, and how to prepare your top for a great fit.
How to Take Your Measurements
Before starting, take the following measurements using a flexible measuring tape:
- Bust: Measure around the fullest part of your chest.
- Waist: Measure the narrowest part of your torso.
- Length: Decide how long you want the top to be—from shoulder to hem.
- Shoulder Width: Measure across the top of your back, shoulder to shoulder.
- Armhole Depth: For sleeveless or cap-sleeve designs, measure from the top of the shoulder to just below the armpit.
Write down these numbers. They’ll help you plan your front and back panels and decide how wide and long each one should be.
Understanding Gauge
Gauge refers to how many stitches and rows fit within a four-inch (10 cm) square. It’s critical when making garments to ensure the final piece fits properly.
Here’s how to check your gauge:
- Crochet a 4″x4″ swatch using the yarn and hook you plan to use.
- Use the same stitch pattern you’ll use in your top—typically double crochet or mesh stitch.
- Count how many stitches and rows are in the swatch.
- Adjust your hook size if needed:
- Too many stitches = go up a hook size.
- Too few stitches = go down a hook size.
Write down your gauge result before you move on. This number will tell you how many stitches you need to achieve your desired width and length.
Choosing a Simple Top Structure: Two Rectangular Panels
One of the simplest ways to create a beginner-friendly V-neck top is to work with two rectangular or slightly shaped panels: a front panel and a back panel.
- The back panel is a basic rectangle that matches your bust width and desired length.
- The front panel is similar but includes a V-shaped neckline that dips in the center.
For this tutorial, we’ll focus on making the front panel first. Once complete, the back panel will follow the same general pattern but without the neckline shaping.

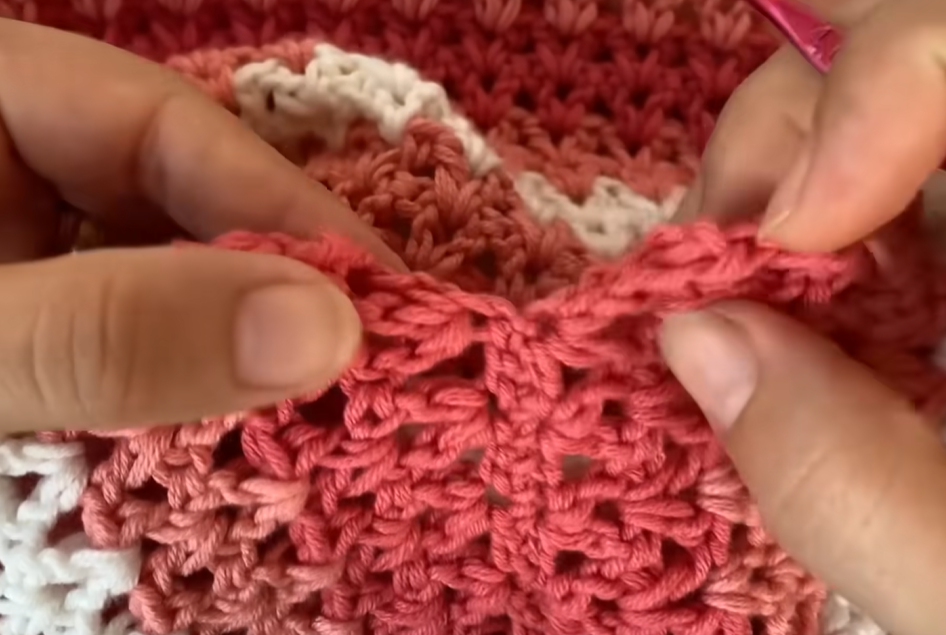
Stitch Pattern for Your V-Neck Top
You can use a basic mesh stitch or double crochet throughout the top. Let’s use a very simple openwork stitch that looks lovely and is easy for beginners:
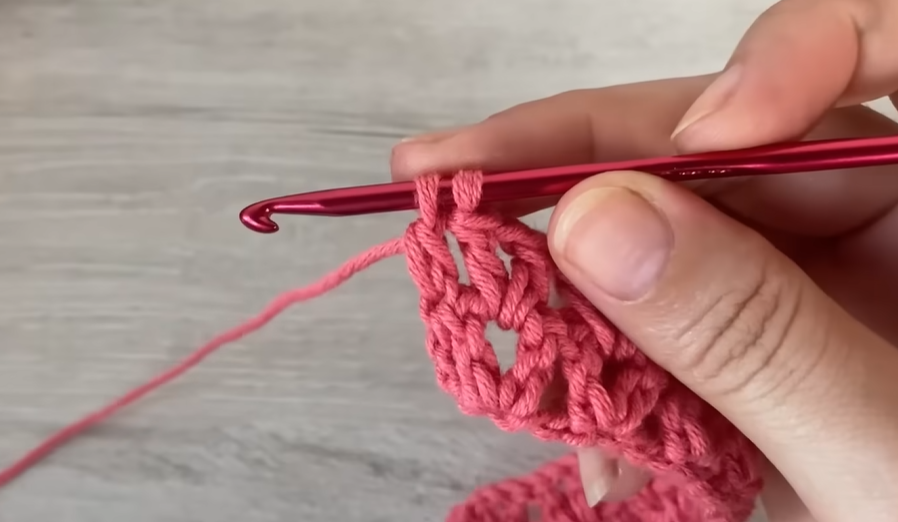
Mesh Stitch (Multiple of 2 + 1):
- Row 1: Dc in the 4th ch from hook, ch 1, skip 1 ch, dc in next ch; repeat across.
- Row 2: Ch 3 (counts as dc), turn. Ch 1, dc in next dc; repeat across.
- Repeat Row 2 for pattern.
It’s light, airy, and quick to work up, making it ideal for spring and summer blouses.
Calculating the Number of Stitches to Begin
Let’s say your gauge is 16 stitches per 4 inches (4 sts per inch). If your bust is 36 inches, you want your panel to be around 18 inches wide (since you’ll make two panels).
So: 18 inches x 4 sts/inch = 72 stitches
Now, adjust for the pattern multiple. The mesh stitch requires a multiple of 2 + 1. So round to 73. This will be your foundation chain for the front panel.
Step-by-Step: Starting the Front Panel
Let’s break it down:
- Foundation Chain: Chain 73 (or your calculated number based on gauge).
- Row 1: Dc in 4th chain from hook, ch 1, skip 1, dc in next; repeat to end.
- Row 2: Ch 3, turn. Ch 1, dc in next dc; repeat across.
- Continue the pattern until your panel measures about two-thirds of your total desired length.
Example: If your total top length is 22 inches, work about 14–15 inches before beginning the neckline shaping.
Shaping the V Neck
This part can feel intimidating to beginners, but don’t worry—it’s just a matter of decreasing toward the center to form a gentle “V.”
To shape the V-neck:
- Find the center stitch of your panel.
- For 73 stitches, that’s stitch 37.
- Work two separate halves now: left side and right side of the neckline.
- Mark the center with a stitch marker so you don’t lose your place.
Left Side of Neckline
- Row A: Work across from edge to the center stitch.
- Turn, ch 3, and begin decreasing 1 stitch every other row (dc2tog at the neckline edge).
- Continue until your panel reaches the total length.
- Fasten off.
Right Side of Neckline
- Join yarn at the center stitch on the other side.
- Repeat the same decrease process, mirroring the left side.
You now have a completed front panel with a symmetrical V-neck.
Step-by-Step: Back Panel (Straight Rectangle)
- Chain the same number of stitches as the front panel (e.g., 73).
- Follow the same mesh stitch pattern.
- Continue working until the back panel matches the length of the front panel (e.g., 22 inches).
- Fasten off and weave in ends.
No neckline shaping is needed here. It’s a simple rectangle.
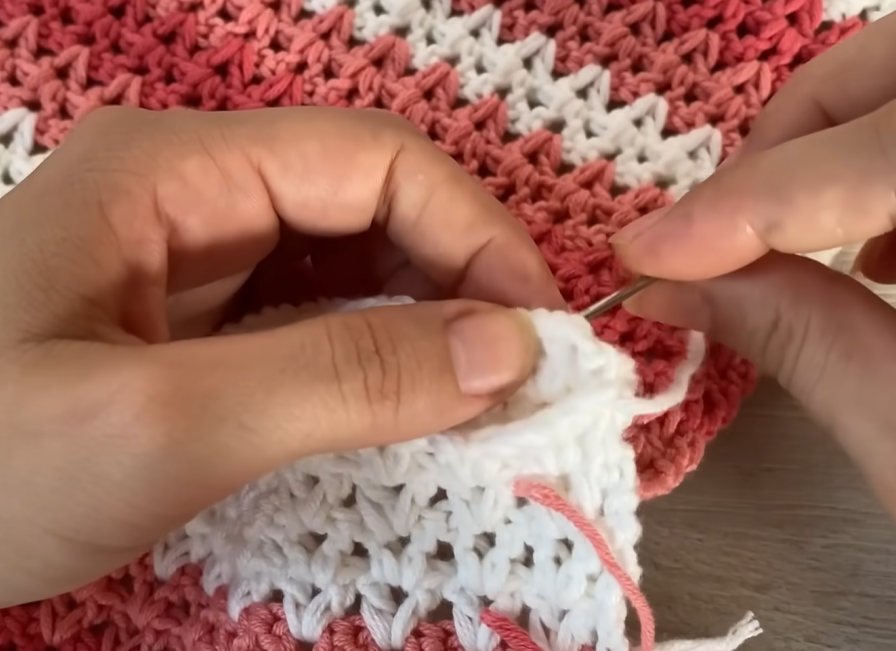
Joining the Front and Back Panels of Your Crochet V-Neck Top
Now that you’ve completed both your front and back panels, the next step is assembling them. Seaming is a crucial part of garment-making because it determines the drape and structure of the finished piece.
To begin, lay both panels flat on a surface with the right sides facing each other. Align the edges and make sure the rows match up.
You’ll want to seam the top of the shoulders first, then move on to the sides.
Shoulder Seams:
- Use a tapestry needle and a length of matching yarn.
- Seam the top edge of each shoulder using whip stitch or mattress stitch.
- Leave the neck open where your V-shape is.
- Seam about 4 to 5 inches from the outside edge inward.
- Fasten off and weave in your ends.
Side Seams:
- Begin at the bottom hem and work your way up.
- Leave an opening for armholes—typically 7 to 9 inches, depending on size.
- Pin or mark where the armhole ends before you start seaming to maintain symmetry.
- Seam the rest using whip stitch or your preferred method.
- Fasten off and weave in ends.
Once seamed, turn your blouse right-side out and admire your progress. It’s starting to look like a real garment now!
Optional: Adding Sleeves to Your V-Neck Top
If you prefer a more finished look or want added coverage, adding sleeves is a simple extension. You can crochet directly into the armhole openings or create separate sleeve pieces.
Let’s try working sleeves directly from the armhole:
- Join yarn at the bottom of the armhole with a slip stitch.
- Work around the armhole opening with mesh stitch or double crochet.
- Evenly space stitches around the armhole. Use stitch markers to guide you.
- Continue working in the round or turning rows until your sleeve is the desired length.
- For cap sleeves, 3–4 inches is sufficient.
- Finish with a neat single crochet border for a polished edge.
For long sleeves, continue working until wrist length and consider tapering by gradually decreasing 1 stitch every few rows.
Finishing the V-Neckline: Clean Edges and Borders
The V-neckline is a focal point, so finishing it cleanly is key to making your top look professional.
To edge the neckline:
- Join yarn at the center point of the V using a slip stitch.
- Work single crochet or reverse single crochet (crab stitch) around the neckline.
- Keep stitches even and not too tight, especially around the curve of the “V.”
- At the bottom of the V, insert 3 single crochets into the central point to round it out.
- Slip stitch to join and fasten off.
This clean edge will not only enhance the look but also help maintain the shape of your neckline.
Adding a Hemline Border
The hemline of your blouse deserves attention too. Adding a bottom border can keep the piece from curling and gives it a finished touch.
Popular options include:
- Single crochet for a clean look
- Shell stitch for a decorative, lacy touch
- Picot edging for a dainty finish
Choose a border that complements your stitch pattern. Work evenly across the hem, making sure it lays flat without puckering or rippling.
Blocking Your Finished Crochet Top
Blocking is a method of wetting or steaming your finished piece to set the stitches and shape. It’s highly recommended for garments, especially those using openwork or mesh stitches.
To block:
- Soak your blouse in lukewarm water with mild soap.
- Gently squeeze out excess water—do not wring.
- Lay it flat on a clean towel or blocking mat.
- Shape the top to the exact dimensions you want.
- Pin edges if necessary and let it dry completely.
This step will transform your work from “handmade” to “handcrafted.”
How to Customize Your Crochet V-Neck Blouse
What makes this V-neck top exciting is how customizable it is. Whether you’re aiming for casual beachwear or a refined evening look, small changes can make a big difference.
Here are ideas to spark your creativity:
1. Use Gradient Yarn:
- Try a color-transitioning yarn cake to let the color do the work for you.
- The changing hues add dimension to the mesh pattern without extra effort.
2. Add Decorative Edges:
- Incorporate lace or shell stitch edges on sleeves and bottom hems.
- Try a contrast color to highlight borders.
3. Try a Back Detail:
- For a fashion-forward twist, replicate a mini V-neck at the back.
- You can also insert a keyhole opening or lacing with a simple chain tie.
4. Embellish with Appliqué:
- Add crocheted flowers, motifs, or beads.
- Sew on a few tiny buttons down the front for a faux-placket effect.
5. Create a Tie Waist:
- Work a long chain cord and weave it through spaces at the waistline.
- Pull it in and tie a bow for a more fitted silhouette.
6. Modify the Length:
- Turn the blouse into a tunic or cropped top depending on your wardrobe needs.
- Use row counts to shorten or lengthen your front and back panels as needed.

How to Adjust the Pattern for Other Sizes
The beauty of simple panel-based designs is that they scale easily. To make a top in other sizes:
- Recalculate your starting chain based on bust width and gauge.
- Adjust panel length for petite or tall sizing.
- Vary armhole depth for comfort depending on sleeve choices.
- Keep neckline shaping symmetrical, but shift center stitch position accordingly.
With the right gauge and measurements, you can make this V-neck top in XS through 3XL without needing a drastically different pattern.
Best Yarns and Hooks for This Project
While you can use most yarns for this top, the best results come from light and breathable fibers.
Try these options:
- Cotton: Durable, washable, and ideal for warm climates.
- Bamboo or Modal: Soft, silky, and cool against the skin.
- Acrylic Blends: Economical and easy-care for daily wear.
Recommended hook sizes are 3.5 mm to 5 mm, depending on your gauge. Always make a swatch before deciding.
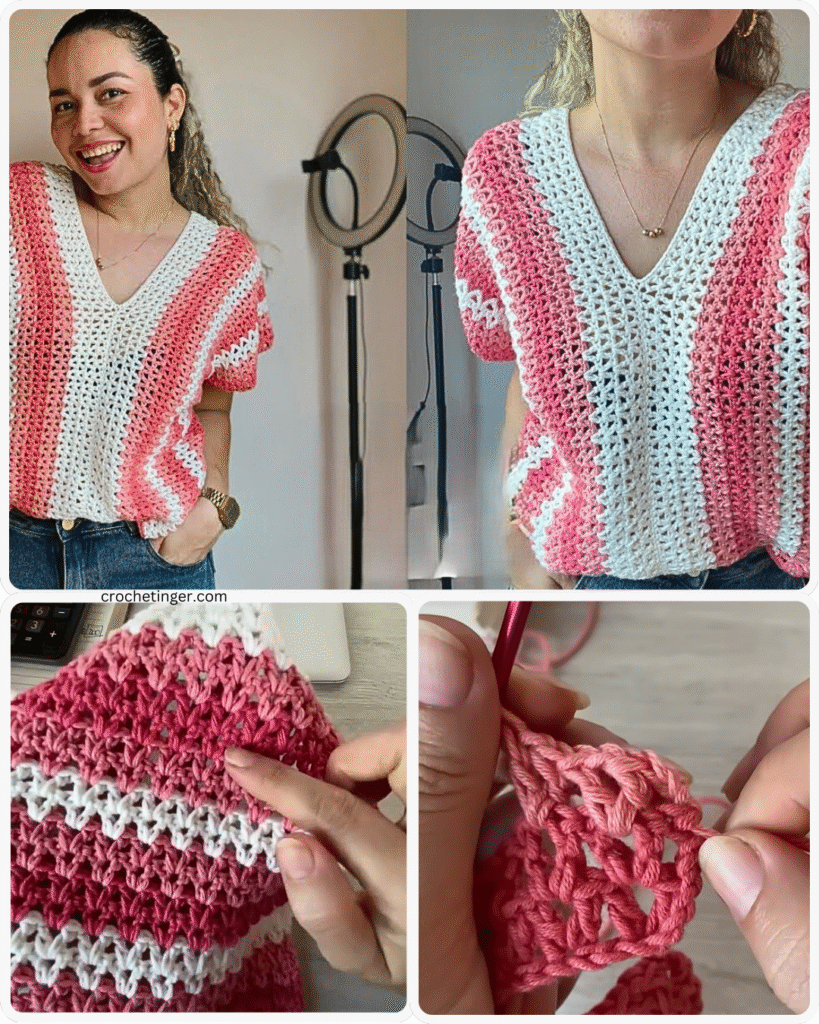
Wearing and Styling Your Crochet V-Neck Top
Once you’ve completed your blouse, the styling possibilities are endless:
- Pair it with high-waisted jeans for a casual day look.
- Tuck it into a skirt for an elegant outfit.
- Layer over a tank top or swimsuit for summer chic.
- Add a belt or sash to define the waist.
- Throw on a cardigan for cooler evenings.
This versatile top can go from day to night with just a few accessories.

How to Care for Your Crochet V-Neck Top for Long-Lasting Wear
After investing so much time and creativity into your handmade top, you want it to last for many seasons. Proper care not only extends the life of your crochet blouse but also helps maintain the shape, texture, and color. Here’s how to care for your V-neck top the right way:
1. Washing Your Crochet Garment
Most handmade crochet items, especially those made with natural fibers, benefit from handwashing. Machine wash only if your yarn label says it’s safe.
Hand Washing Steps:
- Fill a basin with lukewarm water and a gentle detergent or wool wash.
- Soak the top for 10–15 minutes. Avoid agitating to prevent stretching.
- Rinse in cool water until soap is gone.
- Gently press (do not wring) out water.
Machine Washing (if applicable):
- Use a mesh laundry bag to protect the garment.
- Choose the delicate or hand-wash cycle with cold water.
- Lay flat to dry as machine drying can distort shape.
2. Drying Tips
Never hang your crochet top to dry. Doing so can stretch the garment out of shape. Instead, lay it flat on a towel or a drying rack. Reshape the neckline and edges while damp. If you blocked your piece earlier, you already know how to mold the shape as it dries.
3. Storing Your Crochet Top
Fold your top neatly and store it in a drawer or shelf—avoid hanging. If your climate is humid, add silica packs or lavender sachets to prevent mildew. Do not store in plastic bags for long-term storage, as this can trap moisture.
4. Refreshing Between Washes
If your top just needs a light freshening, mist it with fabric spray or use a handheld steamer. Avoid ironing directly unless your yarn label permits it, and even then, use a cloth barrier to protect the stitches.ឮ
Beginner Mistakes to Avoid When Making a Crochet V-Neck Blouse
Even seasoned crocheters make errors from time to time. But being aware of common pitfalls can help you avoid frustration and ensure a smoother experience. Let’s look at mistakes to steer clear of:
1. Skipping the Gauge Swatch
This is the #1 mistake most beginners make. Failing to swatch can lead to tops that are too big, too tight, or won’t fit at all. Taking 15 minutes to make a 4×4 inch swatch can save hours of frogging later.
2. Not Measuring Yourself Properly
Always take fresh measurements before beginning a wearable project. Relying on old or estimated sizes will make your garment less flattering or uncomfortable to wear.
3. Ignoring Stitch Counts at Shaping Points
Especially around the neckline or armholes, counting your stitches is essential to symmetry. Use stitch markers and count regularly as you work through shaping rows.
4. Pulling the Yarn Too Tight
Tension is everything. If your stitches are too tight, your blouse will be stiff and uncomfortable. Loosen up your grip and allow the hook to do the work.
5. Failing to Block Your Pieces
Skipping blocking is like skipping ironing on a sewing project—it might still work, but it won’t shine. Block your panels before assembly for best results.
6. Using the Wrong Yarn Type
If your pattern recommends cotton and you switch to a thick acrylic, your top may be hot, bulky, or have too much drape. Always consider how the yarn behaves when worn.
7. Overworking the Same Yarn
If you frog (undo) your work multiple times with the same yarn, the fibers may weaken or fuzz. Use fresh yarn if your project starts to look worn even before it’s finished.
How to Turn Your Crochet V-Neck Top into a Sellable Product
If you enjoyed making this crochet blouse, you might be thinking about turning it into a small business opportunity. Handmade fashion is in high demand, especially when it blends quality with unique design.
1. Sell the Finished Product
You can crochet and sell finished V-neck tops in small batches.
- Take quality photos with good lighting and varied styling.
- List your tops on platforms like Etsy, Shopify, Facebook Marketplace, or local craft fairs.
- Price fairly by factoring in yarn cost, labor, design time, and shipping.
2. Create and Sell the Pattern
If you’re confident in your notes, convert them into a written pattern to sell online.
- Use clear, standard crochet terminology (US terms or UK terms, but be consistent).
- Include stitch abbreviations, gauge, photos, diagrams, and sizing instructions.
- Format as a PDF and sell on Etsy, Ravelry, or your own blog.
3. Offer Custom Orders
Let clients choose their own colors or measurements and make tops to order. This model works well if you’re looking for a more boutique or personalized business approach.
4. Collaborate with Influencers
Send a sample top to crochet influencers in exchange for reviews or social media features. Exposure like this can help you gain followers and customers.
5. Build a Brand Around It
Create a name, logo, and Instagram page for your crochet creations. People love to support artisans who share the process behind the product.

Video Tutorial:
Why Crochet V-Neck Tops Are Trending
The resurgence of crochet fashion in the mainstream market makes this a perfect time to create your own wearables. Big fashion houses, from Dior to Bottega Veneta, have included crochet-inspired pieces in their collections. That means your handmade V-neck blouse isn’t just a hobby—it’s right on trend.
Here are some reasons why V-neck tops are particularly popular:
- Versatility: Dress them up or down.
- Custom Fit: Unlike mass-produced tops, crochet ones can be adjusted perfectly to your shape.
- Timelessness: A V-neck is always flattering and always in style.
- Seasonless: Made with breathable yarns, your crochet top works across spring, summer, and early fall.
Whether you’re wearing it at the beach, to brunch, or layered under a jacket, your creation becomes part of your signature look.
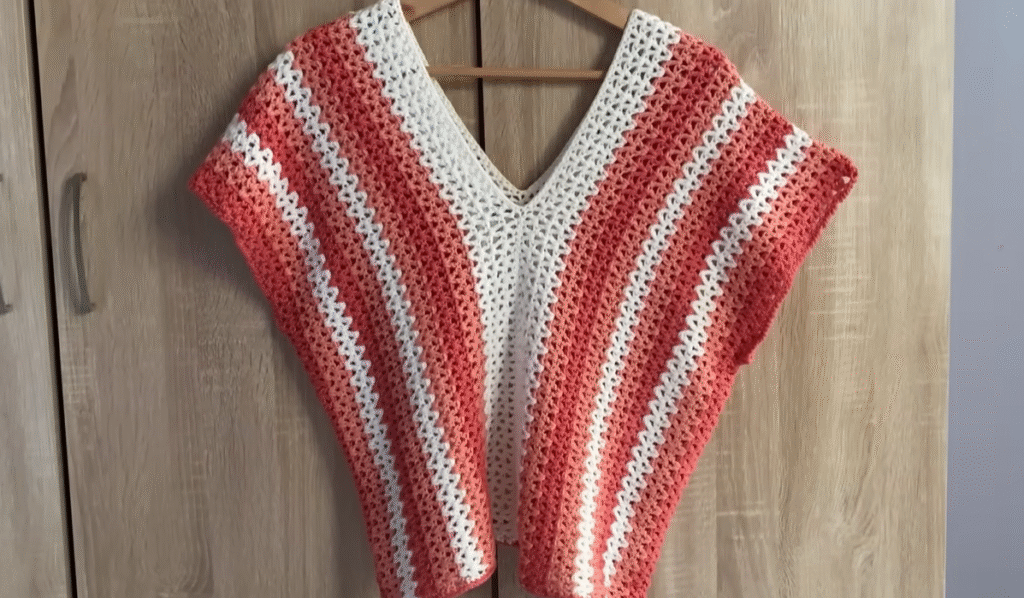
Final Thoughts: Your Creativity is Now Wearable
Making your own easy crochet V-neck top is more than just a craft—it’s an experience that blends patience, skill, and personal expression. From the first chain stitch to the last seam, each part of the process contributes to a finished piece that reflects your individuality and care.
The journey from yarn ball to wearable art empowers you to take your skills to the next level. Whether you decide to wear your top with pride, gift it to a loved one, or sell it to others, you’ve tapped into something meaningful: creativity with purpose.
Your handmade crochet blouse tells a story—and it’s one only you can tell with your own two hands.
So pick up your hook, choose your favorite yarn, and get started. The next stitch might just be the beginning of your new favorite outfit—or your next business venture.
You may be interested:
- Master the Art of the Lace Flower Crochet Stitch
- Easy Knitted Slipper Socks You Can Make
- How to Crochet a Charming Daisy Motif: A Step-by-Step Pattern
- Easy Crochet Shorts: stylish, comfortable, and surprisingly easy-to-make


