
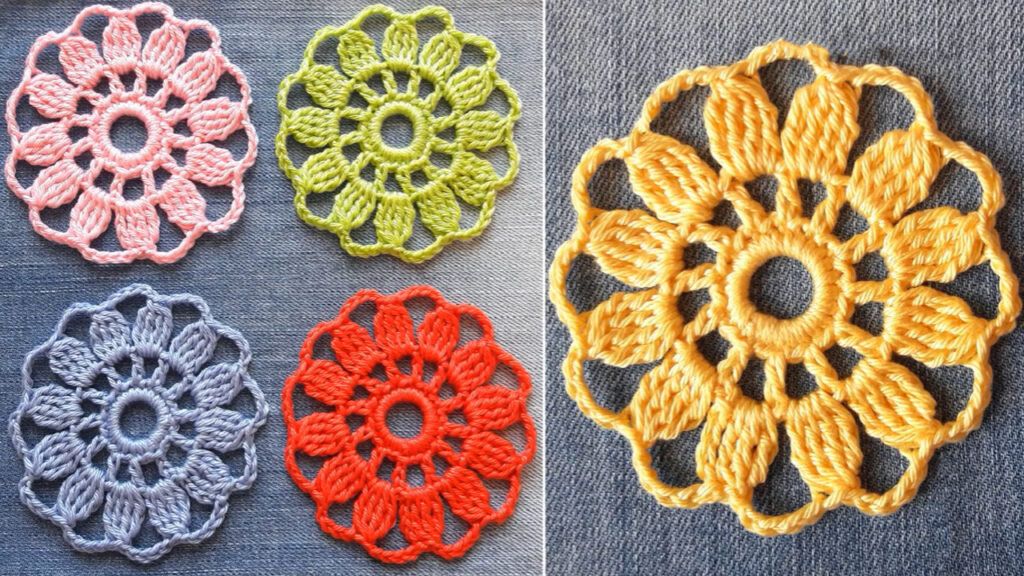
Crafting with crochet offers a fulfilling and adaptable artistic pursuit, enabling the crafting of both aesthetically pleasing and practical creations. One of the most classic and beloved crochet patterns is the Granny Square motif. This timeless design has been cherished for generations due to its simplicity and endless creative possibilities. In this blog post, we will walk you through the step-by-step process of crocheting an easy Granny Square motif, perfect for beginners to start their crochet journey.
Skill Level: Beginner
Materials Needed:
Before we begin, gather the following materials:
- Worsted weight yarn in your desired colors
- Crochet hook (size G or H is recommended for worsted weight yarn)
- Scissors
- Yarn needle
Stitches and Abbreviations Used:
- Ch: Chain
- Sl st: Slip stitch
- Sc: Single crochet
- Dc: Double crochet
Pattern:
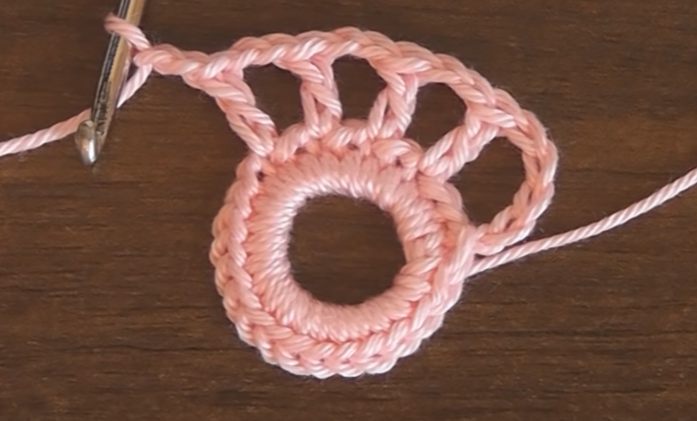
Round 1:
- Commence by crafting a magic circle (or begin with the process of chaining 4 and connecting through a slip stitch to shape a circular foundation).
- Ch 3 (Counts as the initial double crochet stitch), work 2 double crochet stitches into the ring, chain 2, then work 3 double crochet stitches into the ring, chain 2. Repeat the sequence between the asterisks (*) two more times..
- Connect by making a slip stitch to the upper part of the initial chain-3 stitch. (You should have four clusters of 3 dc, separated by ch-2 spaces).
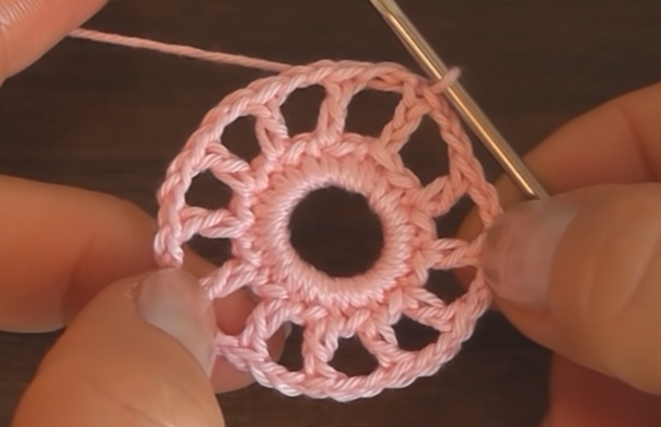
Round 2:
4. Slip stitch to the following chain-2 space.
- Ch 3 (counts as the first dc), Two double crochets in the identical chain-2 space, ch 2, 3 Double crochet in the identical chain-2 space(this creates a corner).
- In the following chain-2 space, work 3 double crochets, chain 2 , and then work 3 more double crochets (corner made). Perform the sequence between * to* twice again.
- Connect by making a slip stitch to the uppermost part of the initial chain-3.
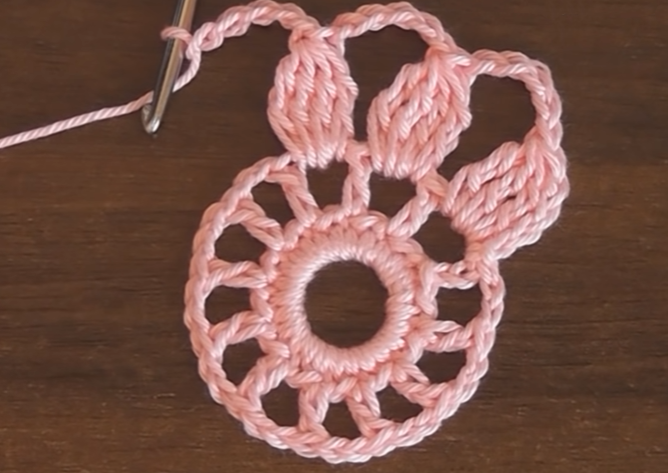
Round 3:
8. Slip stitch to the following two double crochet stitches and into the chain-2 space.
- Ch 3(Counts as the first double crochet), 2 double crochets in the same chain-2 space, chain 2, 3 double crochets in the same chain-2 space (corner made).
- In the following chain-2 space (located on the side of the square), work 3 double crochet stitches.
- In the subsequent chain-2 space (corner), work three double crochet stitches, chain two, and then work three more double crochet stitches (corner made). Perform the sequence between * to* twice again.
- In the last chain-2 space (side of the square), 3 dc.
- Connect by making a slip stitch to the uppermost part of the initial chain-3.
Round 4:
14. Slip stitch to the following two double crochets and into the chain-2 space.
- Chain 3 (counts as the initial double crochet), two double crochets in the same chain-2 space, chain 2, three double crochets in the same chain-2 space (corner made).
- In every chain-2 space (found on the sides of the square), work three double crochet stitches.
- In every chain-2 space (found on the sides of the square), work three double crochet stitches (corner made). Perform the sequence between the * markers twice more.
- In the last ch-2 space (the side of the square), 3 dcIn the final chain-2 space (located on the side of the square), work 3 double crochet stitches.
- Connect by making a slip stitch to the uppermost part of the initial chain-3.
Securely finish and thread through any dangling strands.

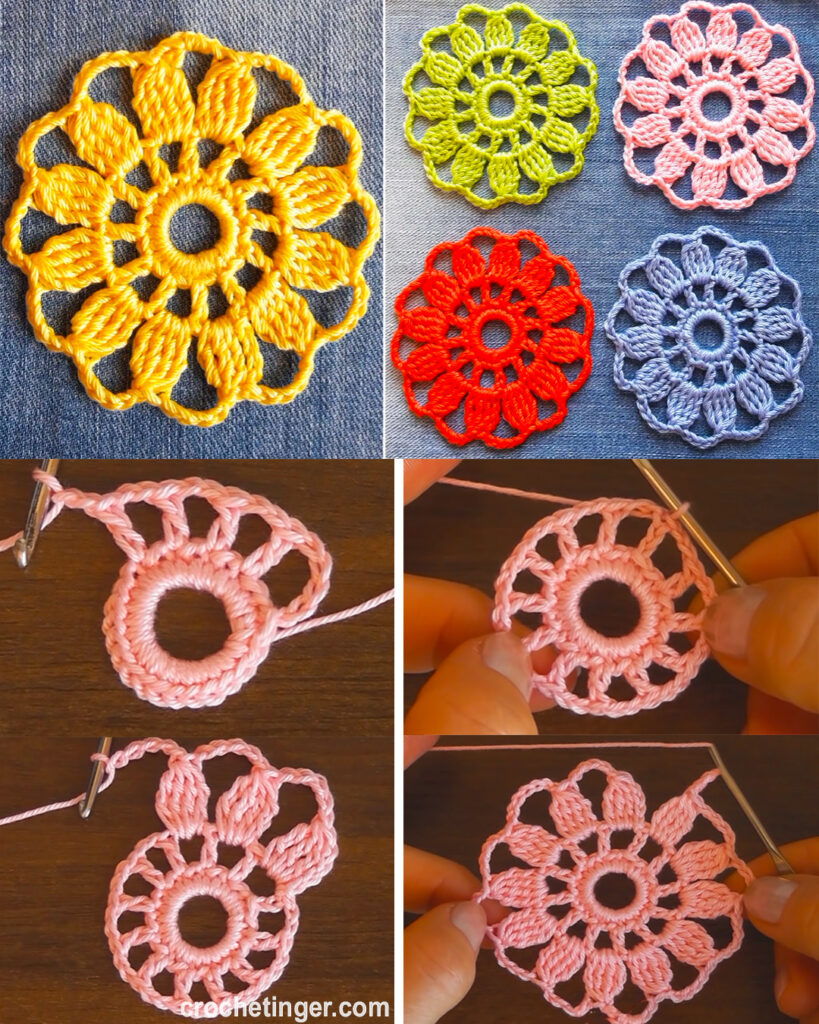
Step-by-step guide:
Step 1: Slip Knot and Chain
To start, create a slip knot by making a loop with the yarn end, pulling the working yarn through the loop, and tightening the knot around the hook. Now, chain 4 forms the center ring of Granny Square.
Step 2: First Round
In the center ring, work three double crochet (dc) stitches. In order to achieve this, execute a yarn-over maneuver, place the hook into the central ring, perform another yarn-over, extract the loop, engage in a yarn-over once more, and then draw the thread through both of the loops currently on the hook. Repeat this two more times. You should now have four dc stitches (including the initial chain-3). To complete the first round, chain 2 forms the first corner of the square.
Step 3: Second Round
In the corner space, work three dc stitches, chain 2, and three more dc stitches. This creates the first corner of your Granny Square. Now, chain 1 and move to the next corner space. Repeat the pattern of three dc stitches, chain 2, three dc stitches in each corner space, with chain 1 between each corner. This will give you a total of four corners.
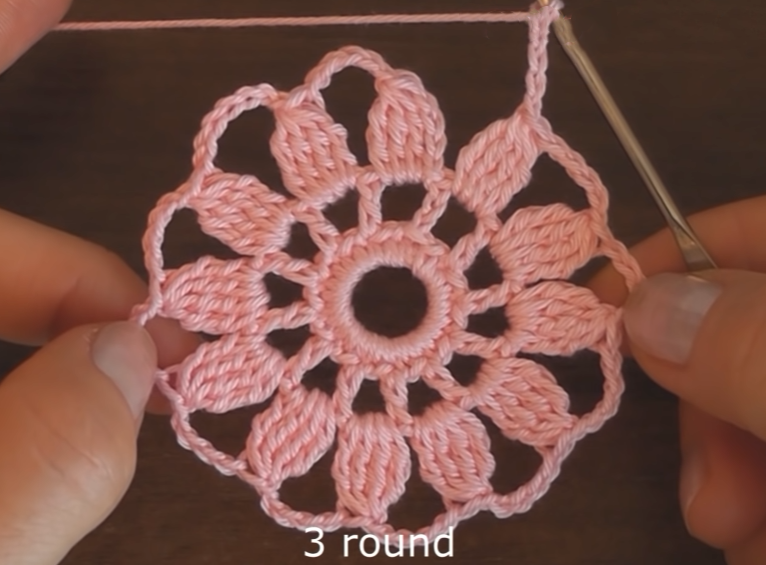
Step 4: Third Round
To begin the third round, start in any corner space. Work three dc stitches, chain 2, and three more dc stitches to form the corner. Now, chain 1, and in the next chain-1 space, work three dc stitches. Repeat this pattern in each chain-1 space around, and in each corner, work three dc stitches, chain 2, and three dc stitches. This round will further expand your Granny Square.
Step 5: Final Round
For the final round, start in any corner space. Work three dc stitches, chain 2, and three more dc stitches to create the corner. Next, work three dc stitches in each chain-1 space around the square. In each corner, work three dc stitches, chain 2, and three dc stitches. This round will complete your Granny Square motif.
Step 6: Finishing
Once you have completed the final round, cut the yarn leaving a tail of about 6 inches. Pull the yarn end through the loop on your hook and gently tighten to secure the stitch. Use the yarn needle to weave in any loose ends on the back of the Granny Square.
Video tutorial:
Conclusion:
Congratulations! You have successfully crocheted an easy Granny Square motif. With this simple pattern, you can create multiple Granny Squares in different colors and combine them to make a beautiful blanket, scarf, or even a cushion cover. The possibilities are endless, and as you gain confidence in your crochet skills, you can experiment with various stitch combinations and color combinations to add your personal touch to this timeless crochet pattern. Happy crocheting.
You may be interested:
- Crochet baby blanket cardigan design – Free Pattern
- How to Crochet a Charming Daisy Motif: A Step-by-Step Pattern
- Crochet Coasters: A Step-by-Step Guide to Creating Functional and Stylish Coasters
- How to Crochet a Simple & Easy Crochet Flower | Free pattern for Absolute Beginners


One Comment on “How to Crochet an Easy Crochet Granny Square Motif: A Step-by-Step Guide for Beginners”