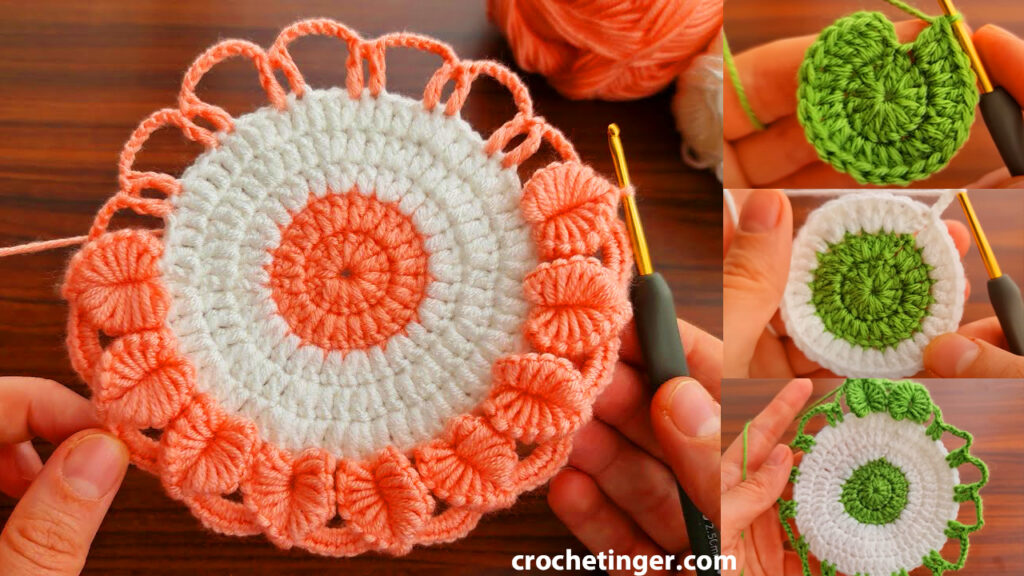
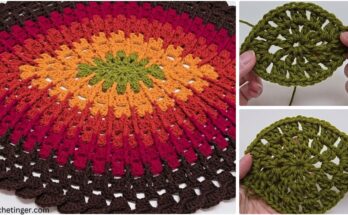
Crocheting coasters are a delightful way to express your creativity and add a touch of elegance to your home decor. With a few basic crochet stitches and some colorful yarn, you can create stunning coaster motifs that will impress your guests and serve as functional works of art. In this blog, we will guide you through the process of crocheting a beautiful coaster motif, providing detailed instructions and tips along the way.
Skill Level: beginner
Materials Needed:
Before we dive into the crocheting process, gather the following materials:
- Crochet hooks (size suitable for your chosen yarn weight)
- Worsted-weight cotton yarn in various colors
- Yarn needle
- Scissors
- Stitch marker (optional)
Abbreviations:
- ch: chain
- sc: single crochet
- hdc: half double crochet
- dc: double crochet
- sl st: slip stitch
- st(s): stitch(es)

Pattern:
Round 1:
Start by making a magic ring (or Chain 4 and join with a slip stitch to form a ring). Chain 2 (counts as the first hdc), work 9 half double crochet into the ring. Connect by making a slip stitch to the upper part of the initial chain 2. (10 hdc)
Round 2:
Ch 1, begins with a single crochet in the exact same stitch as the connection. Chain 4, then skip the following stitch and work another single crochet in the subsequent stitch. Repeat from * to * around. Connect using a slip stitch to the initial single crochet. (5 ch-4 spaces)
Round 3:
Slip stitch in the first chain-4 space. Chain 2 (this will be considered as the first double crochet), perform 4 double crochets in the same chain-4 space. Single crochet in the following chain-4 space, and execute 5 double crochets in the subsequent chain-4 space. Repeat the process from asterisk () to asterisk () all the way around. Connect with a slip stitch to the upper part of the initial chain-2. (There will be a total of 5 clusters, each containing 5 double crochets.)

Round 4:
Ch 1, Single crochet (sc) into the very same stitch as the one where the joining was done. Ch 5, Single crochet in the third double crochet of the following 5-double crochet cluster, chain 5, and then single crochet in the subsequent single crochet stitch. Repeat from * to * around. Connect by making a slip stitch to the initial single crochet stitch. (5 ch-5 spaces)
Round 5:
Insert a slip stitch into the initial chain-5 space. Chain 2, which serves as the equivalent of the first double crochet., Crochet 6 double crochets in the same chain-5 space. Single crochet in the following single crochet stitch then creates 7 double crochets in the subsequent chain-5 space. Repeat from * to * around. Connect by making a slip stitch to the top of the initial chain-2. (5 clusters of 7 dc)
Round 6:
Ch 1, make a single crochet in the identical stitch as the connection. Ch 6, Single crochet in the fourth double crochet of the following 7-double crochet cluster, chain 6, and single crochet in the subsequent single crochet. Repeat from * to * around. Attach with a slip stitch to the initial single crochet. (5 ch-6 spaces)
Round 7:
Insert your slip stitch into the first chain-6 space, and then chain 2, which will be counted as the first double crochet, Crochet 8 double crochets in the same chain-6 space. Single crochet in the following single crochet stitch then creates 9 double crochets in the subsequent chain-6 space. Repeat from * to * around. Connect by making a slip stitch to the top of the initial chain-2 stitch. (5 clusters of 9 dc)

Step-by-step guide:
Step 1: Choose Your Coaster Design and Yarn Colors
Start by selecting the coaster design you want to crochet. You can find a wide range of free and paid crochet patterns online. Select an option that aligns with your proficiency level and preferred level of intricacy. Next, pick your yarn colors. Opt for cotton yarn, as it is durable and suitable for coasters that will regularly come into contact with moisture.
Step 2: Gauge Swatch (Optional)
Although gauge swatches are not always necessary for coasters, creating one can help you ensure the final product’s size and appearance align with your expectations. Make a small square using the chosen yarn and hook, and measure the number of stitches and rows per inch. Adjust the hook size if necessary to match the pattern’s gauge.

Step 3: Starting the Coaster
To begin crocheting the coaster, create a slip knot and then chain the required number of stitches specified in your chosen pattern. Typically, coaster motifs range from 20 to 30 chains. Connect the final link to the initial one using a slip stitch in order to create a circular shape.
Step 4: Round 1 – The Center of the Coaster
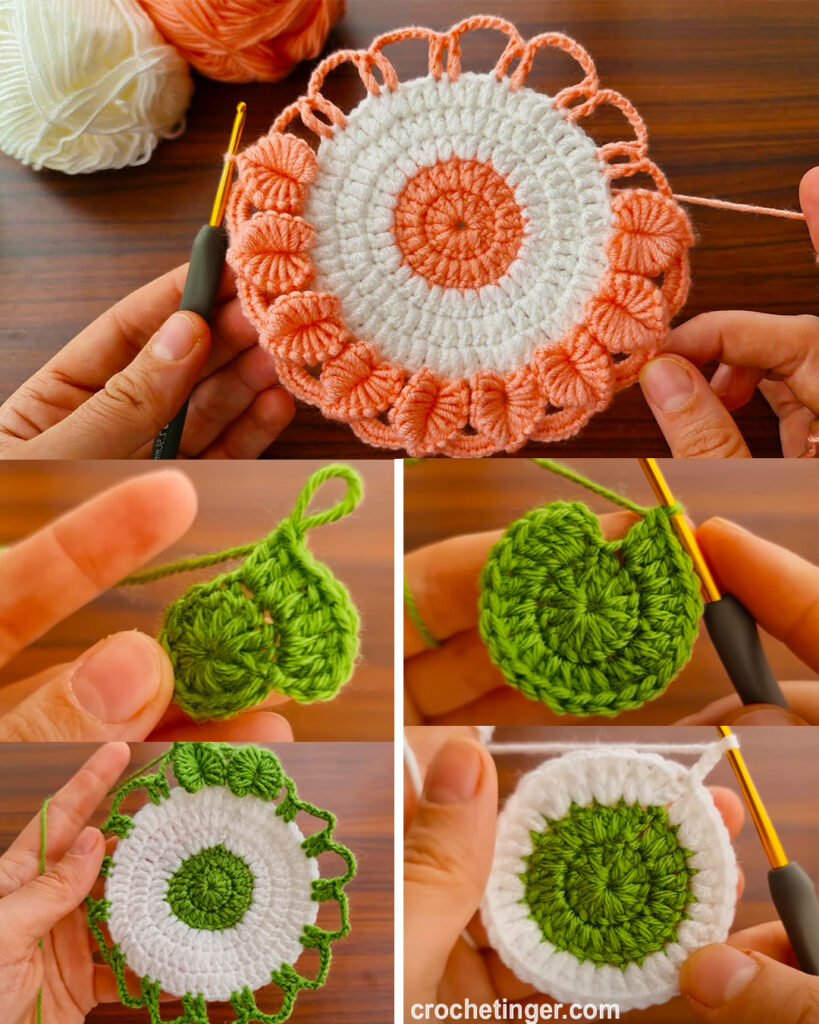
Following the pattern instructions, work the first round into the center ring you created in the previous step. This round usually involves single crochet stitches or other basic stitches to establish the center of the coaster motif.
Step 5: Round 2 – Expanding the Coaster
In this round, you will start to expand the coaster motif. The pattern will instruct you on the stitches to use and the number of increases required. Expected increases include using two single crochet stitches in one stitch or working two stitches in one stitch.
Step 6: Rounds 3 and Beyond
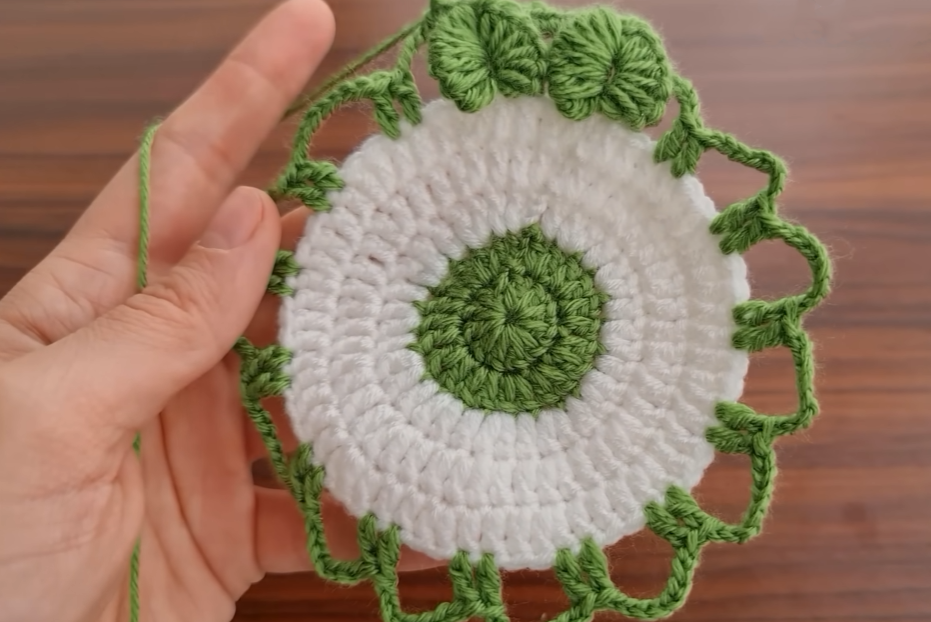
Continue following the pattern, increasing the coaster’s size with each round. Each round might incorporate various stitches and color changes, creating intricate and beautiful designs. Pay attention to stitch counts and placement as you progress through the rounds.
Step 7: Finishing Touches
Once you’ve completed the last round of the coaster motif, finish off your work according to the pattern instructions. Usually, this involves fastening off the yarn and weaving in the loose ends with a yarn needle.
Step 8: Blocking (Optional)
Blocking your coaster can enhance its shape and give it a neater appearance. Gently wet the coaster and shape it to the desired size. Place the item in a horizontal position on top of a towel, secure the corners with pins to uphold its form, and allow it to air dry completely.

Video tutorial:
Conclusion:
Crocheting beautiful coaster motifs is a rewarding and enjoyable craft that allows you to unleash your creativity and decorate your living space with handmade elegance. By following this step-by-step guide and experimenting with different patterns and color combinations, you can create an array of stunning coasters that will delight your guests and brighten up your home. So, grab your crochet hooks, pick some colorful yarn, and start crocheting your way to a beautiful set of coasters!
You may be interested:
- Crochet baby blanket cardigan design – Free Pattern
- How to Crochet a Charming Daisy Motif: A Step-by-Step Pattern
- How to Crochet an Easy Crochet Granny Square Motif: A Step-by-Step Guide for Beginners
- How to Crochet a Simple & Easy Crochet Flower | Free pattern for Absolute Beginners

One Comment on “Crochet Coaster Motif: A Step-by-Step Guide to Creating Beautiful Coasters”