
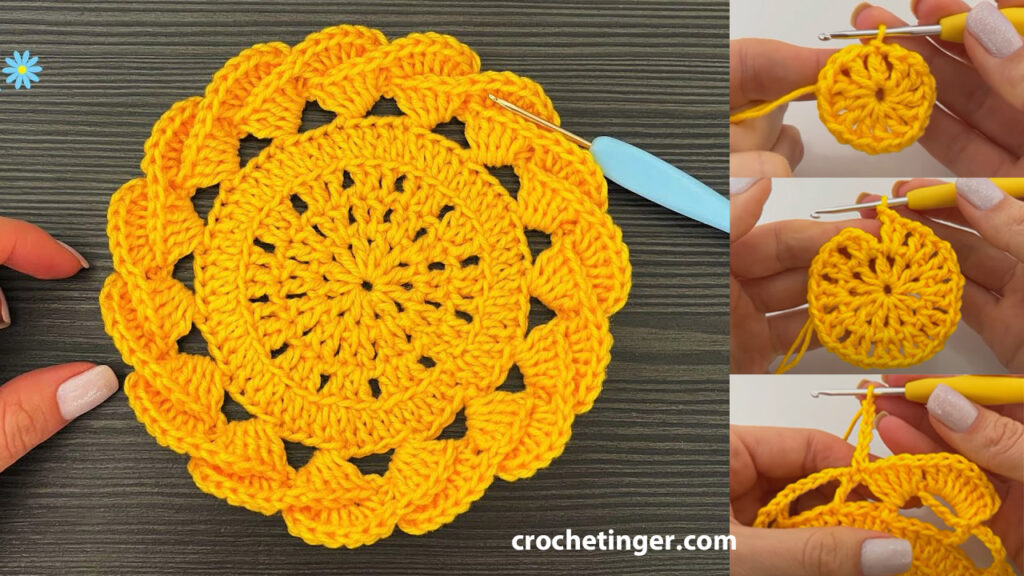
If you love crocheting and enjoy sipping your favorite hot beverages, then creating a crochet cup holder coaster is the perfect project for you! A cup holder coaster not only protects your surfaces from hot cups but also adds a touch of style to your home decor. This step-by-step blog pattern will guide you through the process of making a practical and charming crochet cup holder coaster that you can customize to match your taste and preferences.
Skill Level: beginner
Materials You’ll Need:
- Worsted weight yarn in the color of your choice (choose a color that complements your home decor)
- Crochet hook suitable for the yarn (usually a size G/4.0mm or H/5.0mm hook works well with worsted weight yarn)
- Yarn needle
- Scissors
Abbreviations:
- ch: chain
- st(s): stitch(es)
- sc: single crochet
- hdc: half double crochet
- dc: double crochet
- sl st: slip stitch
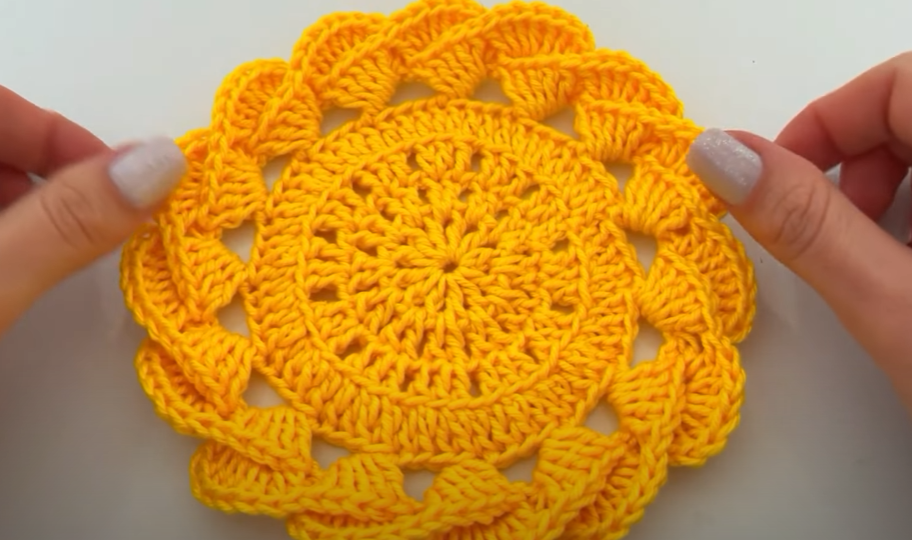
Pattern 1:
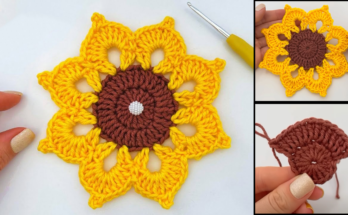
Cup Holder Coaster:
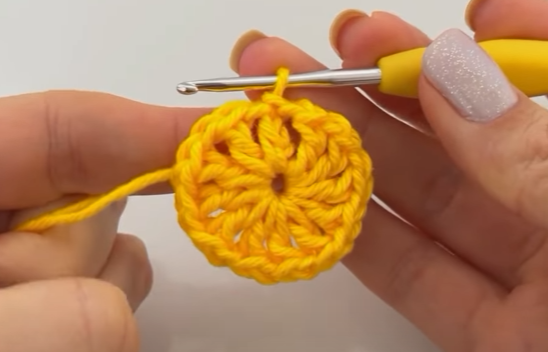
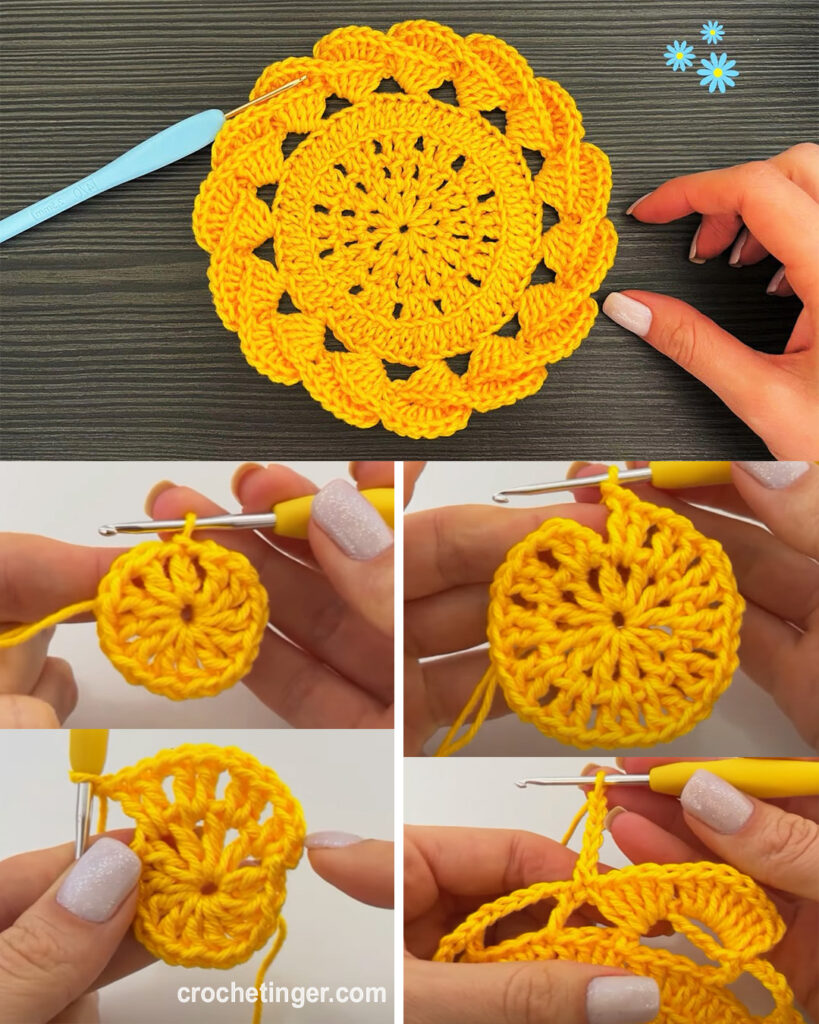
Round 1: Create a magic ring and ch 2 (counts as the first half double crochet here and throughout). Work 9 half double crochet into the ring. Connect using a slip stitch to the upper part of the initial chain-2 loop.. (10 sts)
Round 2: Ch 2, Crochet a half double crochet stitch into the same stitch where the join was made, then proceed to work 2 half double crochet stitches into every stitch around. Complete the connection by slip stitching to the upper part of the initial chain-2 stitch. (20 sts)
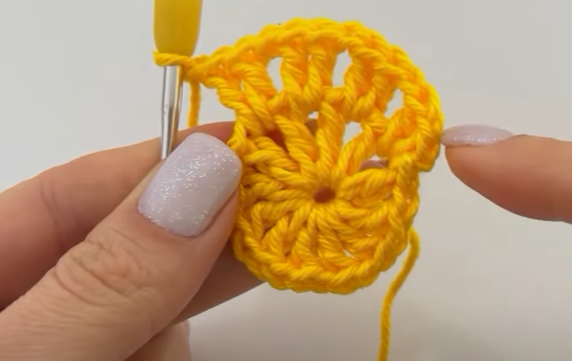
Round 3: Ch 2, Perform a half double crochet stitch in the identical stitch as the point of connection. Perform a half double crochet stitch in the following stitch, followed by 2 half double crochet stitches in the subsequent stitch. Repeat from * to * around. Connect using a slip stitch to the upper part of the initial chain-2 loop. (30 sts)
Round 4: Ch 2, Work a half double crochet stitch in the exact same stitch as the join. Perform a half double crochet stitch in the following stitch, followed by two half double crochet stitches in the subsequent stitch. Repeat from * to * around. Connect using a slip stitch to the upper part of the initial chain-2 loop. (40 sts)
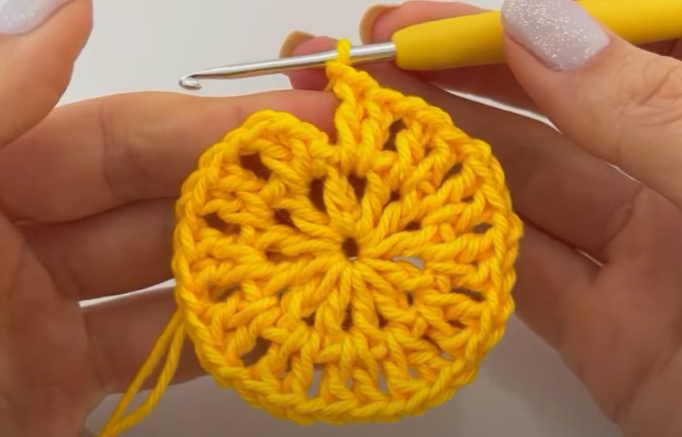
Round 5: Ch 1 (does not count as a stitch), Single crochet in the same stitch as the join and in each stitch around. Attach using a slip stitch to the initial single crochet. (40 sts)
Round 6: Ch 1, Single crochet in the same stitch as the join and in each stitch around. Attach using a slip stitch to the initial single crochet. (40 sts)
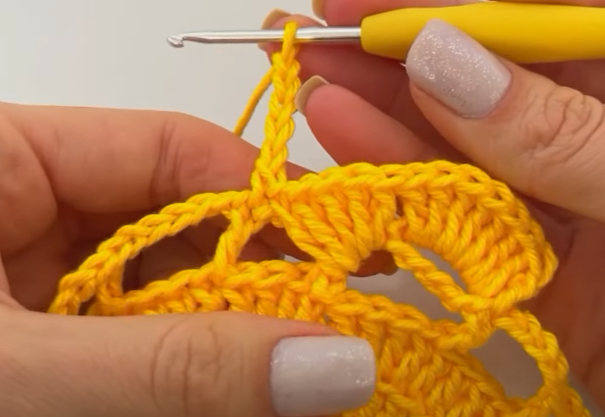
Round 7: Ch 1, Single crochet in the same stitch as the join. In Chapter 3, omit the following stitch, and then work a single crochet stitch into the subsequent stitch.. Repeat from * to * around. Attach using a slip stitch to the initial single crochet. (20 single crochet stitches and 20 chain-3 spaces)
Round 8: Slip stitch into the first chain-3 space. Chain 1, single crochet, half double crochet, double crochet, half double crochet, single crochet all in the same chain-3 space. Repeat this pattern (sc, hdc, dc, hdc, sc) in each chain-3 space around. Attach using a slip stitch to the initial single crochet. (20 sets of petals)
Round 9: Ch 1, Single crochet in the same stitch as the join and in each stitch around. Attach using a slip stitch to the initial single crochet. (40 sts)
Round 10: Chapter 1, create a single crochet stitch in the identical stitch as the connection and in every stitch all around. Attach using a slip stitch to the initial single crochet. (40 sts)
Fasten off: Snip the yarn, ensuring a lengthy trial. Employ the yarn needle to interlace the extremities.
Customization Tips:
- Color Choice: Select a yarn color that complements your kitchen or living room decor. You can go for a neutral shade, or a vibrant hue, or even use variegated yarn for a unique look.
- Embellishments: Feel free to add some embellishments to make your cup holder coaster stand out. You can attach small crochet flowers, beads, or buttons to the center of the coaster.
- Size Variation: You can easily adjust the size of the cup holder coaster by adding or reducing the number of rounds. For a larger coaster, repeat rounds 5 to 9 until you achieve the desired size.
Step By Step Guide:
Why crochet a cup holder? Crocheting coasters allow you to combine practicality and creativity in one project. These coasters provide a soft barrier between hot or cold drinks and delicate surfaces, preventing unsightly water rings and heat damage. Plus, they offer a fantastic opportunity to experiment with different yarn colors and stitches, resulting in a functional piece of art that reflects your personal style.
Collection of your materials
Before diving into the crochet process, it’s important to gather your materials. Start by choosing a yarn that suits your taste and matches your home decor. Worsted-weight cotton yarn is a popular choice for coasters due to its durability and absorbent properties. Also, choose an appropriate hook size, usually between 3.5mm and 5.5mm, depending on the yarn you choose.
Getting Started: The Foundation Network
Making a Slip Knot: First, make a slip knot by wrapping the thread around your fingers and pulling the end through the loop. Tie a knot around the hook of the crochet needle.
Making the main chain: insert the hook into the slipknot and thread it on. Draw the yarn through the slipknot loop, forming a fresh loop on the crochet hook. Repeat this process, creating a chain of the desired length. The foundation chain serves as the starting point for your stand.
Basic crochet stitches
Single crochet: insert your hook into the desired loop, yarn over and pull up a loop. Wrap the yarn over once more and draw it through both loops on the crochet hook. This creates a single crochet stitch.
Creating the half double crochet stitch involves wrapping the yarn over and inserting the hook into the stitch, followed by another yarn over and pulling up a loop, Next, wrap the yarn over the hook and pull it through all three loops that are on the hook.
Double crochet stitch: yarn over, insert hook into stitch, yarn over again, and pull up a loop. Yarn over and pull through the first two loops on the hook, then yarn over again and pull through the remaining two loops.
Formation of coaster base
We knit the first row: we begin to knit in the second chain from the hook. Use the stitch of your choice (single, half double, or double) to create a series of stitches.
Increasing rows: Continue knitting rows in the selected stitch until the base is the desired size. To keep the corners straight, work the same number of stitches at the beginning and end of each row.
Adding vibrant colors
Turning on the second color of yarn: To introduce the second color, knit the last loop of the previous row until there are two loops on the hook. Then let go of the current yarn and pick up a new color by pulling it through the last two loops to complete the stitch.
Creating stripes or patterns: Experiment with stripes by alternating colors every few rows. For more complex patterns, change the colors in the rows using the technique mentioned above.
Forming the coaster
Decreasing Stitches for Tapering: To taper the coaster shape, use decreasing stitches at the beginning and end of each row. This gradually reduces the width of the stand.
Keeping sides even: Make sure you maintain the same number of stitches between decreases so that the sides are even and symmetrical.
Finishing touches
Creating a neat edging: Add a clean finish to the coaster by knitting a row of single crochets around the edge. This gives the coaster a polished look.
Binding and weaving end: Once your coasters have reached the desired size and shape, secure the yarn by cutting it and pulling it through the last loop. Use a yarn needle to weave in any loose ends to secure your work.
Personalization and decoration
Add embroidery or appliqué: Get creative by embellishing the stand with embroidery stitches or small appliqués. Personalize it with initials, drawings, or motifs.
Sewing on buttons or beads. For more elegance, sew buttons or beads onto the stand. Not only do these decorations add visual appeal, but they also add practical weight to hold the stand in place.
Caring for your cup holder
Washing and Cleaning Tips: Maintain the stand’s appearance by gently hand washing in warm water and mild soap. Avoid using harsh detergents that can damage the fibers of the yarn.
Storage and Maintenance: Store the stands horizontally or hang them up so that they do not deform. Ensure that they are kept away from direct sunlight to avoid any fading.
Showcasing your craft
Using your coasters: Place beautifully crafted coasters under cups, mugs, or glasses to protect your furniture and add handcrafted charm to your space.
Gift ideas and occasions: crochet coasters for glasses will be a great gift for friends
Your cup holder coaster is now complete! Secure the ends by fastening off and neatly tuck away any loose threads using the yarn needle. You can make these coasters in various colors to match your kitchen or dining room decor. In addition, they serve as delightful presents for both loved ones and companions.
Video tutorial:
Final Thoughts:
Crocheting a cup holder coaster is a delightful and rewarding project that will not only showcase your crochet skills but also serve a practical purpose in your daily life. With endless possibilities for color, texture, and embellishments, you can create a set of coasters that perfectly matches your unique style. Whether you use them at home or give them as thoughtful handmade gifts, your crochet cup holder coasters are sure to be appreciated and cherished. Enjoy the process of crocheting and revel in the joy of having a handmade item that brings warmth and charm to your space! Happy crocheting!
You may be interested:

This crochet projects are beautiful. Will do for Christmas gifts.
Thank you for sharing.