
Knitting is a wonderful craft that allows you to create cozy and beautiful products, and one of the most important stitches that every knitter should master is knitting. When it comes to making a sweater, knitting forms the backbone of the fabric and determines its look and texture. In this step-by-step guide, we will walk you through the process of creating a beautiful knitted sweater that will amaze everyone with its smoothness and elegance.
Materials Needed
Before we dive into the knitting process, make sure you have the following materials ready:
- Yarn: Choose a soft and durable yarn that complements your sweater design. Worsted-weight yarn is an excellent option for beginners.
- Knitting Needles: Select the appropriate needle size for your yarn.
Examine the yarn label to find the suggested needle size. - Scissors: A good pair of scissors will be needed for cutting the yarn.
- Tapestry Needle: This will help you weave in the loose ends after completing your project.
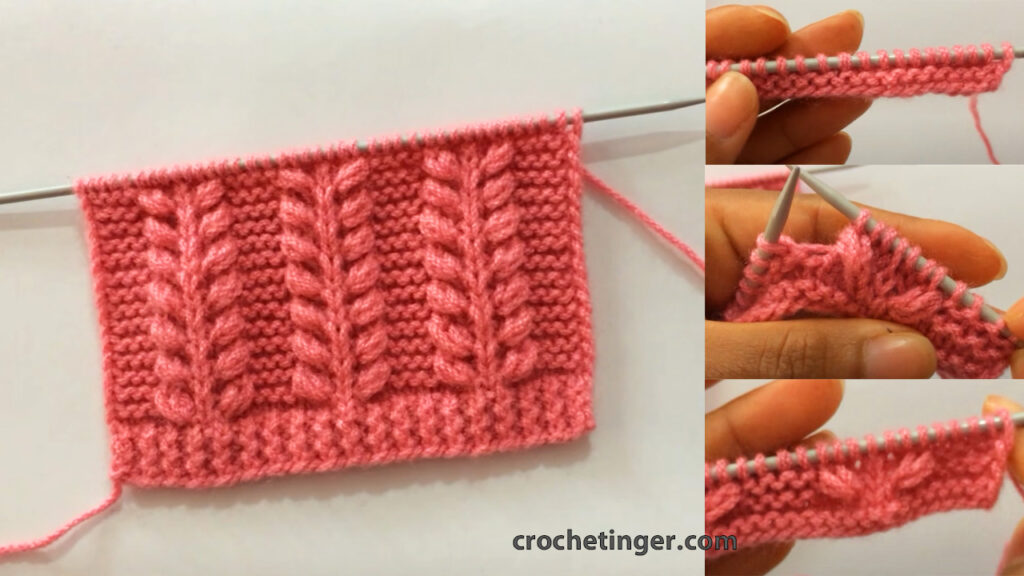
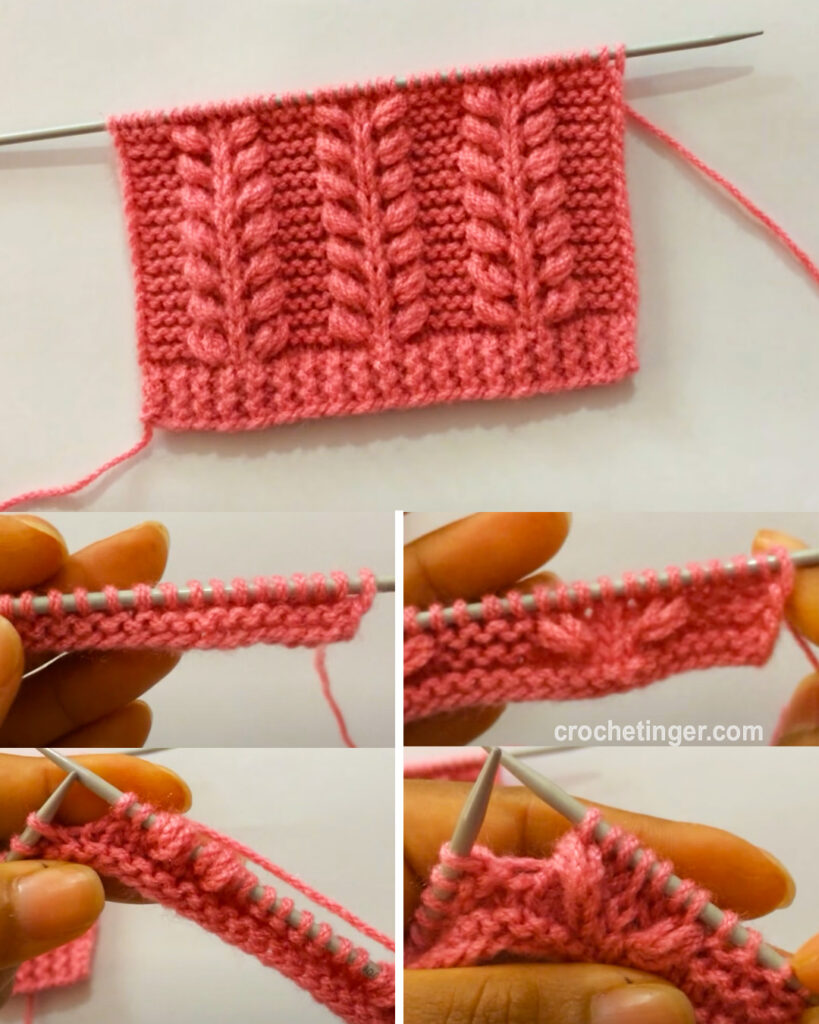
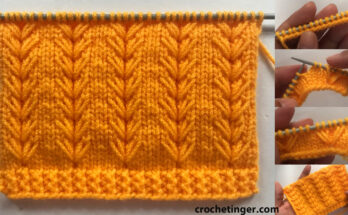
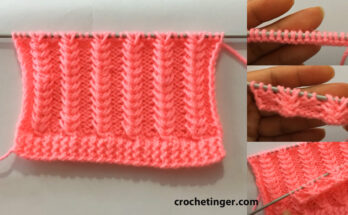
Pattern 1:
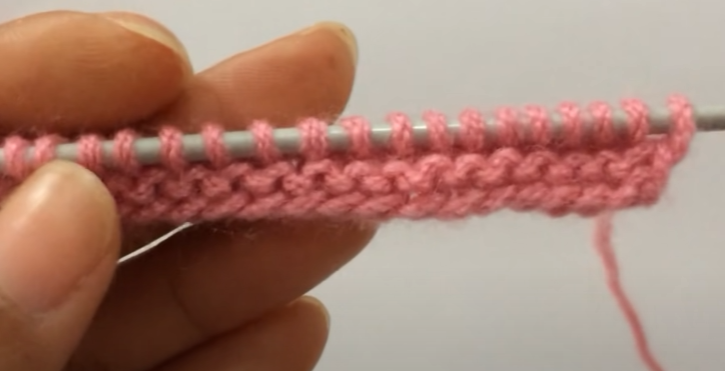
Step 1: Cast On Stitches
Start by casting on an even number of stitches, depending on the desired width of the sweater. You can use the long tail set method for a neat and strong edge.
Step 2: The Base Row
For this knitting stitch, we will use a combination of basic knit stitches. The main row consists of alternating knit and purl stitches. The first row will be all knit stitches.
- Knit the first stitch.
- Purl the next stitch.
- Continue knitting and purling each stitch until you reach the end of the row.
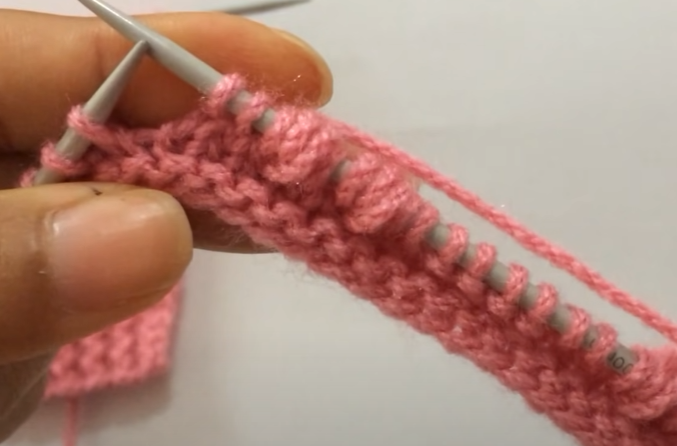
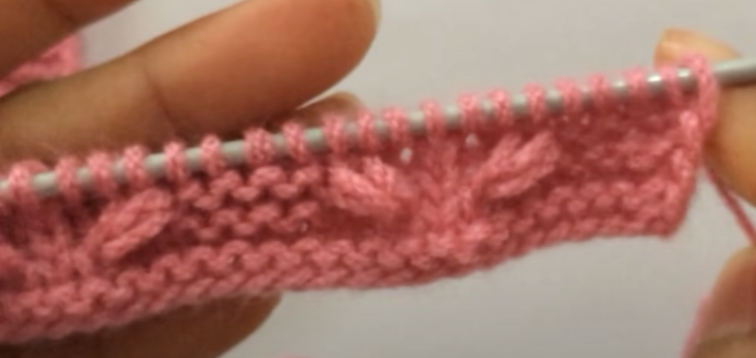
Step 3: Creating the Pattern
The beauty of this knitting stitch lies in the pattern it creates. For the subsequent rows, repeat the following steps until you achieve the desired length:
- Row 2: Purl all stitches.
- Row 3: Knit the first stitch. Then insert the right needle into the back stitch of the second stitch (the stitch that was just purled in the previous row) and knit it. Without slipping the purl stitch off the left needle, knit the first stitch again and then slip both stitches off the needle.
- Row 4: Purl all stitches.
- Row 5: Purl the first stitch. Then insert the right needle into the back stitch of the second stitch and purl it. Without letting the knitted stitch slip off the left needle, purl the first stitch again and then slip both stitches off the needle.
- Row 6: Purl all stitches.
- Row 7: Repeat row 3.
- Row 8: Purl all stitches.
- Row 9: Repeat row 5.
- Row 10: Purl all stitches.
- Row 11: Repeat row 3.
- Row 12: Purl all stitches.
Carry on with this sequence until you attain the preferred extent for your sweater.
Step 4: Binding Off
Once you have completed the knitting pattern it is time to cast off the stitches. Use a simple binding method to secure your work and create a clean edge.
Step 5: Finishing Touches
After binding off, weave in any loose ends using a tapestry needle. Give your sweater a soft block to balance the stitches and improve the overall look.
Congratulations! You’ve successfully created a beautiful knitting stitch for your sweater. The intricate pattern will undoubtedly add a touch of elegance and uniqueness to your handmade creation.

Pattern 2:
Step 1: Cast On Stitches
To begin, cast the required number of stitches onto one of your knitting needles. This creates the foundation for your sweater. The long-tail cast-on method is commonly used, but feel free to use any other cast-on method you’re comfortable with.
Step 2: Hold the Needles and Yarn
Hold one knitting needle in each hand. The needle with the cast-on stitches should be in your left hand, and the empty needle in your right hand. The yarn should be attached to the first stitch on your left-hand needle, trailing toward your right hand.
Step 3: Insert the Right Needle
Insert the tip of the right-hand needle into the first stitch on the left-hand needle from the front to the back. The needles should now be crossed, with the right needle behind the left needle.
Step 4: Wrap the Yarn
Take the yarn in your right hand and wrap it around the right needle, moving from back to front. Ensure that the yarn is positioned between the two needles.
Step 5: Pull-Through the Stitch
With the yarn wrapped around the right needle, gently pull it through the stitch on the left needle, creating a new loop on the right needle.
Step 6: Slide Off the Stitch
Carefully slide the original stitch off the left needle, leaving the newly created loop on the right needle.
Step 7: Repeat
Continue steps 4 to 7 for each stitch until you reach the end of the row. This is the basic knit stitch. Repeat the process for subsequent rows, and you’ll see the fabric grow.
Step 8: Finishing the Row
When you finish a row, turn your work around and start again from the first stitch. This is how you create the knit stitch pattern. Keep knitting rows until your sweater reaches the desired length.
Step 9: Bind Off
Once your sweater has reached the desired length, it’s time to bind off and finish your project. There are various bind-off methods to choose from, such as the basic bind-off, stretchy bind-off, or picot bind-off. Select the one that complements your sweater design.
Step 10: Weave in Ends
To give your sweater a polished look, weave in any loose yarn ends using a tapestry needle. This step ensures that your knitting is secure and tidy.
Step 11: Block Your Sweater
After finishing your sweater, it’s recommended to block it to even out the stitches and give it a professional finish. Wet blocking or steam blocking can be used, depending on the type of yarn used.
Video Tutorial:
Final Thoughts
Knitting is not only a delightful hobby but also a form of artistry that allows you to express your creativity. With practice and patience, you can master various knitting stitches and create stunning pieces of wearable art. Whether you’re knitting for yourself or a loved one, the joy of wearing a sweater made with your own hands is truly unparalleled. So pick up your needles, choose your favorite yarn, and start knitting your way to a wardrobe filled with beautiful, cozy sweaters! Happy knitting!
You may be interested:
One Comment on “How to Make a Beautiful Knit Stitch for Sweater: A Step-by-Step Guide”