
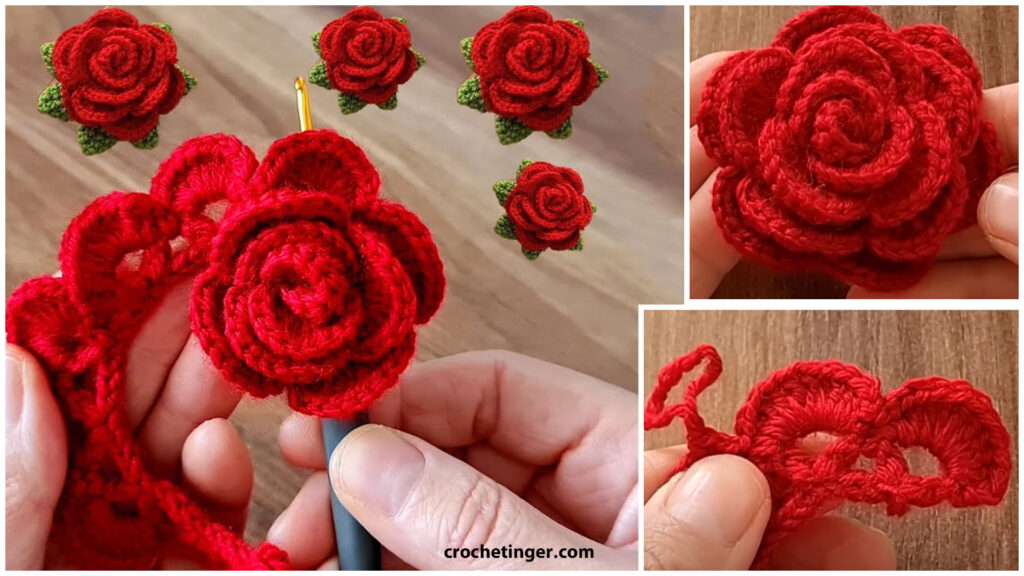
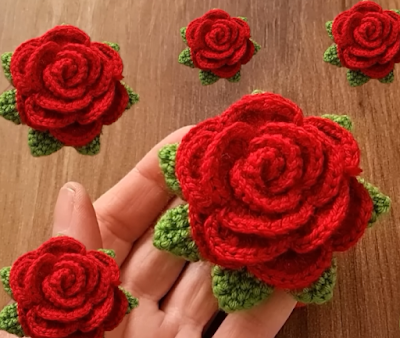
Crocheting a beautiful red rose can be both a rewarding and creative endeavor. Whether you’re a seasoned crocheter or just starting out, this step-by-step guide will take you through the process of creating a stunning red rose using your crochet skills. Roses have long been a symbol of love and beauty, and crafting your very own crocheted rose allows you to capture that essence in a unique way.
Skill Level: Beginner
Materials Needed: Before we start, assemble the following materials:
- Red yarn (preferably worsted-weight) – for the petals and leaves
- Green yarn – for the stem and leaves
- Crochet hook (size appropriate for your yarn choice)
- Scissors
- Yarn needle
- Fiberfill or stuffing (optional)
- Floral wire (optional, for a more realistic stem)
Table of Contents
- Introduction
- Why Crochet Roses?
- Materials You’ll Need
- Getting Started with Crochet
- Basic Crochet Stitches Refresher
- Choosing the Right Yarn
- Creating the Rose Petals
- Forming the Center
- Crafting the Outer Petals
- Building the Rose
- Assembling the Petals
- Shaping the Rosebud
- Adding Realism with Details
- Working on the Stem
- Enhancing with Leaves
- Choosing Your Red Rose’s Final Look
- Full Bloom or Partially Closed?
- Customizing Size and Shape
- Finishing Touches
- Blocking Your Crochet Rose
- Adding Personal Flair
Introduction
Why Crochet Roses?
Creating crocheted roses provides an exclusive avenue for showcasing your imaginative flair and deep fondness for handiwork. Diverging from actual roses, crocheted ones maintain their everlasting allure, rendering them ideal for enduring ornamentation. Regardless of whether you boast advanced crocheting skills or are taking your initial steps, embarking on crafting a crimson rose can prove to be a delightful and gratifying endeavor.
Materials You’ll Need
Before diving into the crocheting process, make sure you have the necessary supplies. You’ll need a crochet hook (size can vary based on your preference), red yarn (or your preferred color), a yarn needle, and a pair of scissors. Opt for a soft, pliable yarn to ensure your rose has a natural look and feel.
Getting Started with Crochet
Basic Crochet Stitches Refresher
If you’re new to crochet, start by familiarizing yourself with the basic stitches. The chain stitch (ch), slip stitch (sl st), single crochet (sc), and double crochet (dc) will be your main tools for this project. Do not be concerned if your skills are slightly diminished; engage in practicing a few sewing techniques to restore your self-assurance.
Choosing the Right Yarn
Choosing the appropriate yarn is essential to achieve the desired look of your rose. Pick a yarn that closely mimics both the texture and color of an actual rose. Opt for a medium-weight yarn as it is simple to handle and offers a realistic final touch.
Creating the Rose Petals
Forming the Center
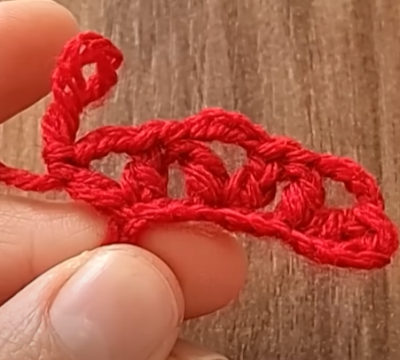
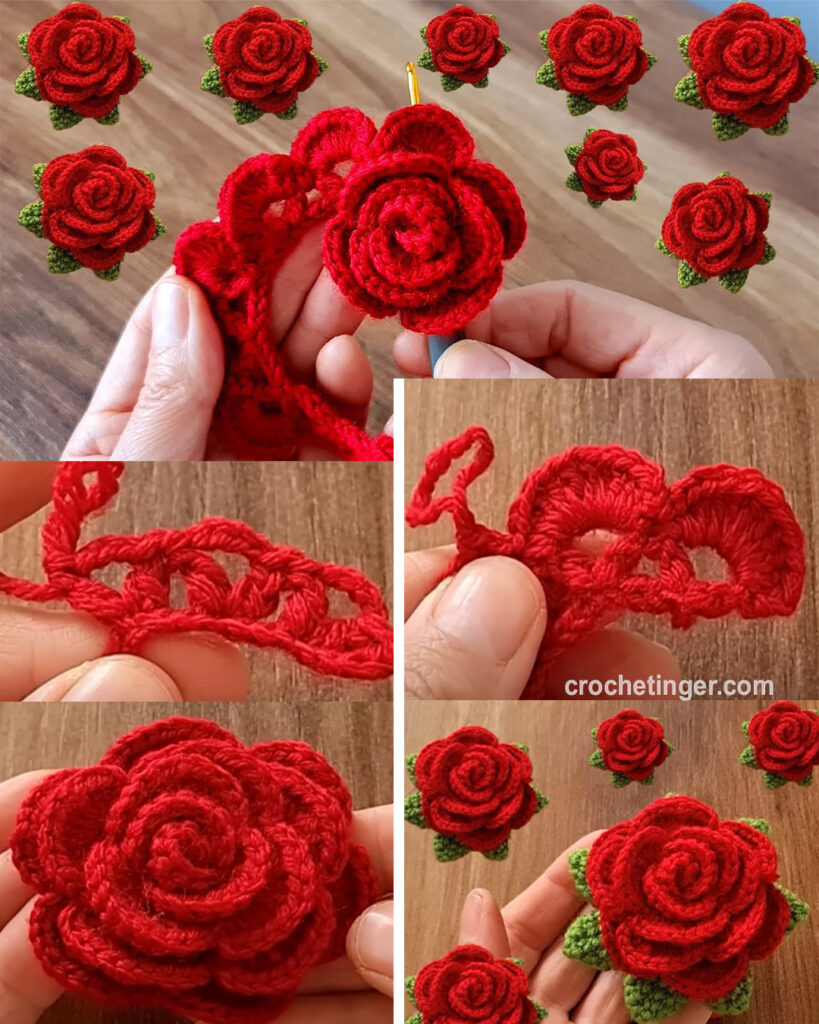
To start, Crochet a magic circle and execute a handful of single crochet stitches into it. This action will establish the core of your rose. Slowly augment the count of stitches in every round to craft a circular form.
Crafting the Outer Petals
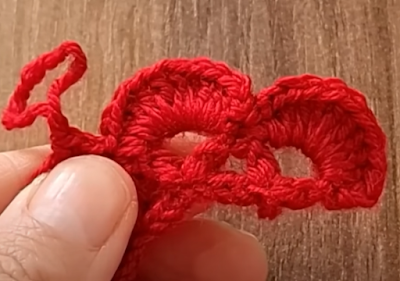
As you move outward from the center, crochet larger petals. Use double crochet stitches to add volume and create a natural petal shape. Work in multiple rounds, gradually increasing the stitches and spacing to form the petal’s contour.
Building the Rose
Assembling the Petals
Gather your completed petals and arrange them around the center, slightly overlapping each one. Attach them securely by crocheting a few stitches through the base of each petal. This action creates the unique stratified appearance of a rose.
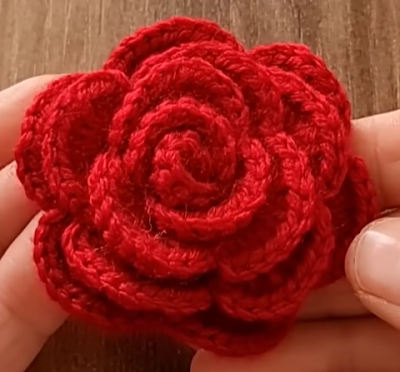
Shaping the Rosebud
In order to bestow upon your rose a truly lifelike semblance, sculpt the petals to mimic the form of an emerging bud. Employ a delicate touch to softly curl the external perimeters of the petals utilizing your fingertips. This particular stage contributes dimensions and profundity to your crochet masterpiece.
Adding Realism with Details
Working on the Stem
No rose is complete without a stem. Crochet a simple chain for the stem, or get creative with a textured stitch pattern. Attach the stem securely to the base of your rose, ensuring it’s centered and balanced.
Enhancing with Leaves
Add a touch of authenticity by crocheting leaves. Use green yarn and a basic leaf pattern to create leaves that complement your rose. Attach them to the stem, positioning them strategically for a natural look.
Choosing Your Red Rose’s Final Look
Full Bloom or Partially Closed?
Decide whether you want your rose in full bloom or partially closed. For a blooming rose, spread out the petals and shape them to resemble an open flower. For a closed bud, Arrange the inner petals in closer proximity, capturing the exquisite essence of a rose on the brink of blossoming into complete fullness.
Customizing Size and Shape
Engage in exploration with diverse stitch counts and techniques to craft roses of assorted sizes and forms. The process of experimentation holds an essential role in discovering the impeccable design that aligns with your envisioned outcome.
Finishing Touches
Blocking Your Crochet Rose
Upon finishing your rose, contemplate the act of blocking it to guarantee the clarity of all petals and stitches. Delicately steam or dampen to block your rose, being cautious not to diminish its texture.
Adding Personal Flair
Feel free to add personal touches to your crochet rose. Attach decorative elements like beads or buttons to the center, or use contrasting yarn colors for a unique twist.
FAQs
Q1: Can I use a different color of yarn for the rose? Yes, absolutely! While red is classic, You have the opportunity to explore a variety of colors in order to craft distinctive roses that align with your personal preferences.
Q2: I’m new to crochet. Is this project suitable for beginners? Yes, this guide is designed with beginners in mind. Allocate sufficient time, engage in deliberate repetition of the fundamental stitches, and meticulously adhere to each sequential instruction.
Q3: Can I use a larger hook to make a bigger rose? Certainly, using a larger hook will result in a larger rose. Merely remember that the dimensions of your rose will be contingent on the yarn, hook, and stitches you opt for.
Q4: What is the duration required to create a crocheted rose? The time required depends on your crochet skill level and the complexity of the pattern. It might take a few hours for beginners, but experienced crocheters could finish more quickly.
Q5: Can I sell roses I’ve crocheted using this guide? Of course! Feel free to sell your handmade roses, but remember to give credit to the original pattern if needed. Sharing your creations can bring joy to others as well.
Video tutorial
Conclusion
Crocheting a gorgeous red rose is a labor of love that yields a stunning and everlasting result. This creative journey allows you to express your personality and bring a touch of nature into your surroundings. With a bit of practice and patience, you’ll master the art of crocheting roses and create beautiful pieces that captivate and inspire.
You may be interested:
- Crochet baby blanket cardigan design – Free Pattern
- How To Crochet A Round Crochet Template with Two Lines in One – Free Pattern
- How to Create a Unique Crochet Stitch for Blankets, Rugs, and Scarves – Free Pattern


