
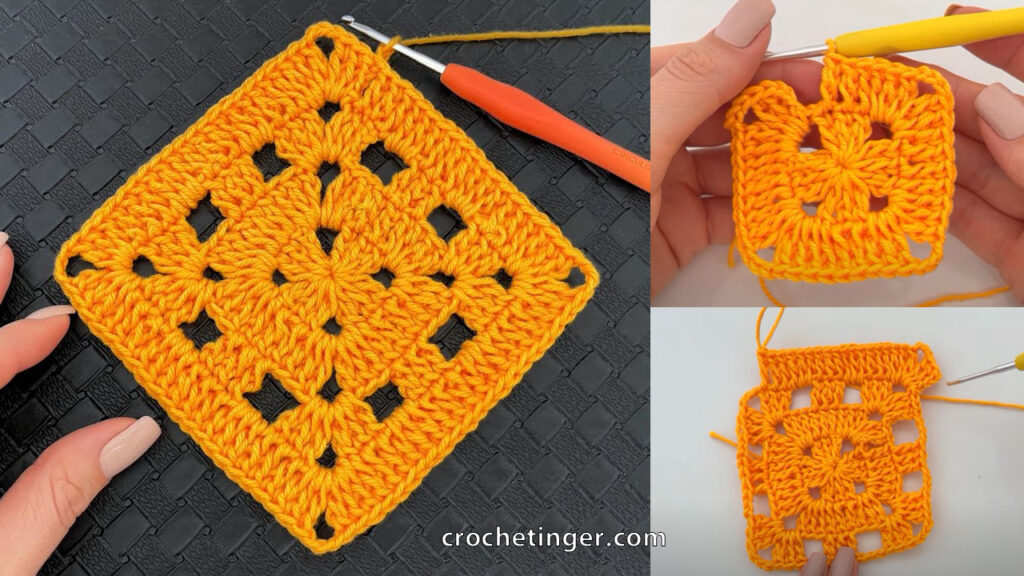
Crocheting is a versatile and enjoyable craft that allows you to create a wide range of beautiful projects. Among them, crocheting a square with different highlights adds depth and visual interest to your work. Whether you’re a beginner or an experienced crocheter looking to try something new, this blog post will guide you through the process of creating a crochet square with various highlights. Let’s dive in and explore the steps to achieve this stunning crochet design!
Skill Level: beginner
Materials Needed:
Before we begin, gather the following materials:
- Yarn: Choose different colored yarns to create highlights in your square. You can opt for a basic cotton yarn for a soft and classic look or experiment with acrylic or wool yarns for varied textures.
- Crochet Hook: Select an appropriate crochet hook size based on the thickness of your yarn. Check the label on the yarn to determine the recommended hook size.
- Scissors: A pair of sharp scissors to cut the yarn.
- Yarn Needle: For weaving in the ends and finishing touches.
Abbreviations:
- MC: Main color
- HC: Highlight color
- ch: chain
- sc: single crochet
- dc: double crochet
- sl st: slip stitch
- st: stitch
- sp: space
Pattern:
Square Base:
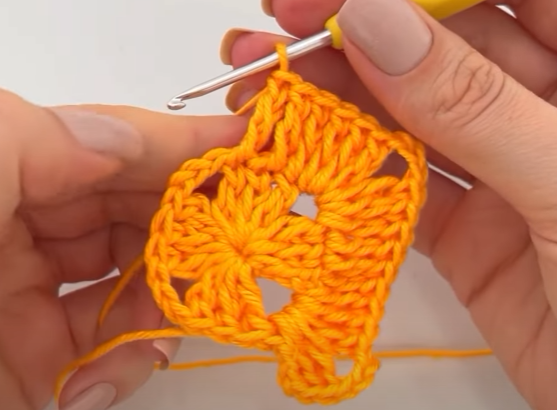
Round 1: Start with a magical circle or crafting a chain of 4 stitches, then connect it with a slip stitch to shape a ring.
Round 2: Ch 3 (Counts as the first double crochet), 2 double crochets in the ring, chain 2, 3 double crochets in the ring (repeat – three more times), chain 2, join with A slip stitch to the top of the initial chain-3 stitch. (4 groups of 3 dc)
Round 3: Sl st into the next 2 dc and into chain-2 space, chain 3 (which counts as the first double crochet), work 2 double crochets in the same chain-2 space, chain 2, and then work 3 double crochets in the following chain-2 space (repeat this sequence three additional times), followed by chain 2, Attach using a slip stitch to the uppermost part of the initial chain-3. (4 groups of 3 dc)
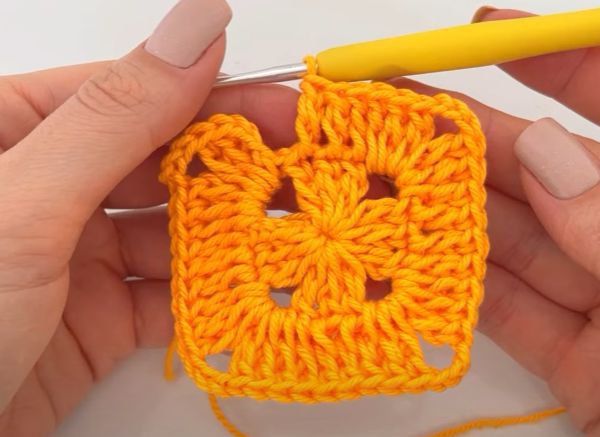
Round 4: Sl st into the next 2 dc and into chain-2 space, then chain 3 (which will be considered as the first double crochet). Make 2 double crochets in the same chain-2 space, followed by chaining 1. Next, create 3 double crochets in the subsequent chain-2 space, chain 1 again, and perform 3 double crochets in the following chain-2 space (Repeat this sequence three additional times), and finish by chain 1, Attach using a slip stitch to the uppermost part of the initial chain-3. (4 groups of 3 dc with ch-1 spaces)
Round 5: Sl st into the next 2 dc and into the Chain 1 space, chain 3 (which counts as the first double crochet), 2 double crochets in the same chain-1 space, chain 1, 3 double crochets in the next chain-1 space, chain 1, 3 double crochets in the subsequent chain-1 space, chain 1, and 3 double crochets in the following chain-1 space (repeat – three more times), ch 1, Connect by making a slip stitch to the uppermost part of the initial chain-3. (4 groups of 3 dc with ch-1 spaces)
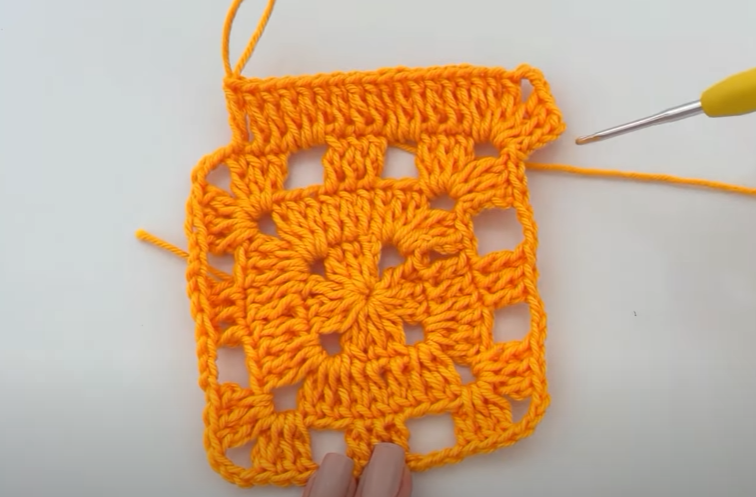
Securely attach the end of your primary color yarn and neatly tuck away the loose strands.
Highlights:
Now comes the fun part where you can add highlights to your square using the highlight color (HC). You can create stripes, stitches in a different color, or any pattern that catches your fancy. Here’s an example of a simple stripe pattern:
Round 6: Join HC yarn in any ch-1 space. Ch 1, Single crochet in the same stitch and in each stitch and chain-1 space around, then join with a slip stitch to the first single crochet.
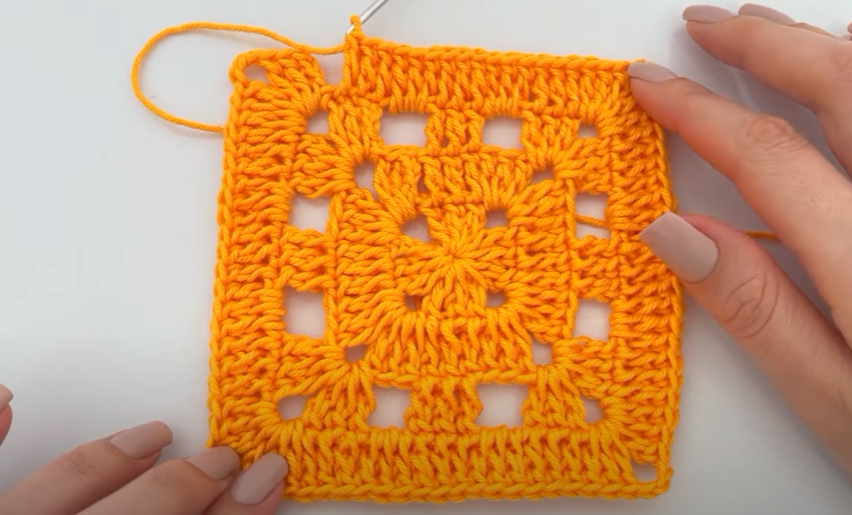
Round 7: Ch 1, sc in each st around, join with a slip stitch to the first single crochet.
Securely attach the accentuating shade and neatly secure the loose ends.
Finishing:
After you finish crocheting the square and adding your desired highlights, block the square to even out the stitches and give it a neat shape. You can dampen the square with water, shape it to the desired dimensions, and pin it in place. Permit it to thoroughly dry before removing the pins.
Repeat this pattern to make as many squares as needed, and then you can join them together to create a larger project like a blanket or an afghan.
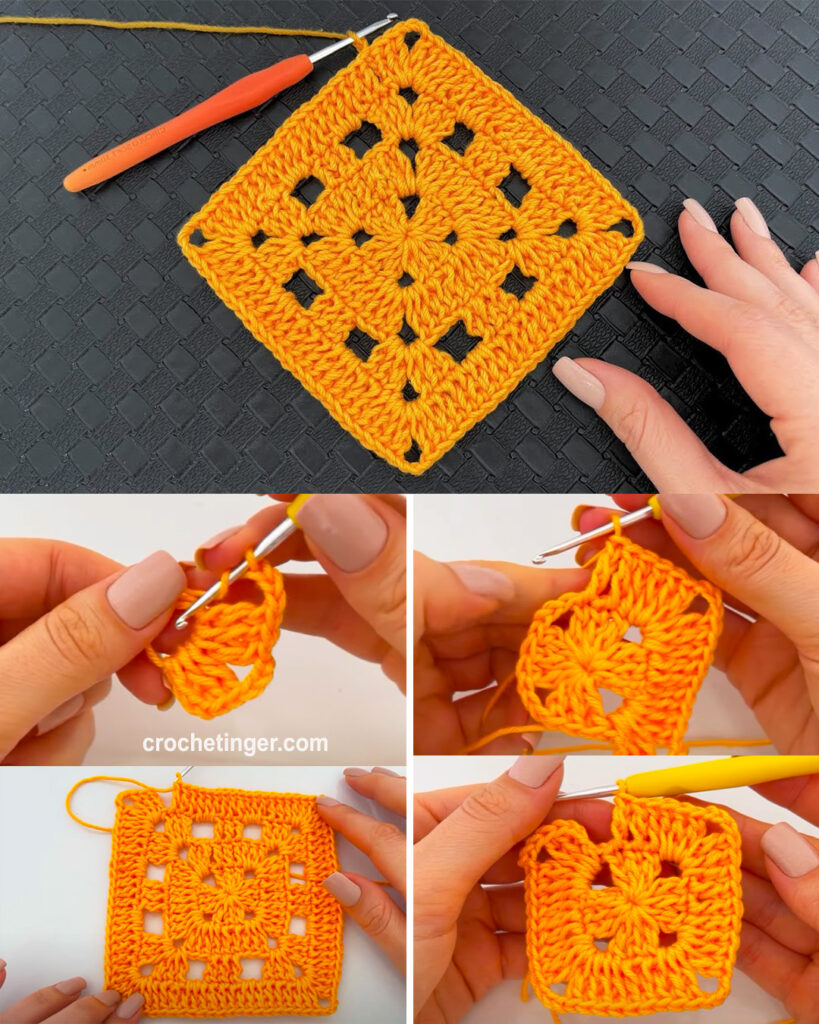
Step-by-Step Instructions:
- Start with a Magic Ring:
To begin your crochet square, use the magic ring technique. Hold the yarn tail in your hand, leaving a small loop at the end. Insert your crochet hook into the loop, yarn over, and pull through to create a slipknot. This slipknot will serve as your magic ring.
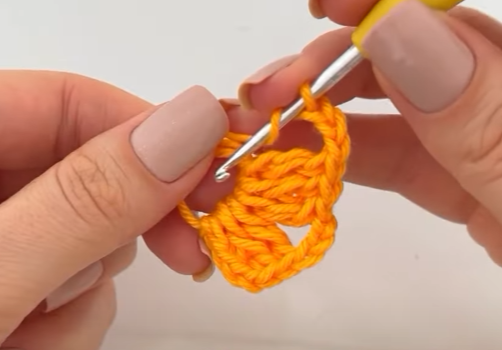
- Chain and Establish the First Round:
Make a chain of 4 or 5 stitches to form the corner of your square. Join the last chain to the first chain with a slip stitch, creating a loop.
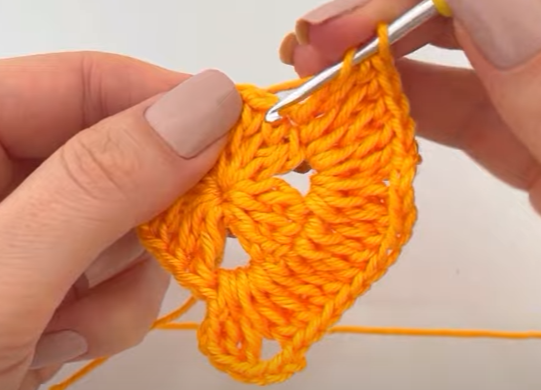
- Work the First Highlight:
Now it’s time to add the first highlight color. Attach the new yarn color by making a slipknot on your hook and pulling it through the loop, securing it to the square. Chain 2 (these count as your first double crochet), then work additional double crochet stitches into the loop to form one side of the square. When you reach the corner, work 2 chain stitches, then continue with double crochet stitches along the next side. Repeat this process until you reach the initial chain-2. Participate in the circular motion by executing a slip stitch.
- Second and Subsequent Rounds:
For the second and subsequent rounds, repeat the process of changing colors and adding highlights. Start by attaching a new yarn color in any corner space, then chain 2 and work double crochet stitches in each space and along each side. Remember to chain 2 at the corners to create a 90-degree turn.
- Finishing:
Once you’ve completed all the desired rounds and highlights, finish off your square. Fasten off the last color and weave in the loose ends using a yarn needle. Trim any excess yarn to tidy up your work.
Tips for Crocheting with Highlights:
- Conduct trials using diverse color blends in order to attain the intended outcome.
- Keep your tension consistent throughout the project to ensure an even and polished look.
- Use stitch markers to mark the corners and keep track of the rounds.
- If you’re new to crocheting, practice creating squares with single colors before attempting highlights.
Conclusion:
Crocheting a square with different highlights is an exciting way to add depth and creativity to your crochet projects. By following the step-by-step guide provided in this blog, you’ll be able to craft stunning squares with various color highlights. Remember to have fun and let your imagination run wild with different color combinations. Happy crocheting!
You may be interested:
- Crochet baby blanket cardigan design – Free Pattern
- How to Crochet a Charming Daisy Motif: A Step-by-Step Pattern
- How to Crochet a Simple & Easy Crochet Flower | Free pattern for Absolute Beginners


3 Comments on “CROCHET SQUARE WITH DIFFERENT HIGHLIGHTS – Free Pattern”