
Crochet has long been a medium of artistic expression, especially when it comes to accessories that balance beauty and utility. Among the many creative projects in the crochet world, big flower bags stand out as vibrant, playful, and attention-grabbing. Whether you’re going for a boho-chic aesthetic or a bold artistic fashion statement, a Crochet Big Flower Bag allows you to showcase your skills while creating something functional and fabulous.
This blog post is your ultimate companion for designing and crocheting your very own big flower bag. Whether you want it as a daily accessory or a showstopper for a summer festival, this guide walks you through every step of the process—from selecting yarn and tools to creating the floral motifs, constructing the bag, and finishing with flair.
If you’re a beginner or an intermediate crocheter looking for your next joyful project, you’ll find everything you need here. By the end, you’ll not only have a gorgeous handmade bag but also the knowledge and inspiration to create more for yourself or even to sell.
Why Crochet a Big Flower Bag?
Big flower motifs bring joy, color, and character to a project. And a bag? It’s the perfect canvas for such a display. Here’s why this project is totally worth your time and yarn:
Bold Expression: Floral motifs are timeless. Large flowers exude a sense of confidence, beauty, and individuality.
High Impact, Low Complexity: With just a few well-made motifs and basic assembly techniques, you can create something stunning.
Customization: You get to choose the size, color scheme, shape, and style. Want a rainbow daisy tote? Go for it. Dreaming of a monochrome sunflower satchel? Totally doable.
Functionality: Make it big enough to carry your essentials—books, crochet supplies, even a picnic. It’s stylish and useful.
Whether you want to rock your creation at a farmer’s market, take it to the beach, or use it daily, this bag fits the bill.
What You’ll Learn in This Guide
This blog isn’t just about following a pattern—it’s about understanding the process behind a crochet big flower bag so you can make it your own.
You’ll learn:
- How to choose the right yarn and tools
- Which stitches are best for big flower motifs
- Step-by-step instructions to create the floral squares
- How to construct and shape your bag
- Tips for adding lining, closures, and finishing touches
- Styling suggestions and care tips
Let’s start by gathering everything you need.
Tools and Materials
Before starting your bag, get all your supplies ready. Here’s what you’ll need:
Yarn
You’ll need several colors of yarn, especially if you want a multicolor flower effect.
Recommended Yarn Type:
- Cotton or cotton-blend yarn (worsted weight or Aran): holds shape, vibrant colors, and good stitch definition.
- Acrylic yarn: budget-friendly and colorful.
- T-shirt yarn: chunky and durable, for a modern look.
Colors:
- 1-2 colors for flower petals
- 1 color for flower centers
- 1 color for background or base
- 1 color for joining and straps
Crochet Hook
Match your hook size to the yarn you’re using.
General Guide:
- Worsted yarn: 4.5 mm to 5.5 mm
- Bulky yarn: 6 mm to 8 mm
Additional Tools
- Scissors
- Yarn needle
- Stitch markers
- Fabric for lining (optional)
- Magnetic snap, zipper, or button (optional)
- Blocking mat and pins (optional)
Overview of Construction
To make a crochet big flower bag, you will:
- Crochet big flower motifs (either round or square)
- Join motifs to form the front and back panels
- Create and attach side panels or a base if desired
- Crochet straps
- Line the bag for structure (optional)
- Add closures or decorative elements
Let’s break this process down step-by-step.
Step-by-Step Instructions for an Easy Crochet Big Flower Bag
This version of the bag uses square flower motifs for easier joining and shaping. You can also use circular flowers and fill in gaps with filler motifs.
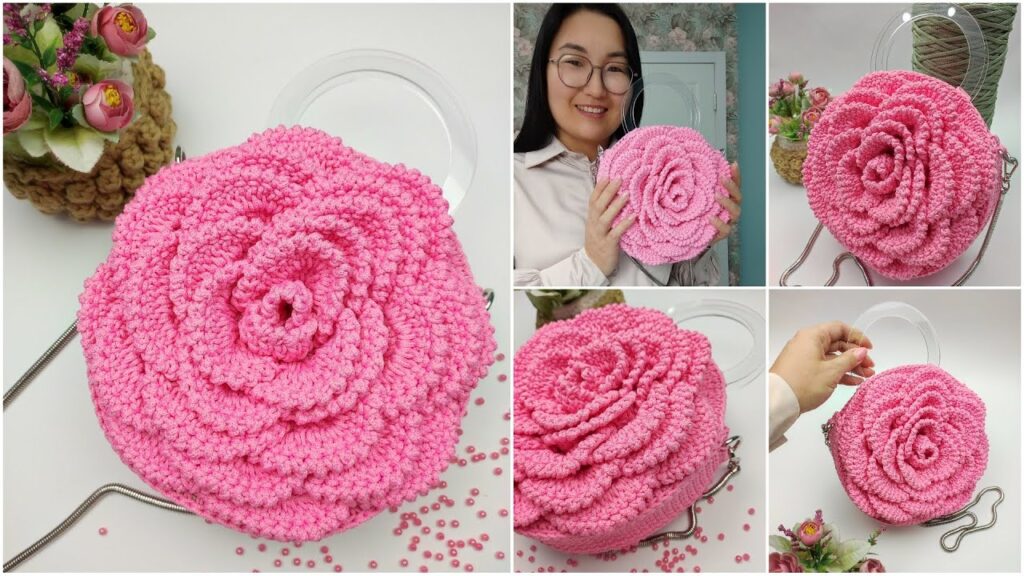
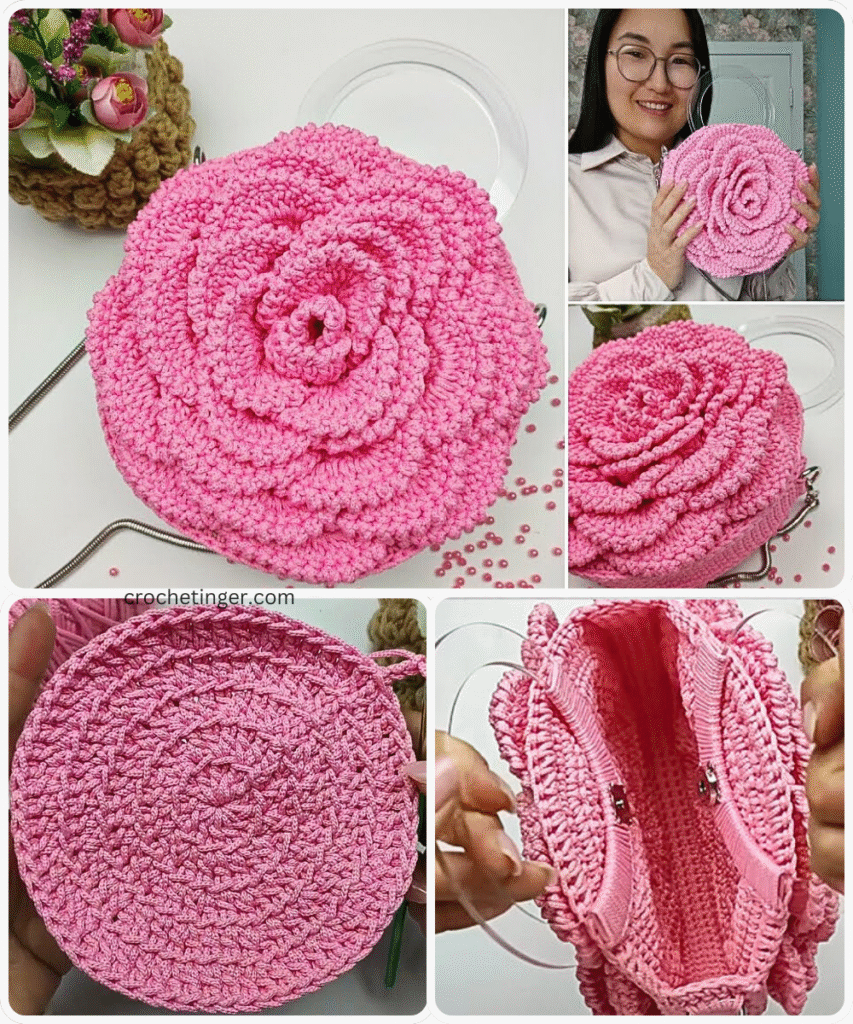
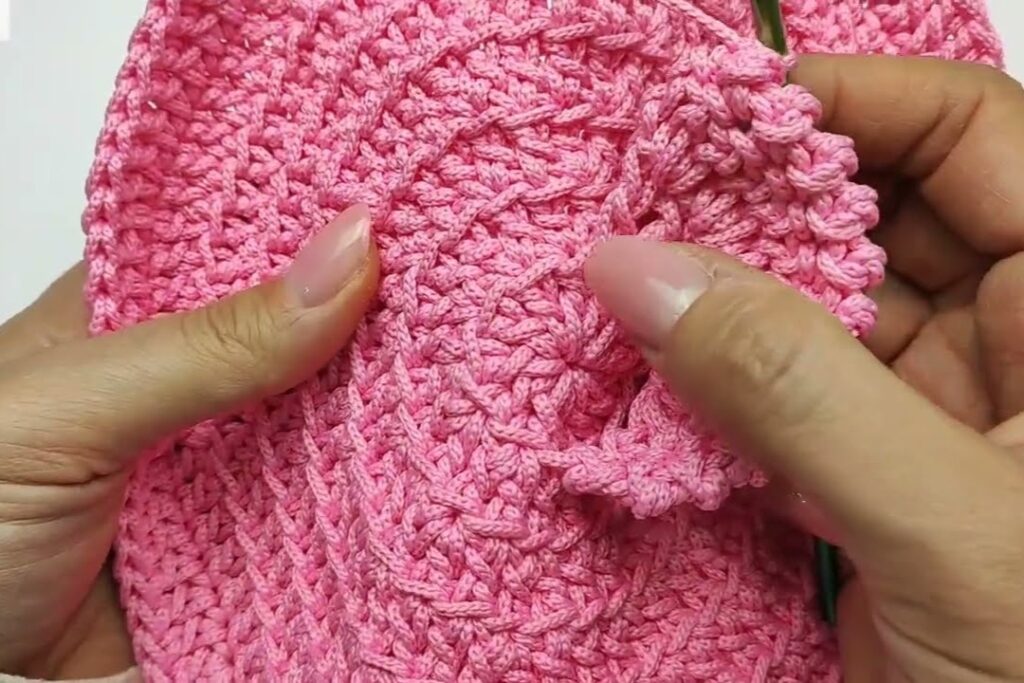
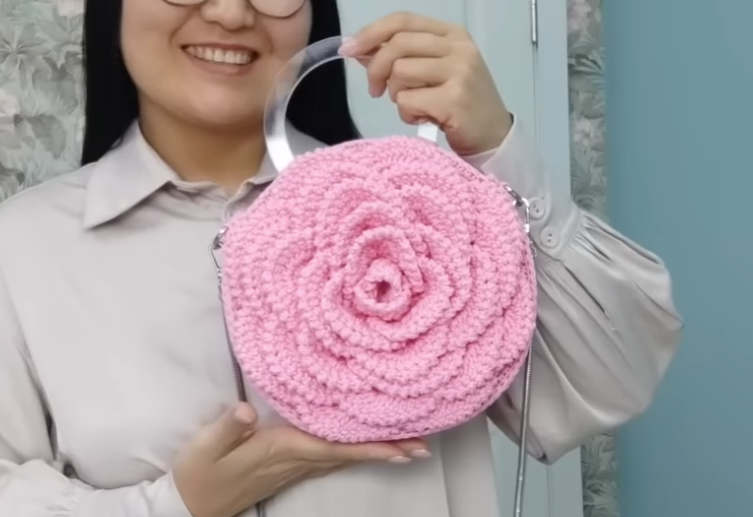
Step 1: Crochet the Big Flower Motif (Granny Style)
This floral granny square forms the main decorative element. We’ll make several of these.
Big Flower Granny Square Pattern:
Round 1:
With flower center color, make a magic ring.
Ch 3 (counts as dc), 11 dc into the ring. Sl st to top of ch-3. (12 dc)
Round 2:
Switch to petal color.
Join with sl st in any dc, *ch 3, 3 tr in same st, ch 3, sl st in next st; repeat from * around (6 petals total). Fasten off.
Round 3:
Switch to background color.
Join with sl st in any space between petals, ch 3 (counts as dc), 2 dc in same space. *In next space: 3 dc; in next space: 3 dc, ch 2, 3 dc (corner). Repeat from * around to form a square. Sl st to top of ch-3.
Adjust the background round to grow the square to your desired size. Repeat the square border rounds to make a motif approximately 5×5 inches.
Make 8–12 motifs, depending on how large you want the bag to be. Four on each side is a good starting point.
Step 2: Block the Motifs
Blocking is optional but recommended for cleaner joins.
- Wet the squares lightly and pin them to a blocking board.
- Let them dry completely to set the shape.
Step 3: Join the Motifs
Use the join-as-you-go method or whip stitch them together with a tapestry needle.
For a 2×2 square layout:
- Join four flower motifs in a square to form the front panel.
- Repeat for the back panel.
For a larger bag, use more motifs (3×2 or 3×3 layout).
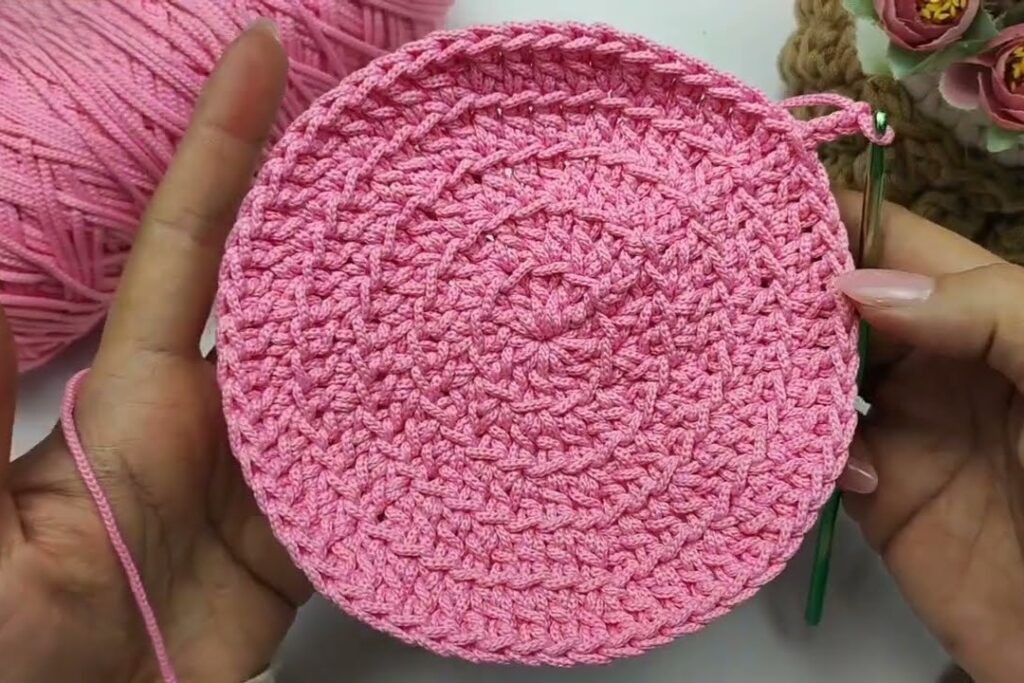
Step 4: Create the Side and Bottom Panel
You can use one continuous rectangular strip or join squares into a band.
To crochet a continuous strip:
- Chain the number of stitches equal to the height of your bag (e.g., 20)
- Use single crochet or mesh stitch for 60 rows (or until it wraps around the bottom and sides)
- Seam to the front and back panels
Step 5: Crochet the Strap
Use a strong, tight stitch for your bag strap.
Simple Strap Pattern:
- Chain 100 (or adjust for desired length)
- Sc in each ch across
- Repeat for 4-5 rows to make a thick, durable strap
- Fasten off and sew to the top corners of the bag
Double up the strap or crochet an I-cord for more support.
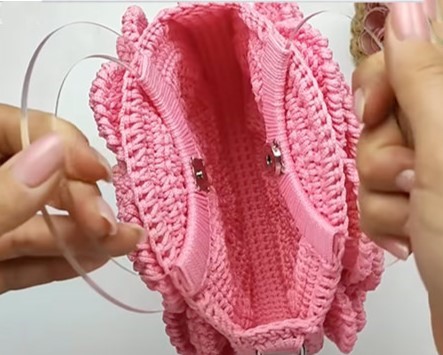
Step 6: Add a Lining (Optional but Recommended)
To line your bag:
- Cut fabric to match the shape of the finished bag
- Fold and sew the sides with a sewing machine or by hand
- Insert into the crochet bag and whip stitch the top edges
This adds structure and keeps smaller items from poking through the stitches.
Step 7: Add a Closure
Options include:
- Magnetic snaps
- Buttons and loops
- Zippers
Sew them securely into the lining or crochet them into the top edge.
Step 8: Final Finishing Touches
Weave in all ends, steam block the bag if needed, and give it a good shape. You can also:
- Add tassels to the strap ends
- Sew on a handmade label or charm
- Embroider on top of the flower petals for extra texture
Customization Ideas for Your Flower Bag
This project is only the beginning. Here’s how to make it even more YOU:
Color Themes:
- Bold tropical colors
- Soft pastels
- Monochrome black and white
- Rainbow gradient
Flower Types:
- Change the petal stitch to puff or bobble for dimension
- Make layered flowers by stacking petals
Shapes and Layouts:
- Use hexagons for a honeycomb design
- Make it circular by joining motifs in a radial pattern
Handles:
- Add wooden or bamboo handles
- Crochet chain handles for a rope effect
Closures and Embellishments:
- Add button flaps
- Decorate with beads or sequins
How to Care for Your Big Flower Crochet Bag
Handmade bags need some love and care. Here’s how to keep it looking great:
- Spot clean or gently hand wash with cold water
- Lay flat to dry, reshaping if necessary
- Store flat or stuffed with tissue paper to retain shape
- Avoid heavy stretching with overloaded contents
If lined properly, your crochet bag can last for years and only get softer with time.
Frequently Asked Questions
Can I make this bag if I’m a beginner?
Absolutely! As long as you’re comfortable with basic stitches and joining squares, this is a perfect next step.
How long does it take to make?
Depending on motif complexity, it may take 10–20 hours. You can break it up over several days.
Is it strong enough to carry heavy things?
Yes, especially if you use tight stitches, strong yarn, and line it properly.
Can I sell these bags?
Of course! Just be sure the pattern is your own or adapted enough for commercial use. Handmade flower bags are super popular at craft fairs and online shops.
Styling Tips for Your Crochet Flower Bag
Festival Ready: Pair with a floral kimono, ankle boots, and stacked jewelry
Beach Vibes: Use bright yarn, pair with flip-flops and a sundress
Urban Chic: Make it in black and white, pair with a leather jacket
Boho Queen: Fringe, tassels, oversized sunglasses—go all out!
Video Tutorial:
Final Thoughts: Your Handmade Statement Piece
Creating a Crochet Big Flower Bag is more than a craft—it’s an experience. You’re pouring your creativity into something that reflects your taste, your time, and your love of beautiful things. It’s colorful, it’s personal, and it’s practical.
From the first loop of yarn to the final stitch, this bag grows under your hands into something unique and full of life—just like the flowers that inspired it. Whether you wear it yourself, give it as a gift, or sell it as part of your handmade brand, it’s sure to turn heads and spark conversations.
So go on—gather your yarn, pick your palette, and let your floral fantasies bloom into reality. Happy crocheting!
You may be interested:
- Crochet Women Cardigan: A Complete Step-by-Step Guide
- Crochet Coaster Motif: A Step-by-Step Guide to Creating Beautiful Coasters
- Crochet Fashion Bag: A Stylish DIY You Can Master
- Crochet Lace Waves Motif


