Introduction
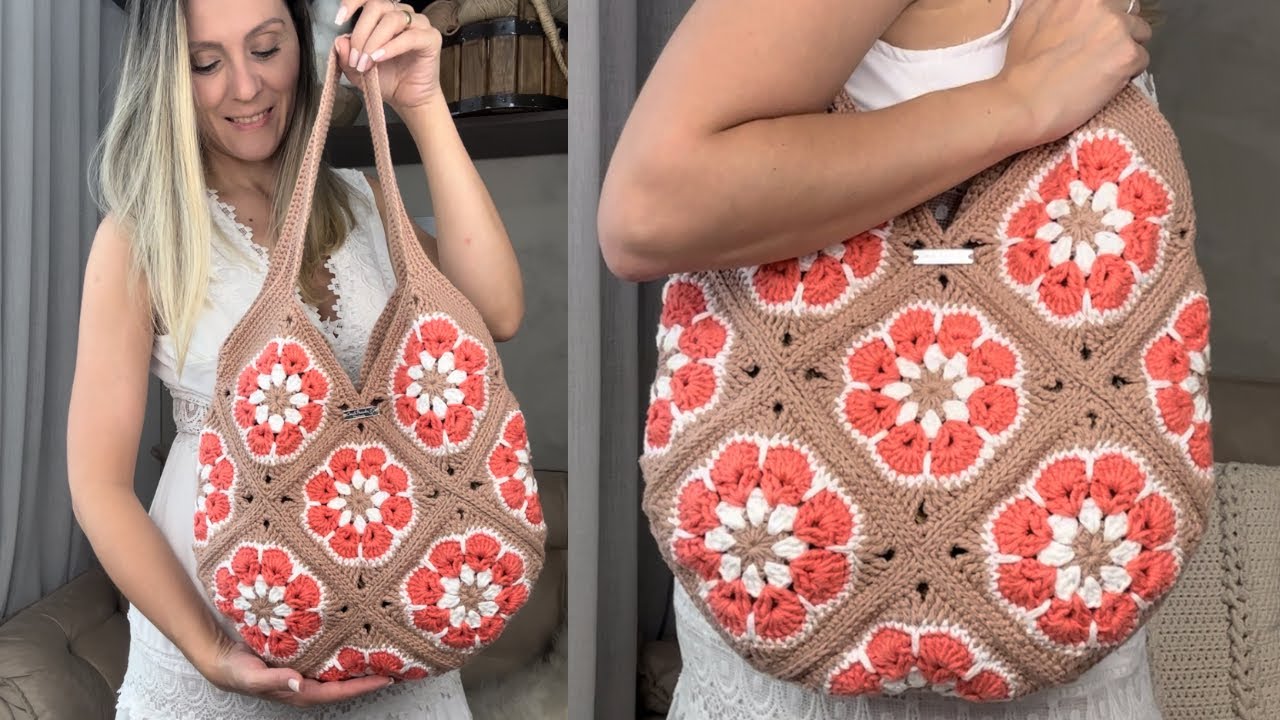
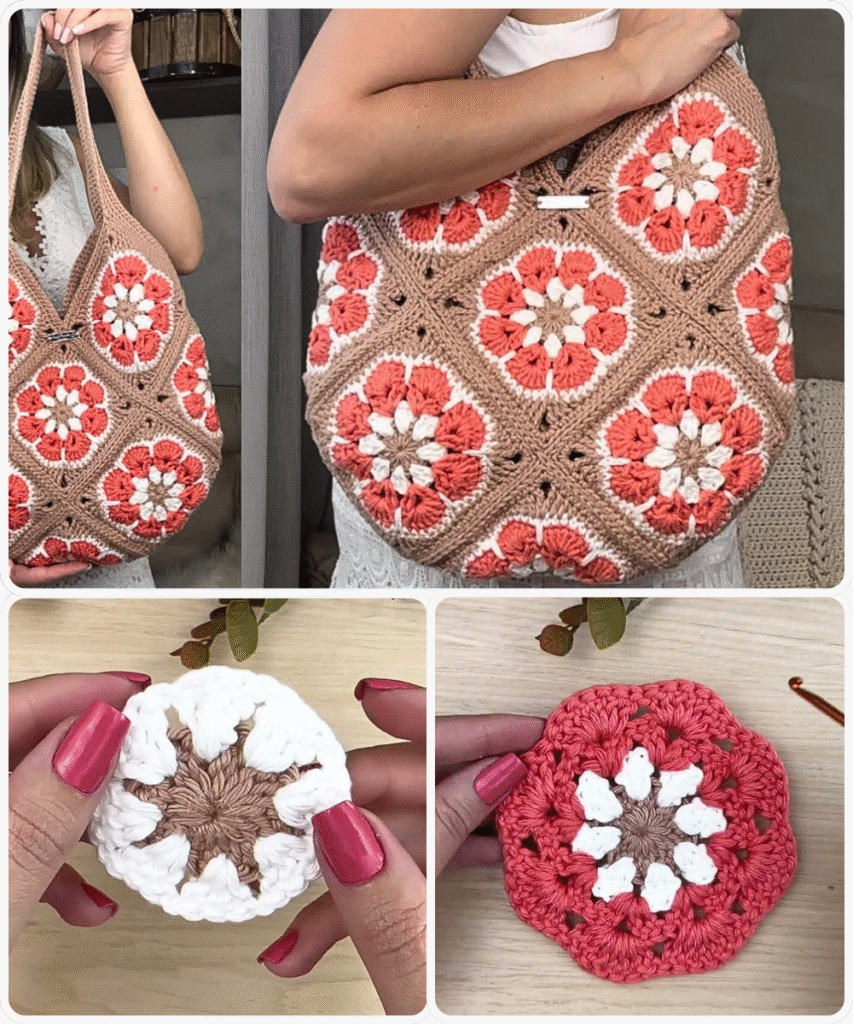
The Granny Square is a classic crochet motif that has stood the test of time. Combining nostalgia with modern flair, a Granny Square Bag is not only functional but also a perfect fashion statement. This guide provides you with a comprehensive, step-by-step pattern to create a charming, durable, and stylish Granny Square Bag. Whether you are a beginner or an experienced crocheter, this pattern offers detailed instructions and tips to help you achieve the best results.
Skill Level: Intermediate (confident beginner friendly)
Materials Required:
- Worsted weight yarn (cotton or acrylic preferred) in multiple colors for a traditional look or solid colors for a modern aesthetic (approx. 400-500g total)
- Crochet hook size H/5.0mm or size needed to obtain gauge
- Yarn needle for weaving in ends
- Scissors
- Stitch markers (optional)
- Lining fabric (optional, for a finished interior)
- Magnetic snap or zipper (optional)
- Sewing needle and thread (if lining or closures are added)
Overview: This pattern will guide you through creating a beautiful and functional crochet granny square bag. The project includes making traditional granny squares, joining them in a structured arrangement, assembling the bag body and handles, and optionally adding a lining and closure. By the end, you will have a colorful, sturdy bag perfect for everyday use or as a handmade gift.
Section 1: Creating the Granny Squares
Each bag is made up of individual granny squares. You can choose how many to make depending on your desired bag size. For this pattern, we will create a medium-sized tote using 13 squares (12 for the body, 1 for the bottom).
Standard Granny Square Pattern:
Round 1: With Color A, make a magic ring. Ch 3 (counts as first dc), 2 dc into ring, ch 2, [3 dc into ring, ch 2] three times. Join with sl st to top of ch-3. Fasten off or change color.
Round 2: Attach Color B in any ch-2 space. Ch 3, (2 dc, ch 2, 3 dc) in same space, ch 1, (3 dc, ch 2, 3 dc) in next ch-2 space; repeat from * to * around. Ch 1, join with sl st. Fasten off or change color.
Round 3: Attach Color C in any ch-2 corner space. Ch 3, (2 dc, ch 2, 3 dc) in same space, ch 1, 3 dc in ch-1 space, ch 1, (3 dc, ch 2, 3 dc) in corner ch-2 space; repeat from * to * around. Join with sl st.
Round 4: (Optional for larger squares) Continue in pattern, working (3 dc, ch 2, 3 dc) in corners and 3 dc in each ch-1 space along sides.
Note: We will make 13 squares of 4 rounds each. Feel free to mix and match colors for a patchwork look.

Section 2: Blocking the Squares
Blocking your squares ensures uniform size and helps with even assembly.
To Block:
- Pin each square to a blocking board or foam pad to 6″ x 6″.
- Spray lightly with water or steam block with an iron held a few inches above.
- Allow to dry completely.
Section 3: Arranging and Joining Squares
Suggested Layout:
- 3 squares for the front
- 3 squares for the back
- 2 squares for each side (4 total)
- 1 square for the bottom
Joining Method (Whip Stitch or Slip Stitch Join):
Whip Stitch: Place two squares right sides together. Using yarn needle and matching yarn, whip stitch through both loops of each stitch across.
Slip Stitch Join: Hold squares with right sides facing up, working through back loops only, sl st across to join.
Join the squares as follows:
- First join 3 front squares in a row.
- Repeat for back.
- Join 2 side squares vertically.
- Attach bottom square to front, back, and side strips.
- Seam the sides and bottom together, forming a 3D box.

Section 4: Adding the Handles
Option 1: Crocheted Straps:
Strap Pattern:
- Ch 9.
- Row 1: Sc in second ch from hook and across (8 sc). Ch 1, turn.
- Repeat until strap measures 20-24 inches (adjust to desired length).
- Make two.
- Sew ends securely to top edge of the bag.
Option 2: Purchased Handles:
- Use D-rings and leather straps.
- Sew D-rings to inside edge of bag, then attach straps.
Section 5: Lining (Optional but Recommended)
Lining your bag gives it a polished finish and prevents stretching.

To Add Lining:
- Cut fabric to match bag dimensions plus 0.5″ seam allowance.
- Sew lining pieces together to match bag shape.
- Fold top edge under by 0.5″ and press.
- Insert into bag and hand-sew around the top edge.
Add a magnetic snap or zipper before sewing in the lining if desired.
Section 6: Finishing Touches
- Weave in all loose ends using a yarn needle.
- Add embellishments like tassels, buttons, or fringe.
- Use a steam iron to gently shape the final bag if needed.
Customization Ideas:
- Use different motifs: sunburst, flower centers, or solid granny squares.
- Make a flap with a button for closure.
- Add interior pockets to the lining.
- Use metallic or sparkle yarns for accents.
- Scale up to make a beach bag or down to make a handbag.
Care Instructions:
- Spot clean or hand wash with mild detergent.
- Lay flat to dry.
- Avoid heavy stretching when wet.
Conclusion: This crochet granny square bag is both a nostalgic and contemporary piece. Whether you love the vibrant patchwork of traditional grannies or prefer sleek modern color palettes, this project is endlessly adaptable. It’s perfect for practicing colorwork, honing joining techniques, and ending up with a beautiful, functional accessory.
Enjoy your crafting!
You may be interested:
- How to Crochet a Gorgeous Red Rose: A Step-by-Step Guide
- PERFECT THIS BEAUTIFUL SUPER EASY SUNFLOWER COATER MODEL
- CROCHET SQUARE WITH DIFFERENT HIGHLIGHTS – Free Pattern
- How to Crochet a Beautiful Slipper: A Step-by-Step Guide