
In the world of handmade fashion, nothing quite captures the charm, magic, and creativity of a crochet princess dress. Whether you’re crafting it for a child’s birthday party, a dress-up event, Halloween, or just because every little one deserves to feel like royalty, a crochet princess dress is a labor of love and a true showstopper. This blog will walk you through everything you need to know to create a stunning and durable crochet princess dress from scratch.
From selecting the perfect yarn and color palette to shaping the bodice and embellishing with elegant details like lace trims, ruffles, and beadwork, this in-depth guide offers you a complete roadmap. We’ll also explore variations for different ages, customization ideas for different Disney-style princesses, and how to turn this creative passion into a side business.
Let’s begin this royal crochet journey.
Why Crochet a Princess Dress?
Crocheting a princess dress is not only a delightful project but also a meaningful one. Handmade garments carry sentimental value, particularly when they’re made for children or loved ones. Here’s why this project is worth every stitch:
- It’s highly customizable—you can adapt it to fit any size, style, or theme.
- It’s perfect for heirloom gifts and memory keepsakes.
- It teaches you advanced garment-making skills in crochet.
- It brings joy to whoever wears it.
What Makes a Dress “Princess-Like”?
The princess aesthetic usually includes some of the following features:
- A fitted bodice and a flared or layered skirt
- Puffy sleeves or cap sleeves
- Lacy or decorative trims
- Embellishments like pearls, rosettes, sequins, or tulle
- Pastel or jewel-tone color palettes
- Fairy-tale-inspired themes (e.g., Cinderella blue, Belle’s golden yellow)
Materials and Tools You’ll Need
Before diving into the pattern, it’s important to gather the right materials. Depending on the size and style, you may need to adjust quantities, but here’s a good general list.
Yarn Selection:
- Choose a soft, lightweight yarn for comfort and drape.
- Categories: DK (3), Light worsted (4), or even sport weight (2) for finer work.
- Fiber options: Cotton for summer, acrylic for easy care, or a soft wool blend for winter.
- Sparkle yarn or yarn with a subtle sheen (like mercerized cotton) can enhance the royal look.
Hook Size:
- Recommended: 3.5 mm to 5 mm (depending on the yarn)
- Always check your gauge first before starting the main body.
Notions and Accessories:
- Stitch markers
- Yarn needle
- Buttons or snap closures
- Ribbon or tulle (optional)
- Beads, sequins, lace trim, and other embellishments
- Scissors
- Measuring tape
Measuring the Child for the Perfect Fit
One of the great things about handmade clothing is the custom fit. For a princess dress, you’ll want to measure:
- Chest circumference
- Waist circumference
- Length from shoulder to waist
- Length from waist to desired hem (knee, mid-calf, or full length)
- Armhole depth
- Shoulder width
Keep these measurements on hand as we design the dress in sections.
Breaking Down the Dress into Sections
The easiest way to approach such a complex garment is to work in parts:
- Bodice (top part, fitted)
- Skirt (gathered or flared)
- Sleeves (optional but recommended for full princess effect)
- Embellishments (flowers, beads, lace, appliqués)
Now, let’s begin crocheting our princess dress, section by section.
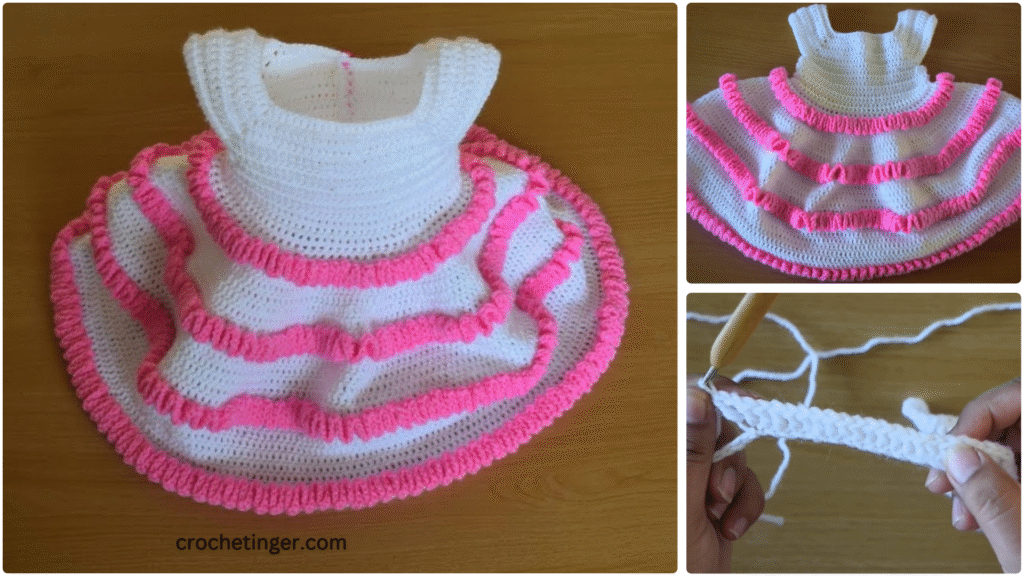
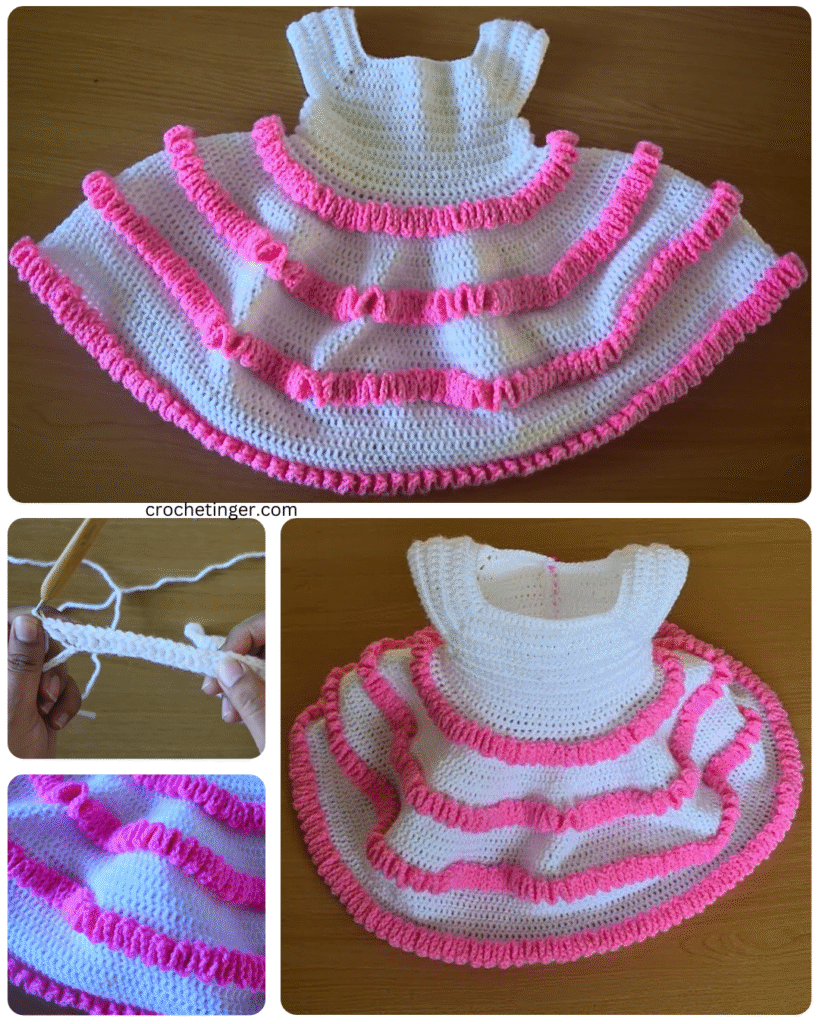
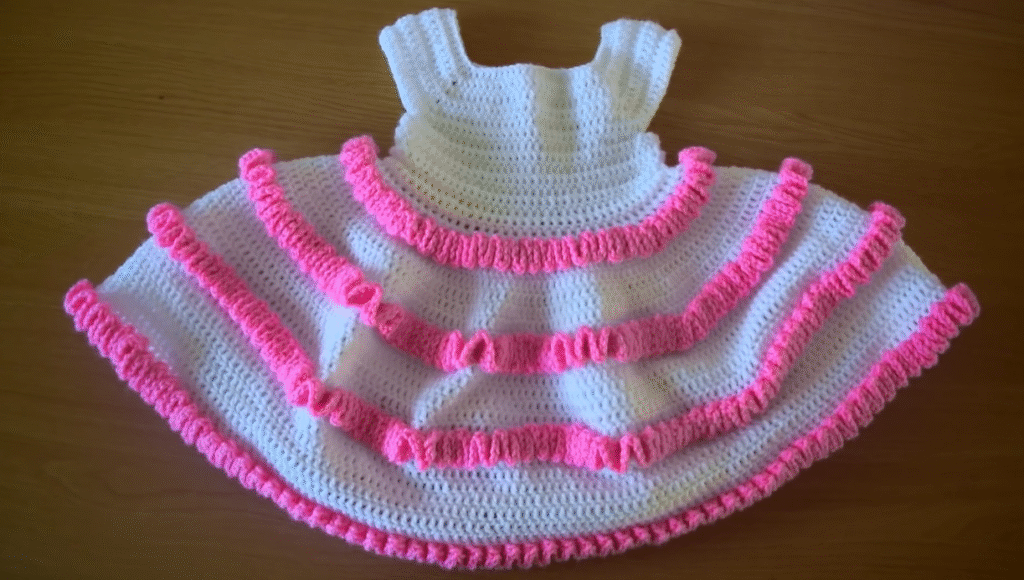
Part 1: Crocheting the Bodice
The bodice is the fitted top portion of the dress that hugs the chest and waist. You can work it in the round or in flat panels that you sew together.
Basic Bodice Pattern (Toddler Size 2-4T)
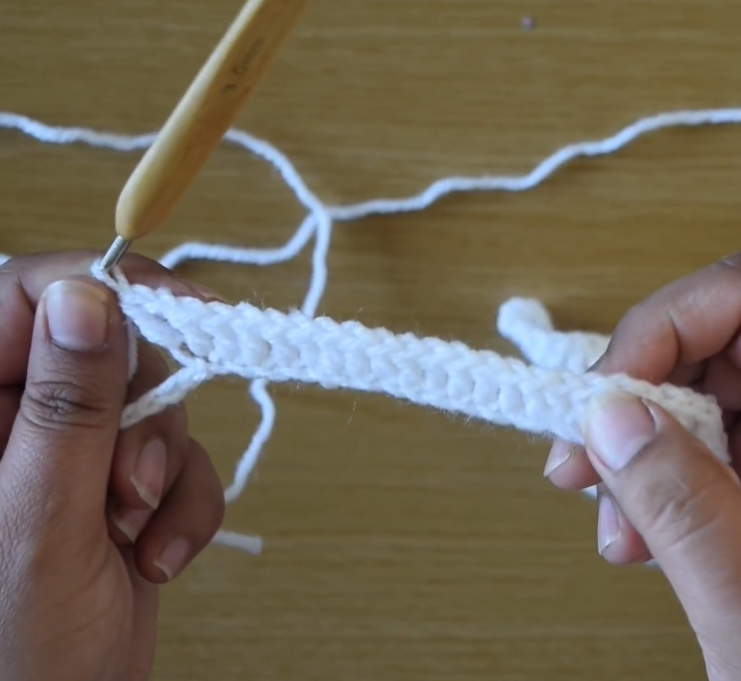
Foundation:
- Ch 60 (or a multiple that matches the child’s chest measurement with 1–2 inches of ease)
- Join to form a ring, being careful not to twist.
Round 1:
- Ch 1, SC in each stitch around. Join with a slip stitch. (60 sts)
Round 2–10:
- Repeat SC rounds or alternate with DC rows for a ribbed texture.
Optional Shaping:
- To give it more structure, work a few decrease rounds around the waist area (e.g., SC2tog every 10 sts in round 5).
Straps:
- Ch 10–15 on each side of the top opening (after shaping for armholes) and attach to the back to form tank-style straps. You can also crochet puff sleeves separately and attach them if you want a puffed princess sleeve.
Closure:
- Work back and forth in rows at the back to add a button band (2 inches), or insert snaps/ribbon for tying.
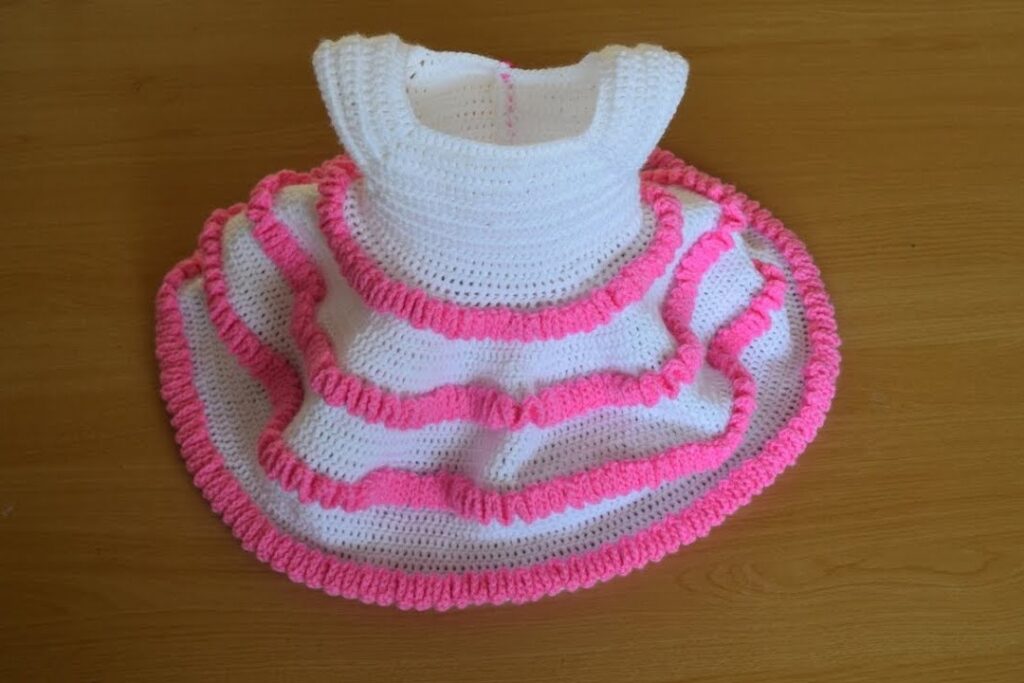
Part 2: Designing the Skirt
The skirt is where you can get truly creative. You can work it as a simple gathered skirt or go full fairy tale with layers, color changes, and ruffles.
Simple Gathered Skirt:
- Attach yarn at the waistline and work DC stitches in the round.
- Increase by working 2 DC in every 3rd stitch for a flared skirt.
- Continue increasing every few rounds to create a bell-shaped effect.
Lace Panel Variation:
- Alternate shell stitch rows with DC rows for a lacey, flowy texture.
- Use contrasting or complementary colors for a layered look.
Full-Length Skirt:
- Measure from the waist down to ankle or floor length.
- Add ruffles at the hem by working 2 or 3 DCs in each stitch of the final round.
Tulle Layer (Optional):
- Sew a tulle lining to the underside of the crochet skirt.
- This adds volume and a ballerina-style puff.
Part 3: Adding Sleeves
Sleeves give the princess dress extra flair. Here are two popular sleeve styles:
Cap Sleeves:
- Rejoin yarn at the armhole.
- Ch 1, SC around armhole, sl st to join.
- Work 2–3 rounds of puff stitch or shell stitch to create a slight flare.
Puffed Sleeves:
- Crochet a small rectangle (e.g., 20 rows of DC with 10–15 stitches per row).
- Gather each end with a running stitch and sew to armhole.
- Edge with lace or picots.
Part 4: Embellishing the Dress
Here’s where you let your imagination run wild. Think about the princess themes:
- Cinderella: Pale blue with white lace and pearl beads
- Belle: Golden yellow with rose motifs
- Aurora (Sleeping Beauty): Soft pink and lilac with sparkly yarn
- Elsa: Ice blue with silver embroidery and snowflake appliqués

Ideas for Decoration:
- Crochet flowers and leaves to sew onto the bodice or skirt
- Attach beads or sequins with thread for sparkle
- Work surface slip stitches with metallic yarn for elegant outlines
- Sew on ribbon at the waistline with a bow in the back
- Create a train by adding extra length to the back skirt
Customizing the Princess Dress for Different Ages and Sizes
One of the greatest advantages of crocheting your own princess dress is the flexibility to adjust for various sizes. Whether you’re making this for a newborn photoshoot or a six-year-old’s birthday, tailoring the pattern to the right fit ensures comfort and style. Here’s how you can do it.
1. Sizing Guidelines
Although every child grows at their own pace, here’s a rough chart to help you start:
- Newborn (0–3 months)
Chest: 14–16 inches
Length (shoulder to ankle): 15–18 inches - Baby (6–12 months)
Chest: 17–18 inches
Length: 18–22 inches - Toddler (2–3 years)
Chest: 19–21 inches
Length: 23–26 inches - Preschooler (4–5 years)
Chest: 21–23 inches
Length: 26–30 inches - Child (6–8 years)
Chest: 24–26 inches
Length: 30–34 inches
Adjust your foundation chain and stitch counts based on the chest size and the overall dress length you want. Always start with a gauge swatch, especially if you’re using a different yarn or hook than recommended.
2. Bodice Customization
A snug bodice is essential for that princess silhouette. For older children, consider adding shaping darts or gentle decreases at the waistline for a more tailored look. Add extra coverage under the arms for comfort or line the bodice with fabric for structure and a professional finish.
3. Sleeve Variations by Age
- For babies: stick to cap sleeves or sleeveless options.
- For toddlers: puffed sleeves add dramatic flair without restricting movement.
- For older children: try 3/4 lace sleeves or flutter sleeves for elegance.

Color Themes Inspired by Iconic Princesses
You can turn the basic princess dress pattern into a tribute to any famous fairy-tale character just by adjusting the yarn color and embellishments.
Elsa (Frozen)
Base color: Ice blue
Accent: Silver or white
Decorations: Snowflakes, beads, metallic threads
Belle (Beauty and the Beast)
Base color: Golden yellow
Accent: Pale orange or white
Decorations: Crochet roses, ruffles at the hem
Ariel (The Little Mermaid)
Base color: Purple bodice, seafoam green skirt
Accent: Shell motifs, sparkle yarn
Decorations: Starfish appliqués, fish scales texture
Rapunzel (Tangled)
Base color: Lavender or purple
Accent: Pink and gold
Decorations: Floral garland, braid-style sleeves
Cinderella
Base color: Soft blue
Accent: White
Decorations: Pearls, ball gown-style puff skirt
You can even mix and match colors for a unique princess that suits the child’s personality.
Using Different Stitch Patterns to Add Depth
Rather than working only in single or double crochet, you can introduce more texture and intricacy using a combination of stitches:
- Shell Stitch for lacey, regal skirts
- Star Stitch for decorative panels on the bodice
- Puff Stitch for added volume in sleeves
- V-Stitch for airy, elegant layers
- Crossed DC for a woven look in skirts or waistlines
Each stitch offers a different feel. For example, a star stitch bodice with a shell stitch skirt gives the illusion of a gown that sparkles and flows.
Tips for Perfect Finishing
Creating a beautiful dress is one thing, but finishing it neatly makes all the difference between homemade and handcrafted.
- Block the garment after assembly to smooth out the stitches and even out the tension.
- Use a yarn needle, not a hook, to sew pieces together for tighter, cleaner seams.
- Weave in all ends securely—especially at the waist and underarms where there’s more movement.
- Add a soft lining if the dress will be worn for extended periods or if it includes sequins or tulle that might itch.

Care and Maintenance of a Crochet Princess Dress
After putting in all the effort to create your princess masterpiece, it’s essential to care for it properly. Most princess dresses are not everyday wear, but they do need to last.
Washing Tips
- Hand-wash only in cold water with mild soap.
- Never wring or twist—roll in a towel to absorb moisture.
- Lay flat to dry, reshaping as needed.
Storage Tips
- Store in a breathable fabric bag (like cotton), not plastic.
- Avoid hanging for long periods to prevent stretching.
- Add lavender sachets or cedar blocks to protect from moths.
Seasonal Variations: Dresses for Every Climate
Crochet dresses aren’t just for summer birthdays or indoor parties. You can modify the design for various seasons.
Spring Princess Dress
- Use cotton yarns in pastel shades.
- Add floral motifs and a short-sleeved bodice.
- Make the skirt knee-length for a light and airy look.
Summer Princess Dress
- Go sleeveless with an open lace pattern.
- Use bamboo or linen blends to keep it cool.
- Add a wide crochet sun hat for the full look.
Autumn Princess Dress
- Use heavier cotton blends in warm tones like rust, mustard, or burgundy.
- Try long bell sleeves.
- Use rich trim details like gold accents and thicker lace.
Winter Princess Dress
- Use soft acrylic or wool blends for warmth.
- Full-length sleeves and a high neckline.
- Add a crochet capelet or bolero with snowflake accents.
Selling Crochet Princess Dresses as a Business
If you’ve mastered the pattern, why not turn it into a source of income? Handmade dresses are in high demand for birthdays, themed photo shoots, pageants, and gifts.
1. Pricing Tips
Factor in:
- Yarn cost
- Time (track how many hours you spend)
- Skill and design complexity
- Market rates in your area or online
For example: A well-made toddler-size dress with embellishments might range from $60–$150 depending on labor and quality.
2. Where to Sell
- Etsy or Shopify
- Instagram or Facebook Marketplace
- Local craft fairs
- Specialty boutiques (partner on commission)
3. Building a Brand
- Give your dresses creative names like “Winter Rose Princess” or “Dreamy Garden Gown.”
- Offer customizable color options or matching accessories (like a wand or tiara).
- Include a care instruction card and gift wrapping.
4. Taking Beautiful Photos
Photos sell. Use natural light, neutral backgrounds, and child models to display the dress. If you don’t have access to a model, display it on a child-size dress form or hanger.
Creating Matching Accessories
To take your dress to the next level (and possibly upsell more products), consider creating:
- Crochet tiaras with metallic thread and beads
- Wands with crocheted stars or flowers and streamers
- Matching bags or pouches
- Crochet ballet slippers
- Hairbands with crocheted flowers or bows
Involving the Child in the Design
If you’re making the dress for your own daughter, niece, or a client’s child, asking their opinion can make the process even more special. Show them color swatches or sketch a few ideas. This fosters excitement and ensures the dress will be worn proudly.
Video Tutorial:
Conclusion: From Dream to Reality—The Joy of Crocheting a Princess Dress
A crochet princess dress isn’t just a garment—it’s a story, an expression of love, and a display of craftsmanship. Whether you’re making one for a beloved child, a photography business, or a boutique, each dress you complete is a piece of magic stitched by hand.
With the guidance and detail in this blog, you’re now equipped to choose the perfect yarn, follow a flexible pattern, personalize the design, and finish it like a pro. From newborn sizes to growing girls, your dresses can evolve just like the little ones who wear them.
Let your creativity guide your hook. Add a dash of sparkle, a swirl of lace, and a heart full of joy. Because every child deserves to feel like royalty—and you have the power to make it happen, one stitch at a time.
You may be interested:
- Master the Art of the Lace Flower Crochet Stitch
- Easy Knitted Slipper Socks You Can Make
- Easy Crochet Rectangle Shawl: A Beautiful, Versatile Piece for Your Wardrobe
- Fingerless Crochet Gloves with Flowers: A Beautiful DIY Guide


