Home is where comfort meets creativity, and nothing captures that better than handmade décor. In a world full of mass-produced furnishings, the art of crochet allows you to personalize every corner of your living space. One of the most accessible yet impactful crochet projects is the crochet pillow cover. It’s the perfect blend of functionality and charm. Whether you’re looking to refresh your couch, decorate your bedroom, or create a meaningful handmade gift, a crochet pillow cover is a stunning, versatile option.
In this in-depth guide, you’ll learn how to create a beautiful, easy crochet pillow cover from scratch. But we won’t stop at the basics. This blog post will walk you through everything—from understanding design elements to choosing the best yarn, mastering the stitches, styling ideas, and even turning your crochet cover into a part of a cohesive interior design theme.
By the end of this post, you’ll not only have a ready-to-make crochet pillow pattern, but also the confidence and inspiration to customize it to match your own creative vision. This is more than a pattern—it’s a journey into cozy, colorful self-expression through crochet.
Let’s begin with the inspiration behind it all.

Why Crochet a Pillow Cover?
A pillow may be a small item, but it holds powerful decorative potential. When you crochet a pillow cover, you’re not just making something to rest your head on—you’re weaving a story into your space.
Here are some reasons why a crochet pillow cover is the perfect project:
1. Versatility:
It fits any interior style—minimalist, boho, rustic, modern, vintage—just by adjusting the stitch, color, and size.
2. Beginner-Friendly:
Unlike larger projects like blankets or cardigans, pillow covers are compact and manageable, making them ideal for new crocheters.
3. Customizable:
You can personalize your pillow with initials, motifs, buttons, and color blocks.
4. Practical & Giftable:
They’re both usable and decorative, making them excellent gifts for housewarmings, holidays, or birthdays.
5. Sustainable:
Reuse old pillow inserts and avoid store-bought plastic-based decor with a handcrafted alternative.
Now that we know why, let’s look at the materials you’ll need.
Materials & Tools for an Easy Crochet Pillow Cover
Creating a pillow cover doesn’t require a huge investment. A few simple tools and some quality yarn will get you started. Below is a complete list of what you’ll need:
Yarn:
- Worsted weight yarn (medium #4) for structure
- Cotton yarn for durability and a neat finish
- Acrylic yarn for affordability and easy washing
Recommended Yarn Types:
- Lily Sugar’n Cream (for a classic, sturdy look)
- Paintbox Yarns Cotton Aran (for soft texture and bright color options)
- Red Heart Soft (if you want a plush, cozy result)
Hook:
- Size H/8 (5.0mm) or as recommended on your yarn label
- You can adjust the hook size depending on your desired texture
Other Tools:
- Tapestry needle (for weaving in ends)
- Scissors
- Measuring tape
- Stitch markers (optional)
- Buttons or zipper (if making a removable cover)
- Pillow insert (standard 16×16” or 18×18” is common)

Understanding Pillow Construction: Envelopes, Zippers, and Seamless Styles
Before jumping into the stitches, it’s helpful to understand how pillow covers are structured. There are several ways to construct them:
1. Envelope Style (No Closures):
Two panels overlap in the back like an envelope. This style is easy and closure-free.
2. Zippered Style:
A zipper is sewn into one side, allowing for easy removal and cleaning.
3. Buttoned Style:
Buttons are added for a charming, functional touch. Great for rustic or farmhouse aesthetics.
4. Seamless (In-the-Round):
Crocheted as one piece in the round, usually with a front and back panel joined later.
For this project, we’ll focus on the Envelope Style, which is beginner-friendly and does not require additional sewing of closures.
Let’s move on to stitches you need to know.
Basic Crochet Stitches Used in the Pillow Cover
Our easy pillow cover is built using simple stitches that are beginner-friendly and beautifully textured. Here are the key stitches we’ll use:
Chain Stitch (ch):
The foundation of most crochet patterns. Yarn over and pull through loop.
Single Crochet (sc):
Insert hook, yarn over, pull through, yarn over again, pull through both loops.
Half Double Crochet (hdc):
Yarn over, insert hook, yarn over, pull through, yarn over, pull through all three loops.
Double Crochet (dc):
Yarn over, insert hook, yarn over, pull through, yarn over, pull through two, yarn over, pull through remaining two.
Back Loop Only (BLO):
Work only into the back loop of the stitch to create ribbing or ridges.
Slip Stitch (sl st):
Used to join or finish. Insert hook, yarn over, pull through both loops.
Optional: You can incorporate puff stitches, granny square motifs, or shell stitches if you’re feeling more creative.

Easy Crochet Pillow Cover Pattern (Envelope Style)
This version uses a classic ribbed texture for a clean, modern look that’s perfect for nearly any space.
Finished Size: Fits a standard 16” x 16” pillow insert.
Gauge: 14 hdc stitches x 10 rows = 4 inches in hdc
Instructions:
Front Panel:
- Chain 61 (or a multiple that measures 16” across, plus 1 ch for turning).
- Row 1: Hdc in 2nd ch from hook and across (60 hdc). Turn.
- Row 2: Ch 1, hdc in BLO of each stitch across. Turn.
- Repeat Row 2 until your piece measures 16” long.
- Fasten off and weave in ends.
Back Panels (Make 2):
- Chain 61.
- Row 1: Hdc in 2nd ch from hook and across (60 hdc). Turn.
- Row 2: Ch 1, hdc in BLO of each stitch across. Turn.
- Repeat Row 2 until the piece measures 11” long (or about 2/3 of the front panel height).
- Make the second panel the same way.
Assembly:
- Lay the front panel flat.
- Overlap the two back panels on top of it to form the envelope closure.
- Pin or clip in place if needed.
- Using yarn and your hook or tapestry needle, seam around all four edges with single crochet or whip stitch.
- Fasten off and weave in all ends.
Finishing:
- Block lightly for a smooth finish (optional).
- Insert pillow form and enjoy your handmade décor!
Variations and Advanced Customizations
Once you’re comfortable with the basic version, the possibilities are endless. Here are some creative spins on the classic crochet pillow cover:
1. Color Blocking:
Use two or more colors to create geometric blocks, stripes, or diagonals.
2. Texture Play:
Incorporate bobble stitches, popcorn stitches, or puff stitches for added texture.
3. Cables or Aran Style:
Create faux cables using front post and back post stitches.
4. Granny Square Front:
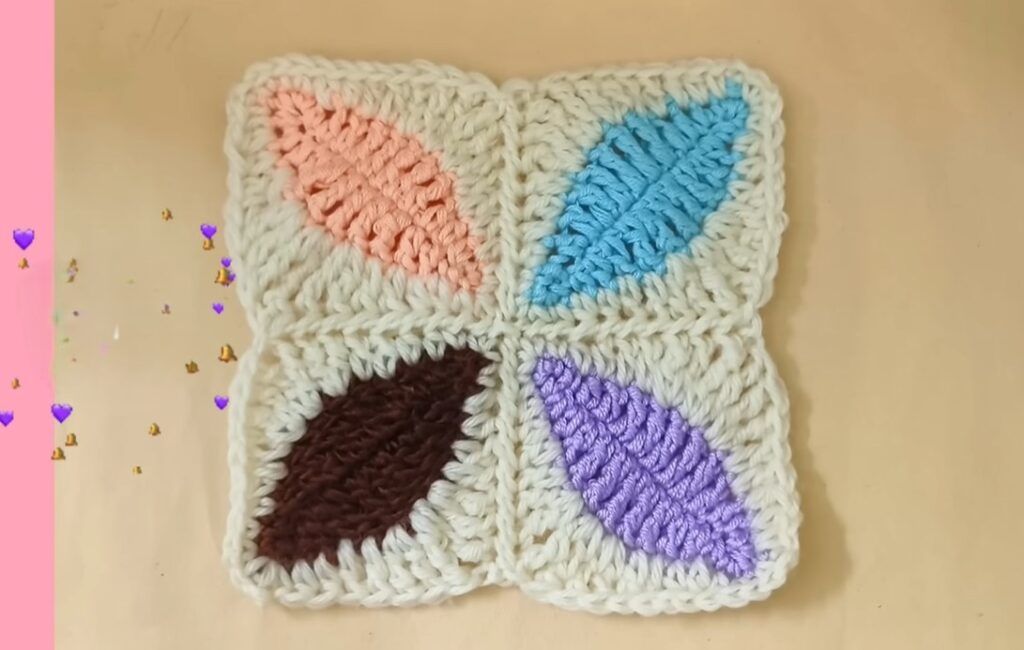
Make 4 small granny squares or one large square for the front panel.
5. Tapestry Crochet Designs:
Create visual patterns like chevrons, hearts, or even initials using colorwork.
6. Fringe or Tassels:
Add flair to the corners with yarn tassels or fringe for a boho look.
7. Buttons and Beads:
Use wooden buttons for a rustic look or beads for a more ornate feel.
8. Seasonal Motifs:
Add crochet snowflakes for winter, flowers for spring, or pumpkins for autumn.

How to Style Your Crochet Pillow Cover
A single crochet pillow can transform a room. Here’s how to style it like a pro:
Living Room:
Place it on a couch with coordinating solid-colored or patterned pillows.
Bedroom:
Use multiple crochet pillows in complementary colors to dress up your bed.
Reading Nook:
Combine with a crochet blanket for a cozy corner setup.
Outdoor Spaces:
Use weather-resistant yarn to create covers for patio or garden furniture.
Kids’ Room:
Make covers in fun shapes—stars, hearts, animals—or use bright, bold colors.
Tips for Care and Maintenance
Crochet pillows are easy to maintain if you follow these tips:
- Washing: Use gentle cycle or hand wash. Always follow yarn label instructions.
- Drying: Air dry flat. Avoid wringing or machine drying unless using acrylic yarn.
- Storage: Store with cedar or lavender to avoid pests and retain freshness.
- Lint & Pilling: Use a fabric shaver or gently remove lint by hand.
Sustainable Crochet: Repurposing Old Yarn and Fabrics
You can make your crochet pillow even more eco-friendly:
- Use yarn scraps: Create a striped or color block design from leftover yarn.
- Repurpose old sweaters: Unravel yarn from sweaters for a vintage, worn-in aesthetic.
- Line with fabric: Use scraps of old clothing to reinforce your pillow interior.
Monetizing Your Crochet Pillow Covers
If you fall in love with this project, why not turn it into a side hustle?
Ideas:
- Sell on Etsy, Ravelry, or craft markets.
- Offer custom orders based on home color schemes.
- Start a blog or YouTube channel with tutorials.
- Write and sell your own patterns.
Video Tutorial:
Conclusion: Add Handmade Heart to Your Home
Crocheting a pillow cover isn’t just about making a soft surface to lean against—it’s about investing love, effort, and creativity into your space. Each stitch you make is a step toward creating a home that reflects your personality and care.
Whether you’re gifting it, selling it, or keeping it to adorn your own space, a crochet pillow cover is a simple yet beautiful way to showcase your craft. With endless customization options and countless styling opportunities, you can make your project uniquely yours every single time.
So, grab your hook, pick your colors, and make your home a little cozier—one stitch at a time.
You may be interested:
- Crochet Lace Summer Top: All Skill Levels
- Crochet Coaster Motif: A Step-by-Step Guide to Creating Beautiful Coasters
- How to Crochet a Charming Daisy Motif: A Step-by-Step Pattern
- Crochet Lace Waves Motif


