
Crocheting is a wonderful creative outlet that allows you to turn simple yarn into beautiful, functional pieces. One way to make your crochet projects stand out is by creating your very own unique crochet stitch. In this tutorial, we’ll guide you through the process of designing and implementing a distinctive crochet stitch for blankets, rugs, and scarves. Get ready to let your imagination run wild and create something truly special!
Skill Level: Beginner
Materials You’ll Need:
- Yarn of your choice (suitable for the project you’re working on)
- Hook (appropriate size for your chosen yarn)
- Scissors
- Notebook and pen/pencil (for jotting down stitch variations and ideas)
- Measuring tape (for checking gauge)
Abbreviations:
- ch: chain
- sc: single crochet
- dc: double crochet
- sk: skip
- st(s): stitch(es)
- rep: repeat
- …: Repeat instructions within asterisks as indicated

Step-by-Step Guide:
1. Research and Inspiration:
Start by gathering inspiration from various sources such as crochet stitch books, online tutorials, and even nature. Look at different stitch patterns and motifs to get an idea of what you want to create. Keep in mind the overall look and feel you want for your blanket, rug, and scarf.
2. Choose Yarn and Hook:
Select a yarn that complements your vision for the project. Different yarn weights and textures will affect the final outcome of your stitch pattern. Pair your yarn with an appropriate crochet hook size to ensure the stitches are even and well-defined.
3. Sketch Your Ideas:
Grab your notebook and sketch out different stitch ideas. Play with variations, combinations, and arrangements of basic stitches like single crochet, double crochet, and treble crochet. Experiment with stitch heights, groupings, and spacing.
4. Test Swatches:
Before committing to a full project, create a few small swatches using your chosen yarn and hook. This will allow you to test out your stitch ideas and see how they translate into reality. Pay attention to the tension of your stitches and the overall texture.
5. Refine Your Stitch:
Based on your swatches, refine your stitch pattern. Make note of any adjustments or modifications you want to make. Continue testing different options until you are content with the outcome.
6. Plan the Project:
Decide whether you want to use your unique stitch pattern for a blanket, rug, scarf, or all three. Consider the dimensions, colors, and overall design of each project. Plan the number of stitches and rows needed to achieve your desired size.
7. Start Crocheting:
Begin working on your chosen project using your unique crochet stitch. Adhere to the design you have perfected entirely, keeping track of the stitches and rows as you go. Take breaks to assess your progress and make sure the pattern is turning out as expected.
8. Adjustments on the Go:
Sometimes, the stitch pattern might need slight adjustments as you work on the full project. Don’t hesitate to make changes if you find that the stitch isn’t looking the way you envisioned. It’s all part of the creative process.
9. Finishing Touches:
Once you’ve completed your blanket, rug, or scarf, weave in any loose ends and block the piece to even out the stitches and enhance the overall appearance. Blocking involves wetting the project, shaping it, and allowing it to dry flat.
10. Share Your Creation:
Show off your unique crochet stitch masterpiece to the world! Share it on social media, in online crochet communities, or with friends and family. Your imaginative abilities and diligent efforts warrant recognition and jubilation.
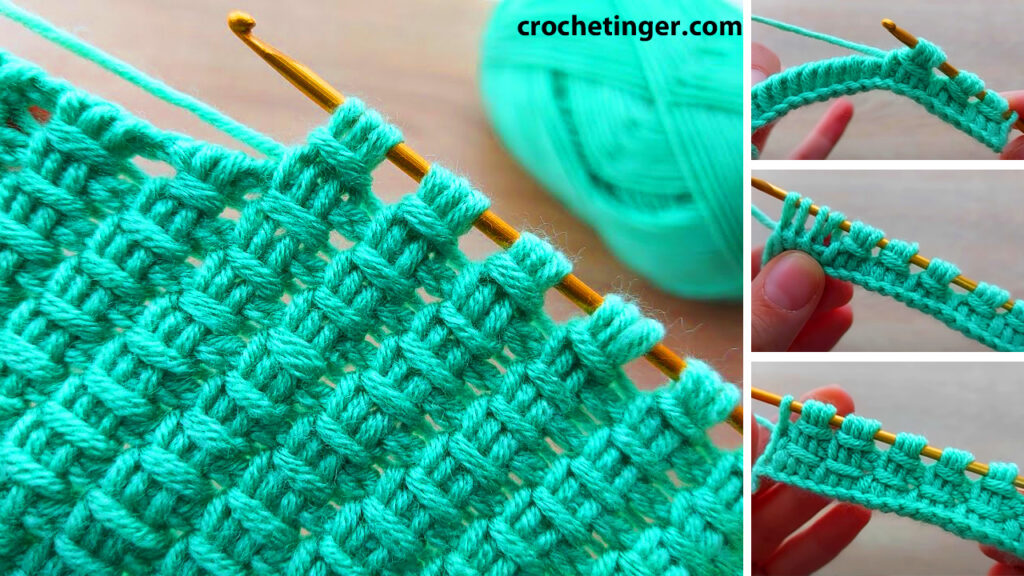
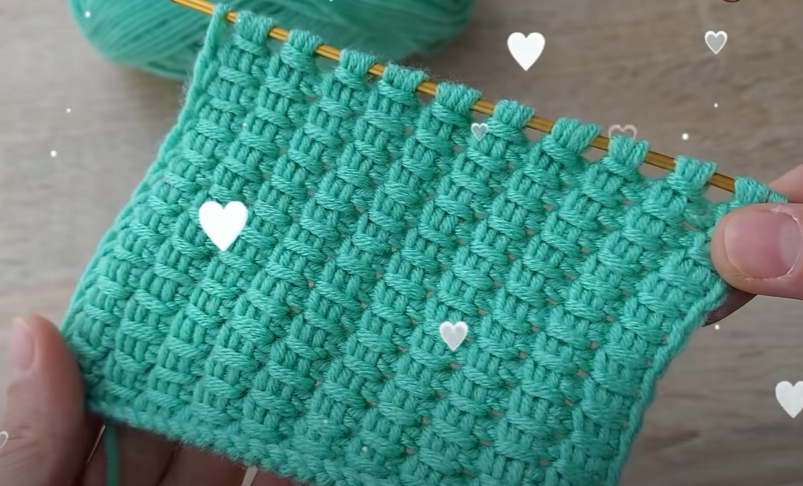
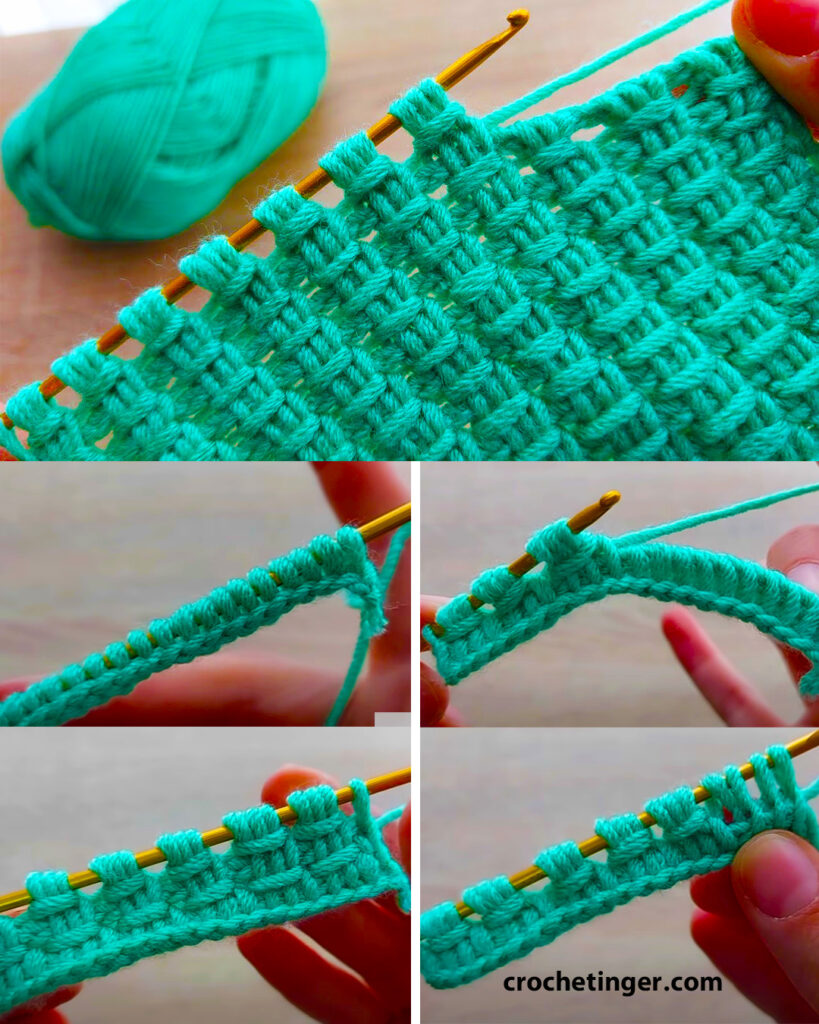
Stitch Pattern:
Foundation Row:
Create a sequence of stitches totaling a multiple of 12 + 3 stitches to achieve your preferred width.
Row 1:
- Perform 1 single crochet stitch in the 2nd chain space 😍 from the hook.
- Skip 2 chain stitches, then create (1 double crochet, chain 2, 1 double crochet) in the following chain stitch, skip 2 chain stitches, and finally make 1 single crochet in the subsequent chain stitch.
- Rep … across the row, Concluding with 1 single crochet stitch in the final chain.
- Then Turn.
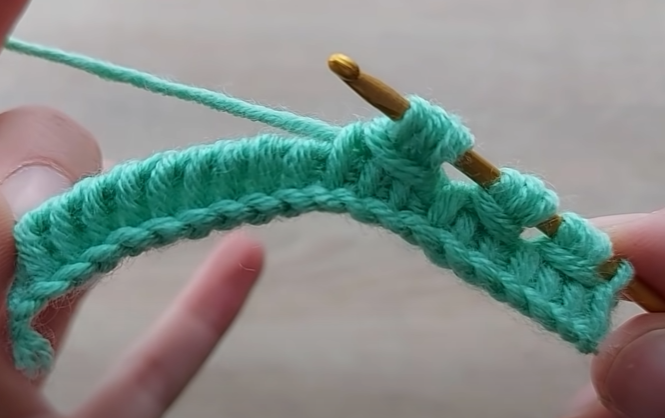
Row 2:
- Chain 1 (counts as 1 single crochet), skip the first single crochet and then work 1 single crochet in the next double crochet.
- Skip 2 stitches, then create (1 double crochet, chain 2, 1 double crochet) in the chain-2 space from the row before, skip 2 stitches, and finally work 1 single crochet in the next double crochet.
- Rep … across the row, Completing the row with 1 single crochet stitch at the top of the turning chain.
- Then Turn.
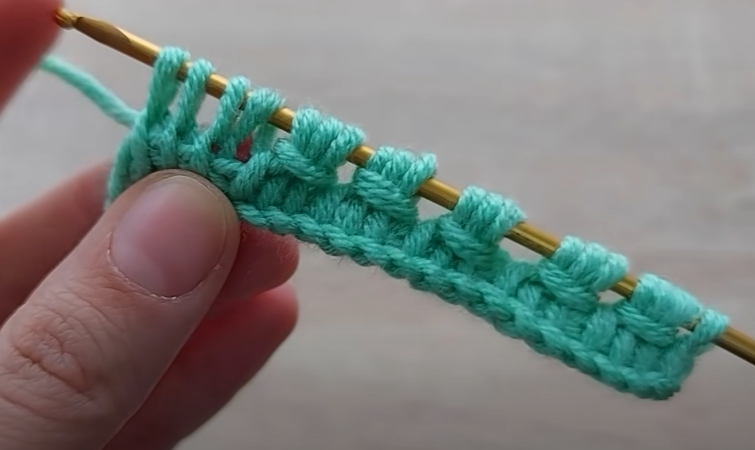
Row 3:
- Ch 3 (which counts as 1 double crochet), skip the first single crochet and then create 1 double crochet in the following single crochet.
- Skip 2 stitches, then create (1 double crochet, chain 2, 1 double crochet) within the chain-2 space originating from the preceding row, skip 2 stitches, and finally craft 1 double crochet in the subsequent single crochet stitch.
- Rep … across the row, Completing the row with 1 double crochet stitch in the top of the turning chain.
- Then Turn.
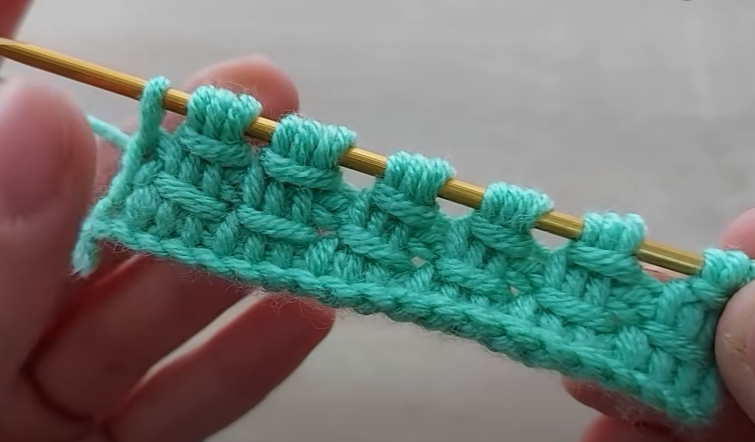
Rows 4-7:
Alternate between Rows 2 and 3 in a repeated manner.
Row 8:
Repeat Row 2.
Row 9 (Increase Row):
- Ch 3 (counts as 1 double crochet), skip the first single crochet, and then work 1 double crochet in the next single crochet.
- Skip 2 stitches, perform (1 double crochet, chain 2, 1 double crochet) in the chain-2 space from the preceding row, skip 2 stitches, and execute 1 double crochet in the subsequent single crochet.
- Skip 2 stitches, then create a (1 double crochet, chain 2, 1 double crochet, chain 2, 1 double crochet) sequence within the following chain-2 space.
- Rep … across the row, ending with 1 dc at the top of the turning ch.
- Then Turn.
Rows 10-15: Repeat Rows 2 and 3 alternately.
Repeat Rows 8-15: Continue repeating Rows 8 to 15 until your piece reaches the desired length you want.
Finishing:
- Fasten off your yarn.
- Securely fasten all of the loose ends by employing a yarn needle.
- Block your finished piece if necessary to even out the stitches and open up the pattern.
Video tutorial:
Conclusion:
Creating your own unique crochet stitch for blankets, rugs, and scarves is a rewarding journey that allows you to express your creativity and design skills. With careful planning, experimentation, and dedication, you can bring your vision to life and produce stunning, one-of-a-kind pieces that will be cherished for years to come. So grab your yarn, hook, and notebook, and embark on this exciting crochet adventure!
You may be interested:
- How to Create Crochet Blanket Borders and Towel Edges – Free Pattern
- Crochet baby blanket cardigan design – Free Pattern
- How To Crochet A Round Crochet Template with Two Lines in One – Free Pattern

One Comment on “How to Create a Unique Crochet Stitch for Blankets, Rugs, and Scarves – Free Pattern”