
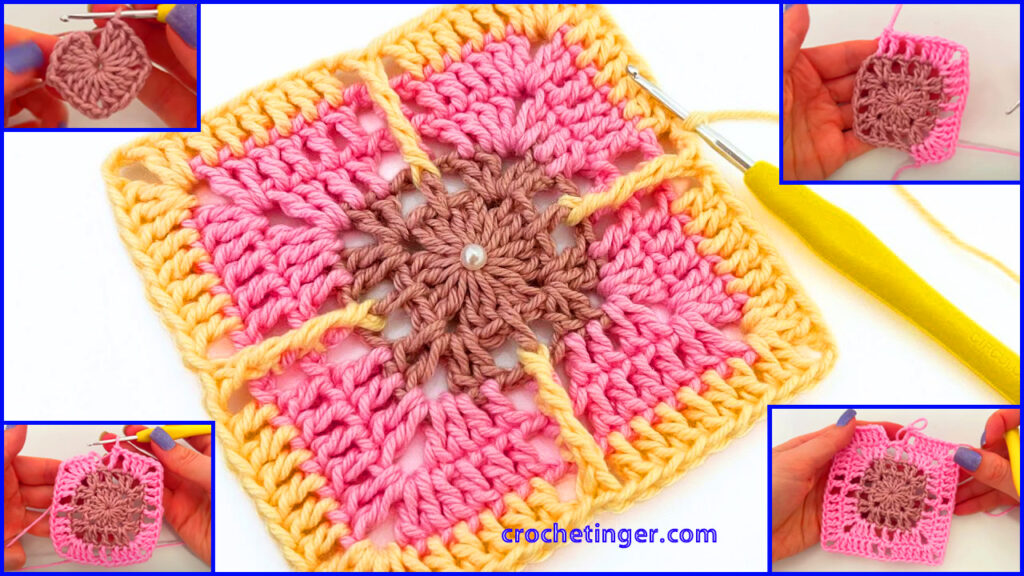
Welcome everyone to another class here on the blog. In today’s tutorial, we are going to learn how to make another crochet square model, very easy to make and very simple. I’m going to use three colors to make this square. You can do one color or two colors. Anyway, how many colors do you prefer to use? We can use leftover yarn to make this model.
Skill Level: Beginner
Materials Needed:
Before we get started, let’s gather the materials you’ll need:
- Yarn of your choice
- Crochet hook (size appropriate for your yarn)
- Scissors
- Yarn needle
- Stitch markers (optional)
Crocheting is a versatile and imaginative art form, enabling you to fashion exquisite and distinctive pieces. If you wish to infuse your crochet skills with a touch of panache, consider mastering the creation of a captivating and unique square. Within this comprehensive tutorial, we shall guide you through the steps of creating a square that transcends the ordinary. Whether you’re a novice or a seasoned crochet enthusiast, this endeavor promises to ignite your creative spark.
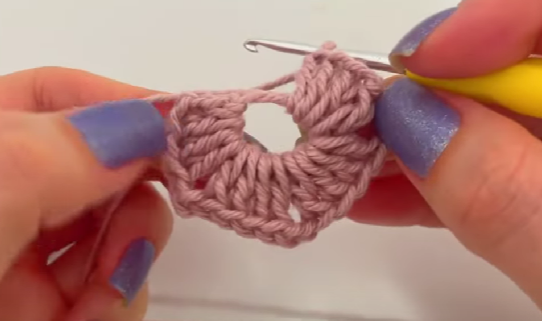
Start with a Magic Ring:
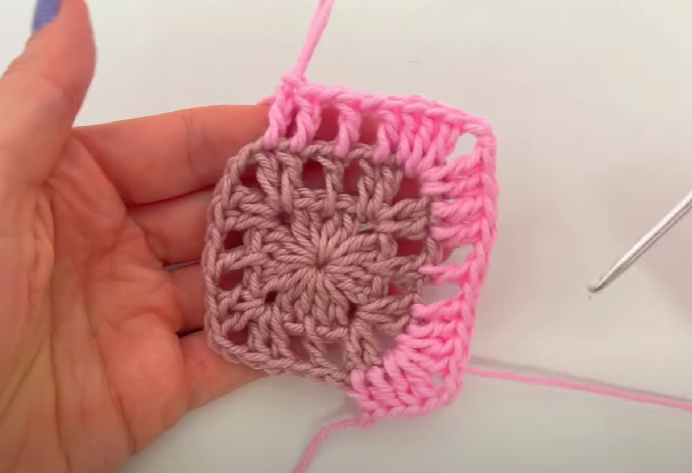
For us to start this model, we are going to make the magic ring here. We pull a loop and we’re going to make a chain here. Inside the magic ring, we are going to make a single crochet and two chains. The single crochet with the two chains serves as the first double crochet in this row.
Let’s go in the same space and work three more double crochets. Let’s make two chains. We’re back in the same place and we’re going to work four double crochets. Two chains and we make four more double crochets. Two chains and we make four more double crochets. We made here four groups of four double crochets separated by two chains, always. Let’s pull the thread of our magic ring closing it well here and now for us to finish this line, we will loop our needle.
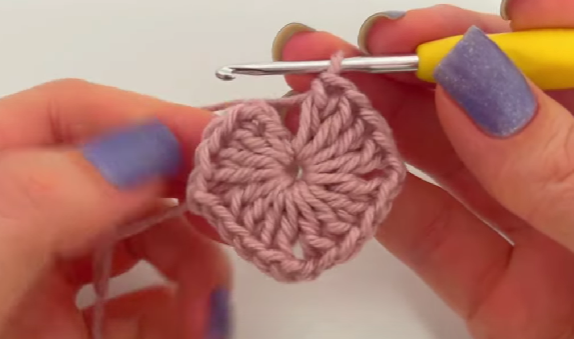
Let’s come in the second chain after the single crochet and we’ll work half a double crochet here taking all the loops at once like this here. Now inside this space, we are going to pull a loop here and we are going to make a single crochet right here in the corner of the work. We do both chains. In the same space, we will work another double crochet.
We make two chains and two double crochets in the same place forming a fan here. Now we are going to make a split chain. We loop our hook and here on the bottom row, we have four double crochets. Right here in the middle of them, we’re going to separate two points for each side. Right here in the middle, we’re going to work a double crochet. A chain and go to the next corner to work the fan again making two double crochets. Two chains and two double crochets in the same place. A chain of separation. Let’s come in the middle of these four points and work a double crochet. A chain and let’s work on the next corner fanning again.
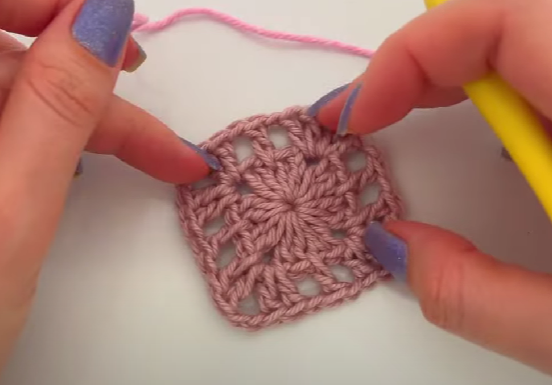
This will be the repetition of our entire line. We repeat this until the end. Arriving here at the end of our line, we are going to finish this line by making the chain of space here. Let’s go over the second chain that we have as a base. Here in the corner, we are going to take it by placing the needle from back to front like this. Let’s pull back that thread. Here we are going to work two chains and we can cut this wire. Then we hide it here between the stitches and cut the excess.
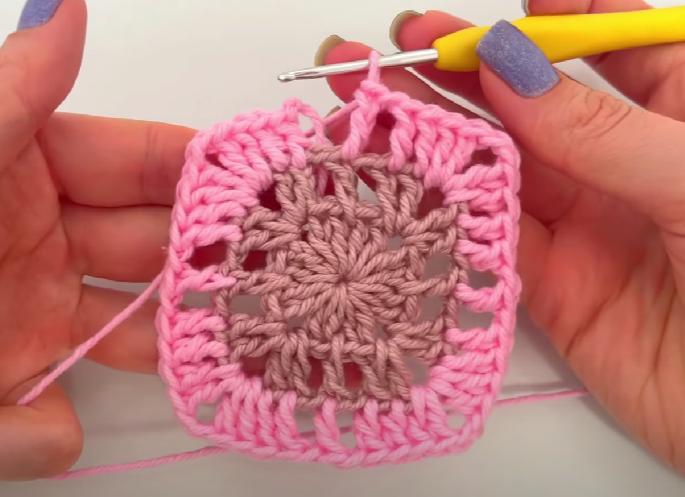
We’re going to do the same thing with this wire here. We’re going to go through the dots. Then we can make a knot and cut the excess of it. Now I’m going to get another yarn color. It may be the color of preference for each of you. Let’s make a knot and loop our needle. We can start working on any of these corners. Let’s work on top of this first high point that we made here on our fan. So here we finish the line.
Continuing the Crochet Pattern
I’m going to take advantage and start working here again making a high point on top of this point. In the next stitch that we have, we’re also going to make a double crochet. Inside the fan we are going to make the fan again by making two double crochets. Two chains and two double crochets in the same place. Now let’s go to the next point and work a double crochet. In the next one too.
The corner of our work was like this along these lines. Let’s make a chain. We lasso. On top of this high point that we have here, let’s work on a high point. A chain. Let’s go over this next point and work a double crochet. We repeat exactly what we did in the other corner. Let’s do the same repetition until the end of the row. To finish this line we are going to make a chain. Let’s come to that first high point and here we are going to make a very low stitch.
Completing the Crochet Row and Working with a New Yarn Color
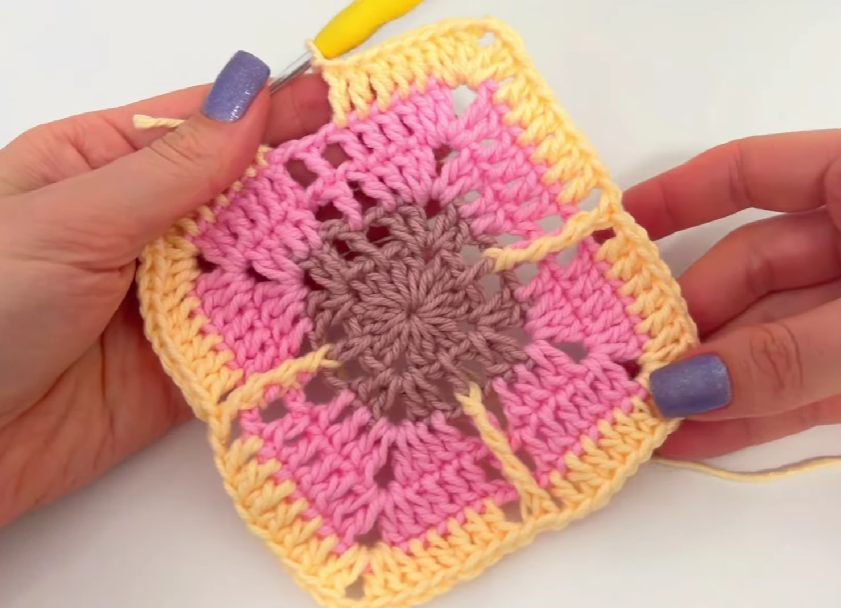
We make a chain. We’re back in the same place and we’re going to work here on a low point and two chains that serve as the first high point of this row. Let’s keep doing point after point. Within the fan, we will always repeat the two double crochets. Two chains and two double crochets. We keep doing the repetition of the high point in each base point.
Getting the corner of our work that way now. A chain of separation. Let’s come on top of this high point and work on the high point. A chain and let’s repeat the same thing in the next corner. In this way, we will continue until the end of the line. Arriving here at the end of our line, we made the last chain here. Let’s go over this second chain, but now we’re going to take it from back to front to take this thread to the back. Here we make two chains. We can cut that thread. Now we are going to pick another yarn color.
Creating Elongated High Points
Let’s loop our needle here and make a knot. We loop the needle. Let’s start working where we ended up on top of that high point. We work at a high point. Let’s make the sequence of points now here. Always being a high point on top of each base point. We worked up here making our fan and the corner of our work turned out like this. Now we are going to make a split chain.
We’re going to loop our hook three times and we’re going to go down this line here where we did this first single double crochet. Embracing it we are going to work a high point in relief taking two loops. Now we’re going to come to this next double crochet of the other row and we’re going to bring this loop to the other side here. We lasso. Let’s take three strings.

Let’s come to that last high point that we have here. Hugging him we pull this loop and now we take three more strings from the stitch. Now we lasso and let’s take one. We looped and removed two to leave the last high point elongated here also at the same height as the others. Let’s make a chain. Let’s go to the next point. We work here on the sequence of high points.
We finished this corner. We are now going to loop our hook three times after making a split chain. Let’s go down to this high point here and then go up working on these two. So embracing this high point we make it here in relief taking two loops. Let’s embrace the next high point. We bring the loop here in the corner and take three loops. We loop here at the next double crochet. We bring this loop and draw three. Now, to give height here from our high point, we take one and two, leaving the drawing of our point. Let’s make a chain. Let’s go to the next point and work with a double crochet. We repeat this chant.
Finishing the Crochet Piece
We made the next corner. Then we made the last chain here. Let’s loop our needle three times. Let’s go down at that point by hugging him. We bring one loop and take out two. Let’s go to the next high point of the top row. We bring the loop and draw three here. Let’s go to the next high point. We bring a loop and take out three. To give the height of our high point, we’re going to do it here by taking one and taking two in this way, leaving this drawing here.
Closing Remarks
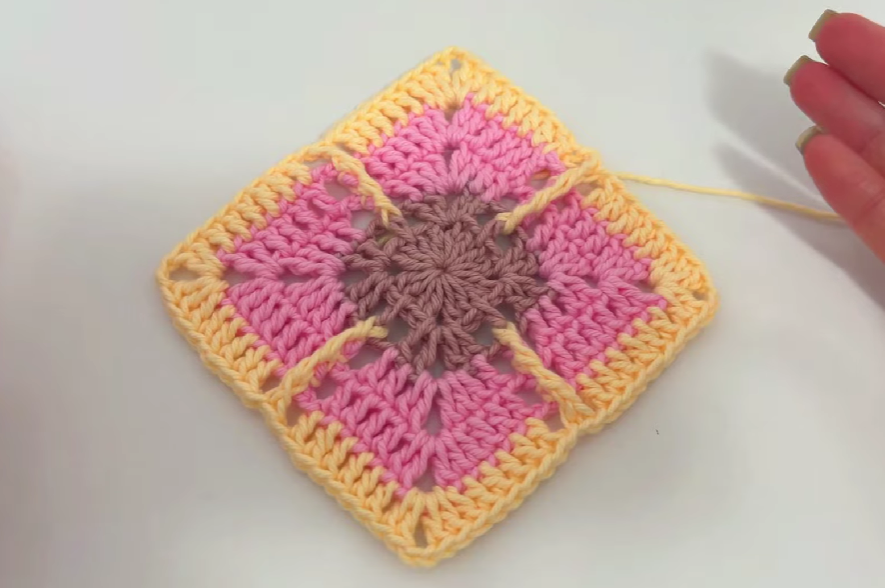
Make a chain and we will make the next corner with a double crochet in each base point and inside the fan we repeat the fan. Now let’s do the last work of our piece. Looping the needle three times. Let’s go down on that high point hugging him. We bring the loop and take out two. Hugging him we bring a loop and take away three. Let’s go to the next point. We bring a loop. We take three. Now we take away one and two.
We make a chain. Let’s take this little strap back there. We can make two chains here and cut that wire. Then we hide those wires back there and we can cut the excess of them. We can adjust our work here. Look how beautiful it turned out. It’s a super different design. We can join one square to the other in the same way that we normally do with other squares. It’s a pretty cool job. Very delicate too. We can make it here in other colors using your preferred color.
Video Tutorial:
Conclusion:
Congratulations on your successful creation of a beautiful and distinct crochet square that highlights your creativity and expertise. Crocheting unique squares offers limitless opportunities, so don’t hesitate to explore various yarns, stitch patterns, and colors to craft truly exceptional pieces. Whether you incorporate your square as a decorative element within a larger project or let it stand alone, it’s bound to leave a lasting impression and motivate others to dive into the art of crochet. Enjoy your crocheting journey!
You may be interested:
- How to Crochet a Gorgeous Red Rose: A Step-by-Step Guide
- Crochet baby blanket cardigan design – Free Pattern
- CROCHET SQUARE WITH DIFFERENT HIGHLIGHTS – Free Pattern
- How to Crochet a Round Crochet Model with a Different Beak


