
Why Make a Crochet Star Baby Cocoon?
There’s something magical about creating handmade gifts for babies, isn’t there? In a world full of mass-produced onesies and baby blankets, making something with your own two hands feels special — even sacred. And when it comes to crochet projects for little ones, a baby cocoon is a classic. But not just any cocoon — today, we’re diving into something truly unique, playful, and eye-catching: the crochet star baby cocoon.
This isn’t your typical baby wrap. It’s bold, colorful, and shaped like an actual star — five or six soft, rounded points cradling a baby like a warm, whimsical hug. Whether you’re a seasoned crocheter looking for a fun new twist on traditional baby patterns, or a confident beginner eager to try something a little more exciting, this project is packed with potential. You’ll get to play with color, texture, and shape all in one — and in the end, you’ll have something that’s not only practical but also full of personality.
But why go for a star shape?
That’s a fair question! Let’s talk about it.
A star baby cocoon has this almost fairy-tale vibe to it. It turns a regular swaddle or bunting-style cocoon into a conversation piece. You can make it in soft pastels for a dreamy look or in vibrant rainbow hues to add some serious cheer. Plus, it’s not just cute — it’s functional. The baby stays warm and snuggled while still being able to move those little arms and legs around inside the points of the star. It’s cozy, roomy, and ideal for those early days of lounging, stroller rides, or even adorable photoshoots.
Parents love receiving these as gifts. Babies love the comfort. And as a maker, you’ll love the creativity it allows. It’s a win-win-win.
In this blog, we’re going to explore everything you need to know to make your own unique crochet star baby cocoon. We’ll go beyond just a step-by-step pattern — though yes, you’ll get that too. But more importantly, we’ll explore what yarn works best for sensitive baby skin, how to choose a color palette that pops, how to customize your cocoon to fit babies from newborn up to 3 years old, and how to add those personal touches that turn a good project into a great one.
Whether you’re crafting this for your own little one, a friend’s baby shower, or even to sell in your handmade shop, this blog will walk you through every single detail. We’ll cover common mistakes to avoid, sizing adjustments, finishing tips, and even how to coordinate with matching baby accessories like hats, mittens, and booties.
So grab your yarn and a cup of tea — this is going to be a fun, colorful, and deeply satisfying project. By the end, you’ll not only have a beautiful finished cocoon, but also the confidence and know-how to customize it in all kinds of creative ways.

Ready? Let’s get stitching.
Project Overview and Finished Look
Before diving into the stitches and tools, let’s take a good look at what this crochet star baby cocoon actually is — because understanding the end goal makes every part of the process feel that much more meaningful.
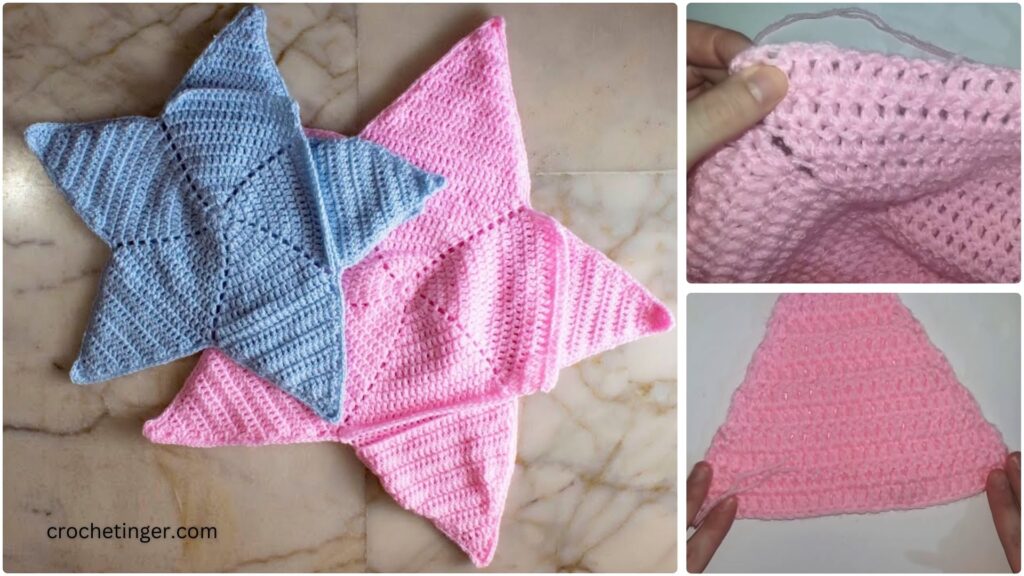
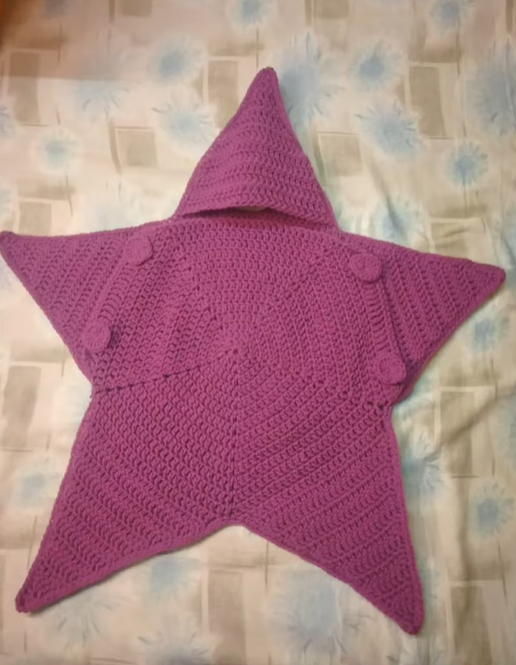
Picture this: a soft, plush star, about two to three feet across depending on the age size you choose, gently wrapped around a baby. The five or six arms of the star act like little wraps that tuck around the baby’s limbs. The middle part of the star is wider and deeper — just the right shape for the baby’s body to be softly cradled. Some people refer to this as a “star sack” or “baby bunting star,” but we’re taking it a step further by making it colorful, customizable, and packed with charm.
This cocoon is a perfect blend of blanket and onesie. It’s open at the top — where the baby’s head peeks out — and depending on how you want to customize it, you can keep the bottom slightly open for easy diaper changes, or stitch it closed like a cozy sleeping bag. The design is ideal for lounging and napping. It’s not meant for overnight sleep in a crib — it’s more of a warm layer for cuddles, strollers, and photo sessions.
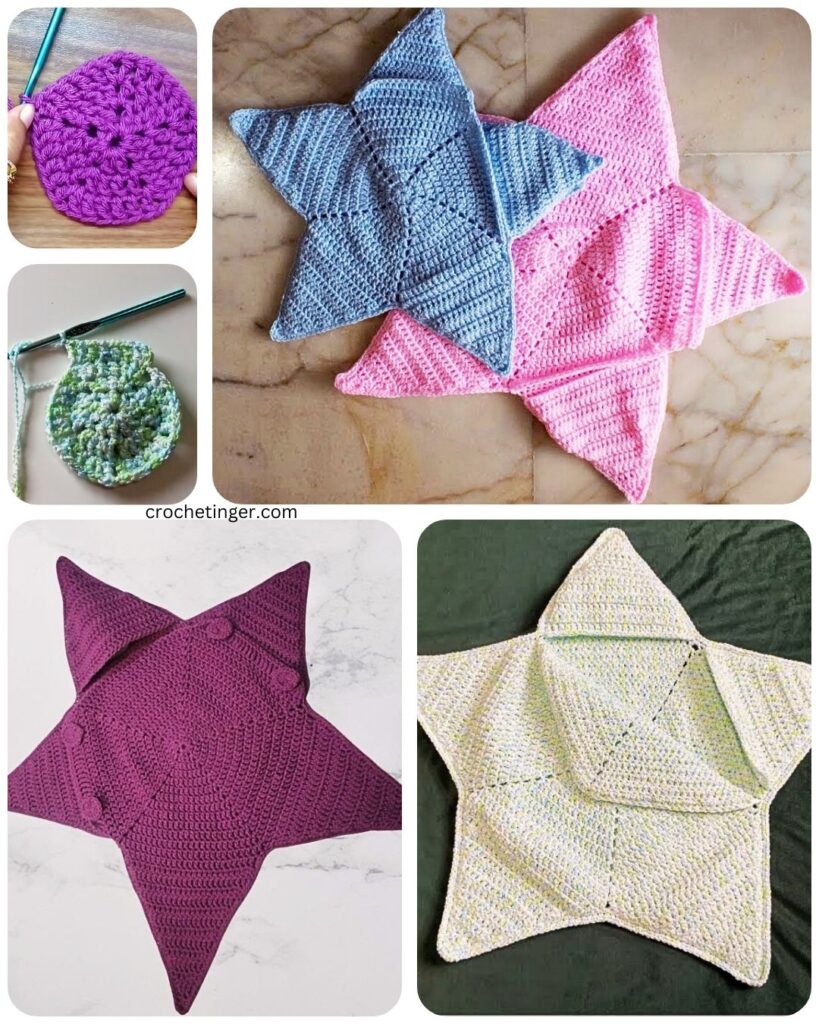
Let’s talk looks. One of the coolest parts of this design is that it can be as simple or bold as you want it to be. You can create a solid-color star cocoon in pale blue or soft pink for a more classic baby vibe, or go full rainbow with each point in a different color. Add in texture by switching between stitches or yarn types, or go completely minimalist with a single stitch and single yarn. Either way, the end result is sure to be eye-catching.
The beauty of this design is that it also works great across multiple ages — from newborns to toddlers. The trick is all in the shaping and size adjustments, which we’ll explore deeply in a later section. But yes, even your toddler can still rock their star cocoon during cozy reading time or as a nap-time wrap.
If you’re worried about skill level — don’t be. You don’t need to be a master crocheter. If you’re comfortable with basic stitches like single crochet, double crochet, and working in the round, you can absolutely do this project. And if you’re new to those stitches, don’t worry — I’ll walk you through the steps slowly, with helpful tips and pointers along the way.
By the end of this blog, you’ll have made something that looks like it took hours of planning and experience — but really just needed some yarn, patience, and your wonderful creativity. This project is one of those rare ones that offers both a learning experience and a finished product that’s impressive and practical.
Now that we’ve got the vision clear, let’s move on to making sure you’ve got the right tools and materials in place to get started.
Tools and Materials Checklist
One of the best things about crochet is that you don’t need a massive inventory to create something beautiful. For this project, you’ll need just a few basic tools — but the right materials can really elevate your final result.
Here’s a complete checklist to get your crochet basket ready before starting your star baby cocoon:
1. Yarn
Yarn is obviously the star of the show here — pun totally intended! Choosing the right yarn will affect everything from texture to drape to color vibrancy. For baby items, we need to prioritize softness, safety, and washability.
Recommended type:
Worsted weight (category 4) yarn is perfect for this pattern. It’s not too bulky, works up quickly, and is soft enough for baby skin. You can also go for a light DK (category 3) weight yarn if you want a more delicate result, especially for warmer climates.
Recommended material:
Look for baby-safe acrylic or cotton yarns. Brands like Bernat Softee Baby, Lion Brand Baby Soft, or Paintbox Yarns Cotton DK are all good options. If you’re making it for colder weather, a soft merino wool blend could also be lovely — just make sure it’s non-scratchy.
Estimated yardage:
- Newborn to 6 months: about 600–700 yards
- 6 months to 1 year: about 700–800 yards
- 1 to 3 years: about 800–1000 yards
Note: yardage will vary depending on your tension and stitch choice.
2. Crochet Hook
A size 5mm (H/8) hook is a great starting point for worsted yarn. If you’re using DK yarn, a 4mm (G/6) hook may be more appropriate.
You’ll want to make a gauge swatch (don’t worry, we’ll cover that later) to check the drape and size before committing to the full piece.
3. Stitch Markers
Since this project involves working in the round and building a symmetrical shape, stitch markers will be your best friend. Use them to mark the start of each round, as well as the “point” transitions in your star shape.
4. Tapestry Needle
This is used for weaving in ends and sewing pieces together if you choose a multi-panel construction method.
5. Scissors
A good pair of sharp scissors is always essential — nothing’s more frustrating than trying to snip yarn with dull blades.
6. Measuring Tape
Measuring your cocoon as you go helps ensure that it’ll fit the intended baby size. This is especially important if you’re adjusting the pattern for older babies or toddlers.
Optional but nice to have:
- Blocking mat and pins (if you want to block your cocoon after finishing)
- Row counter (to help keep track of rounds)
- Yarn bobbins (for colorwork or intarsia-style designs)
Before you start hooking, take a moment to gather all these tools. Lay them out like a little crafting ritual — it helps you get in the zone, and it saves you from frantic searching later on when you’re halfway through a row and realize you misplaced your scissors.
With your toolkit ready to go, let’s get into the heart of this creative process: choosing the colors that will make your cocoon stand out.
Choosing the Right Yarn for Babies: Safety, Comfort, and Style
When it comes to making baby items — especially something like a cocoon that will touch a baby’s skin all over — your yarn choice isn’t just about looks. It’s about softness, safety, and sensory experience. Babies have extremely delicate skin, and their comfort should always come first.
That said, the yarn you choose can also be your best design partner. It affects color vibrancy, stitch definition, how well your cocoon keeps its shape, and how easy it is to wash and maintain.
Let’s break it down into the things that matter most when selecting the best yarn for your crochet star baby cocoon.
Softness is Non-Negotiable
This is the golden rule of baby yarn selection: if it doesn’t feel soft to you, it won’t feel soft to a baby. Even some yarns labeled “baby-friendly” can feel scratchy depending on the fiber blend. Before committing to a yarn, do the simple neck test — rub a small sample of it on your neck or inner arm. If it’s even slightly itchy, it’s a no-go for baby.
Recommended yarns for softness:
- Bernat Softee Baby – Known for being plush and easy to work with.
- Lion Brand Baby Soft – Available in dreamy pastel shades and very soft to the touch.
- Paintbox Cotton DK or Simply DK – Lightweight and breathable, with amazing color variety.
- Red Heart Soft Baby Steps – Affordable, soft, and comes in a variety of kid-friendly colors.
Avoid: cheap acrylics that feel plasticky or stiff, and most wool unless it’s specifically labeled as extra-soft, superwash, or baby-safe.
Hypoallergenic and Safe for Baby Skin
Baby skin is not just sensitive — it can also react strongly to allergens or harsh fibers. That’s why it’s safest to use yarns that are labeled hypoallergenic or are 100% natural and processed without harmful chemicals.
Good options include:
- 100% cotton yarns (ideal for warm climates)
- Acrylic blends that are OEKO-TEX certified or explicitly made for baby products
- Bamboo blends – These are becoming popular because they’re ultra-soft, breathable, and naturally antibacterial
Stay away from:
- Fibers that shed (like mohair or angora)
- Yarns with glitter, sequins, or metallic threads — while pretty, they’re not safe for babies
- Yarns with strong dyes or chemical treatments
Durability and Washability
Let’s be real — babies are messy. That adorable star cocoon? It’s going to get spit-up on. Maybe a little drool. Possibly some milk. Definitely some pee or poop. You need yarn that can handle washing machines without pilling, stretching, or becoming stiff.
Check the yarn label and look for:
- Machine washable (cold or warm, gentle cycle)
- Tumble dry low or flat dry
- Resistant to pilling and snagging
Pro tip: before starting your project, make a small swatch and run it through the wash once or twice. See how it holds up and feels afterward. This one step can save you hours of frustration later.
Weight and Drape
For the star baby cocoon to be both snuggly and functional, you want a yarn that provides structure without being too stiff. Worsted weight is ideal for most patterns, offering that sweet spot between drape and warmth. If you live in a warmer climate or want a lighter cocoon, a DK weight or even sport weight can work well — just know you’ll need more stitches to reach the same size.
Avoid bulky yarns for newborns — they can be too warm and don’t offer as much flexibility for the baby to move inside the cocoon.
Color Considerations
This is the fun part — choosing the palette for your colorful star cocoon! Here’s where you get to be creative, expressive, and maybe even a little whimsical.
Ideas to spark your imagination:
- Rainbow cocoon – each point of the star is a different bright color
- Ombre blend – start at the center with a light shade and darken outward through the points
- Pastel palette – soft peaches, mint greens, butter yellows, and baby blues for a dreamy finish
- Nature-inspired tones – soft forest green, sky blue, sandy beige, and cloud white
- Gender-neutral fun – turquoise, mustard, coral, lavender, gray
Make sure the yarns you choose have similar weights and textures, especially if you’re mixing brands. Different yarns can behave unpredictably when joined, especially over time or after washing.
If you’re gifting or selling the cocoon, it can also be fun to ask the parents if they have a theme or favorite color. Some people love neutrals, while others go wild for color. Customization is part of the magic of handmade gifts.
Planning Your Star Baby Cocoon: Shape, Size, Structure, and Customization
This section is your ultimate creative blueprint. Before your crochet hook meets yarn, there’s a world of thought, color, function, and love that goes into planning. Whether you’re making this star cocoon for a newborn photoshoot, a practical winter wrap for chilly stroller rides, or a whimsical gift for a baby shower, every decision you make will shape the final outcome.
Let’s go deep into every piece of the planning puzzle.
Choosing the Right Star Shape: 5-Point or 6-Point
Most star baby cocoons you’ll see online or in crafting groups use the 5-point star. It’s not just about aesthetics — this shape is deeply functional. The five points allow you to wrap each of the baby’s limbs gently while leaving one point for the head or bottom (depending on orientation). If you’re looking to stay classic and simple, go with the 5-point design.
But if you’re feeling adventurous and want a cocoon that’s a bit roomier or slightly larger as the child grows, you could opt for a 6-point star. It’s less common, but it gives a unique snowflake-like appearance and provides more symmetry if you plan to leave some parts open (like for the arms or feet to peek through). It also distributes the baby’s weight and movement more evenly, which can be more comfortable for longer lounging.
Just note: the more points your star has, the more math (and yarn) you’ll need.
Sizing for Baby Ages: 0 to 3 Years
Now, let’s talk about how to size your cocoon so that it comfortably fits babies across that broad range from newborn to toddler.
Newborn (0–3 months): You’ll want a snug fit that’s warm and womb-like. The finished diameter of your cocoon should be about 22–24 inches across, with star points about 4 inches long. Use soft, flexible yarns and avoid bulky stitches.
Infant (3–12 months): Go slightly larger — aim for 26–28 inches in diameter. Consider using a stretchier stitch pattern or adding extra rows in the body so it can grow with the baby. Some parents love using cocoons for stroller naps or even during breastfeeding, so make sure there’s enough room without being floppy.
Toddler (12–36 months): At this stage, many babies like to move around a lot more. You can make the cocoon more like a wearable blanket or nap pod. Make it roomy: around 32–36 inches in diameter, and maybe add some buttons or a zipper for easy access. Also, consider open hand and foot points for breathability and movement.
Tip: If you’re not sure what size to make, go a little larger — babies grow quickly!
Thinking About Structure: Seamless or Seamed?
Your next decision is whether to create a seamless cocoon or one made in pieces and joined. Each has pros and cons:
Seamless Cocoon (worked in the round):
- Looks sleek and tidy
- No need for much assembly
- Good for quick projects
- Better for smaller sizes
Seamed Cocoon (made in star-point panels):
- Allows more color variation
- Easier to customize fit and shape
- Great for using up scrap yarns
- You can block and shape each piece individually
In general, beginners often go with the seamless option, while more experienced crocheters love the flexibility of a panel-based approach.
How Should It Wrap? Front Closure or Slip-in Style?
Some cocoons are designed to be completely closed — baby slips in from the top and snuggles down like a burrito. Others open from the front with buttons, ties, snaps, or zippers.
Here’s how to decide:
Slip-in Style:
- Best for newborns
- Simpler construction
- Less fiddly to use during naps
- More secure and cozy
Front-Open Style:
- Best for older babies
- Great for quick diaper changes
- Easy to put on without waking baby
- Allows for more breathability in warmer seasons
If you’re gifting this to someone, you might want to go with the openable version — parents will thank you.
Optional Add-ons: Hoods, Booties, Mittens
To make your cocoon extra unique and functional, consider adding matching accessories!
Hood: A little attached hood not only keeps baby’s head warm, but also gives the cocoon a fantasy, starry look — almost like a wizard’s robe! You can crochet this directly onto one of the star points or create it separately and attach later.
Booties: Matching booties in the same yarn give a lovely complete touch. You can design them as tiny star-shape socks or simply cozy slipper-style booties.
Mittens: These are not only cute but functional — keeping baby’s hands warm and preventing scratching. Make them fingerless for toddlers or closed for infants.
Many makers even stitch little loops or rings inside the points to clip in pacifiers or attach small toys. Creative bonus points!
Color Planning and Theming
Let’s talk color! Since you’re going for a “new-style, colorful, and unique” star cocoon, this is your playground.
Some great color theme ideas include:
- Galaxy/Space Theme: Midnight blue body with golden or white tips, add tiny embroidered stars or comets
- Rainbow Bright: Every point is a different vibrant color, body can be neutral or bold
- Pastel Dreams: Soft pinks, baby blues, mint green, and buttery yellow for a soothing look
- Animal Inspired: Brown and cream with little ears on the hood for a teddy bear look
- Holiday Fun: Red and green with jingle bells for Christmas babies, or oranges and black with tiny ghost buttons for October-born babies
Use color to tell a story. Yarn cakes or variegated yarns can create stunning fades or spirals that look complex but are easy to work with.
Step-by-Step Pattern Instructions for the Crochet Star Baby Cocoon
Creating a Crochet Star Baby Cocoon combines charm with function. Its whimsical star shape not only wraps the baby in warmth but also brings delight to parents and onlookers alike. This part of the tutorial is designed for crocheters of all levels. Whether you’re just beginning or you’re a seasoned fiber artist, these clear, easy-to-follow instructions will guide you every step of the way.
We’ll start with the newborn size, then provide notes for infant and toddler sizing. This pattern is written in US terms and uses basic stitches to form a stunning, five- or six-pointed star cocoon with or without a hood.
Pattern Overview
- Skill Level: Easy to intermediate
- Construction: Worked in the round (center out), star shape with increasing rows
- Customization: Size, colorwork, optional hood, and decorative additions
- Stitches Used:
- Magic ring
- Chain (ch)
- Slip stitch (sl st)
- Single crochet (sc)
- Half double crochet (hdc)
- Double crochet (dc)
- Increase (2 sts in same st)
- Decrease (sc2tog or dc2tog)
Newborn Star Cocoon Pattern (Five-Point Star)
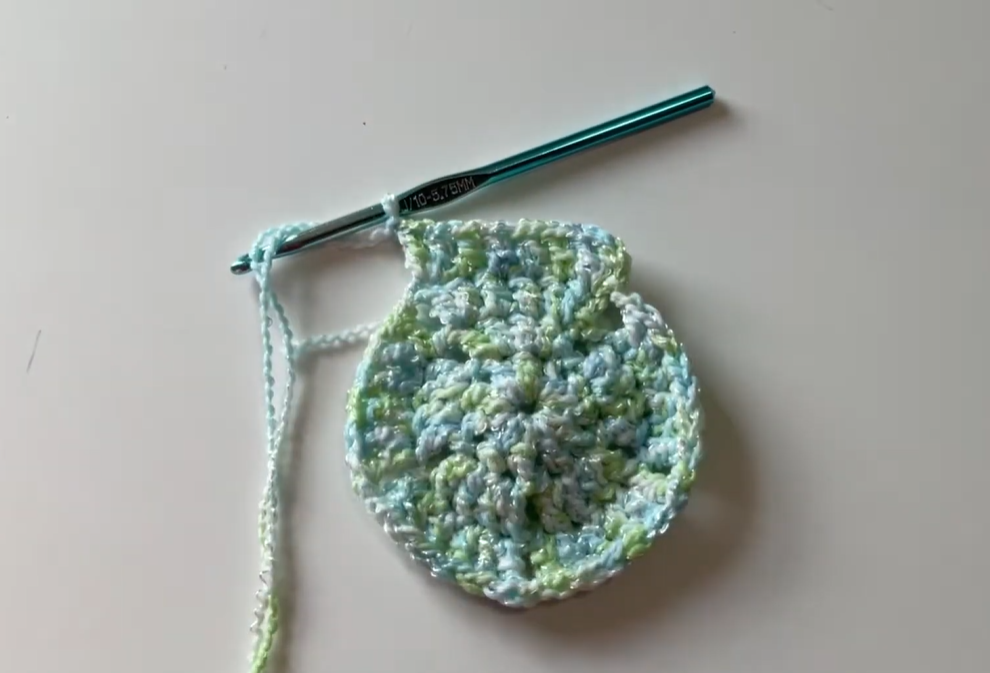
Foundation: Magic Circle and Center
- Make a magic ring, or ch 4 and join with a sl st to form a ring.
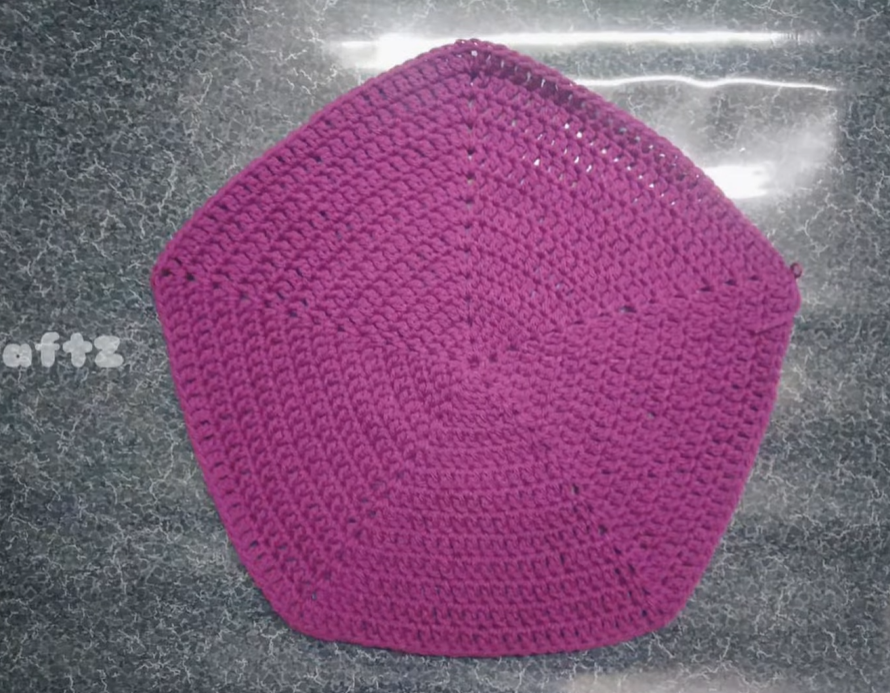
- Round 1: Ch 3 (counts as dc), 14 dc into ring. Join with sl st to top of ch-3. (15 sts)
- Round 2: Ch 3, dc in same st, 2 dc in each around. Join. (30 sts)
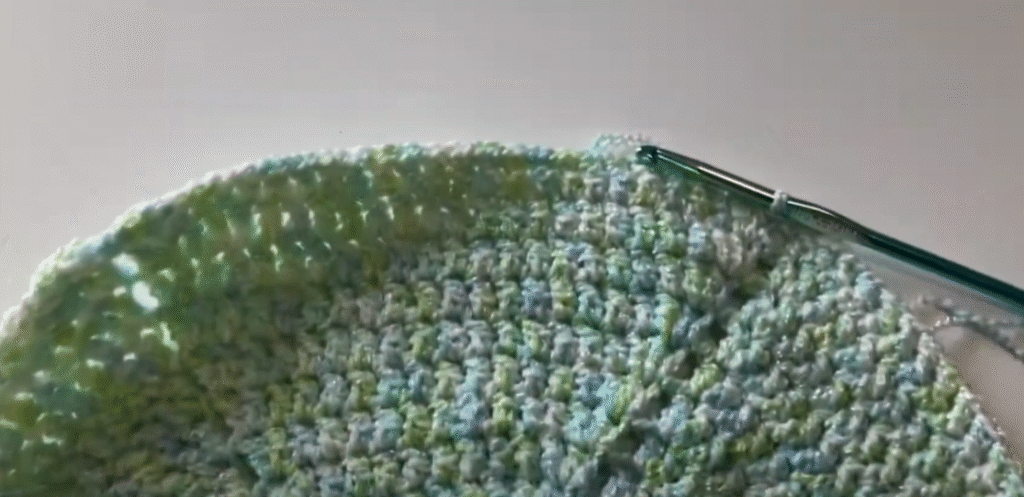
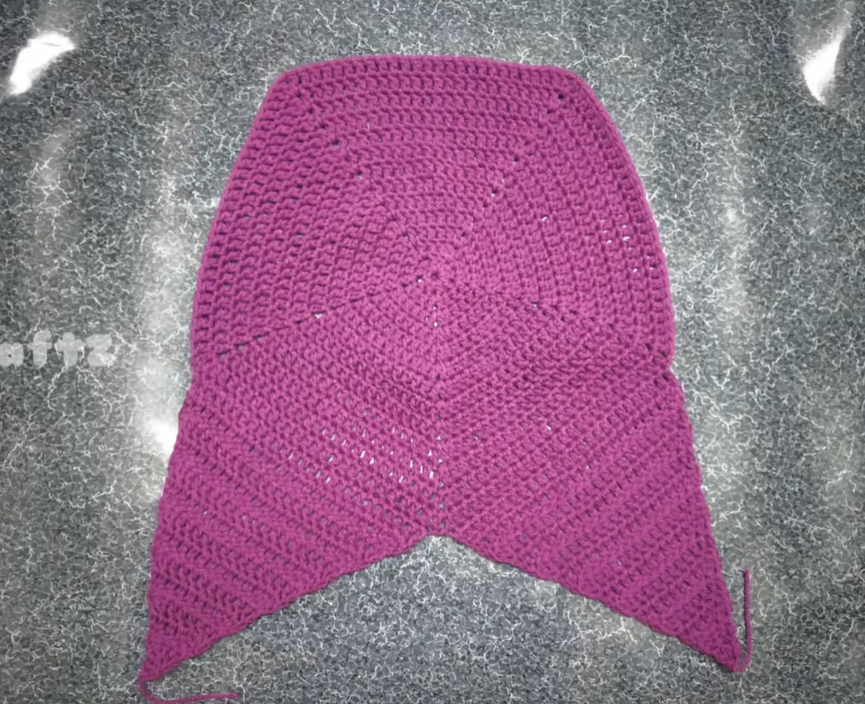
Begin Star Points
You will now divide the circle into 5 sections (for each star point), separated by increases.
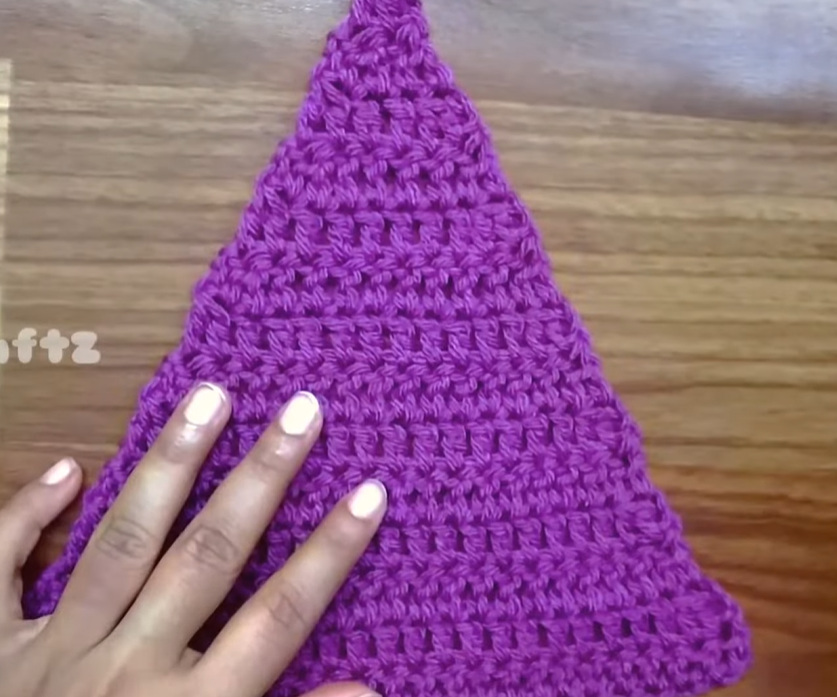
- Round 3: (Dc in next 5 sts, 2 dc in next st) repeat 5 times. (35 sts total)
- Round 4: (Dc in next 6 sts, 2 dc in next st) repeat 5 times. (40 sts)
Continue building rounds with 1 more dc in each point section, separated by increases at the end of each section. This is the structure for growing the star shape.
Repeat until your star has 10–12 rounds, depending on your desired size. For a newborn, stop when the measurement from center to tip is around 12 inches.
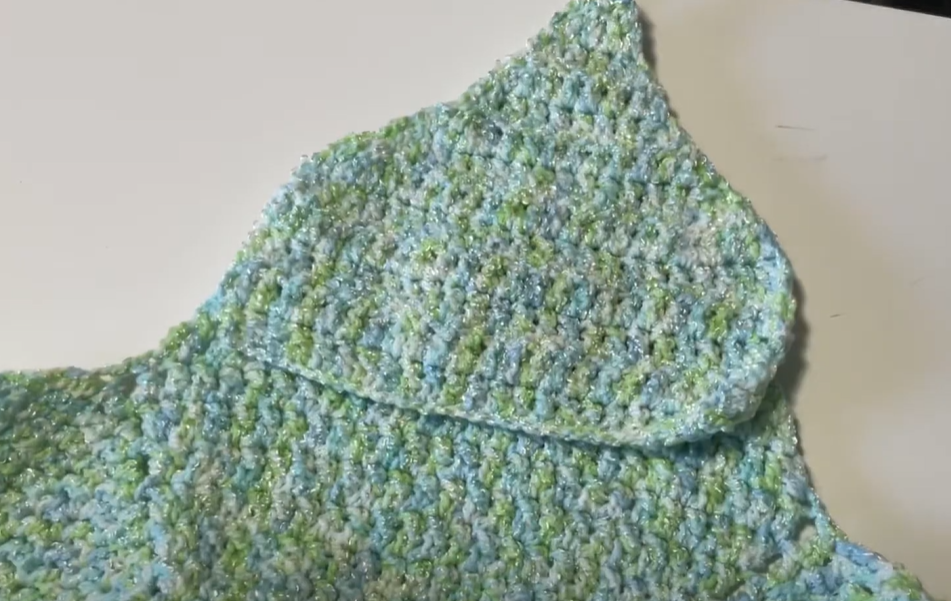
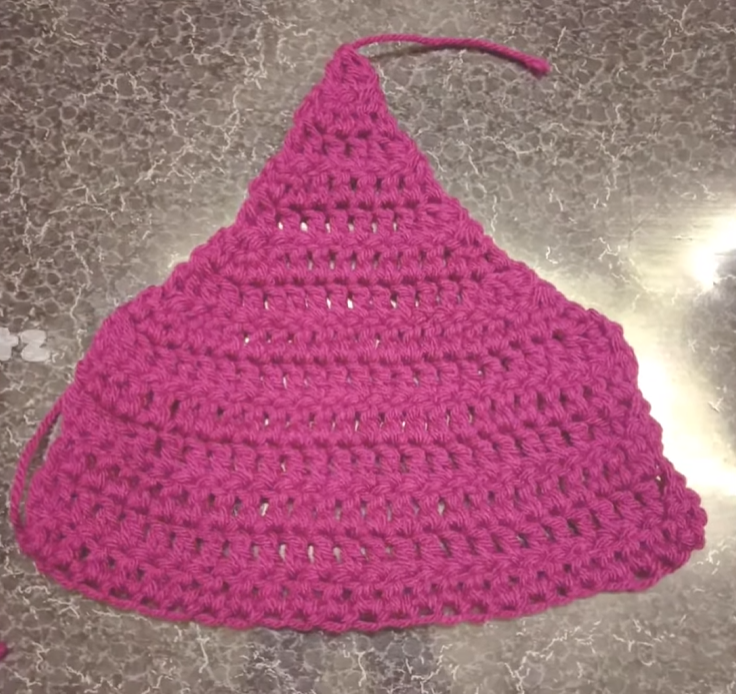
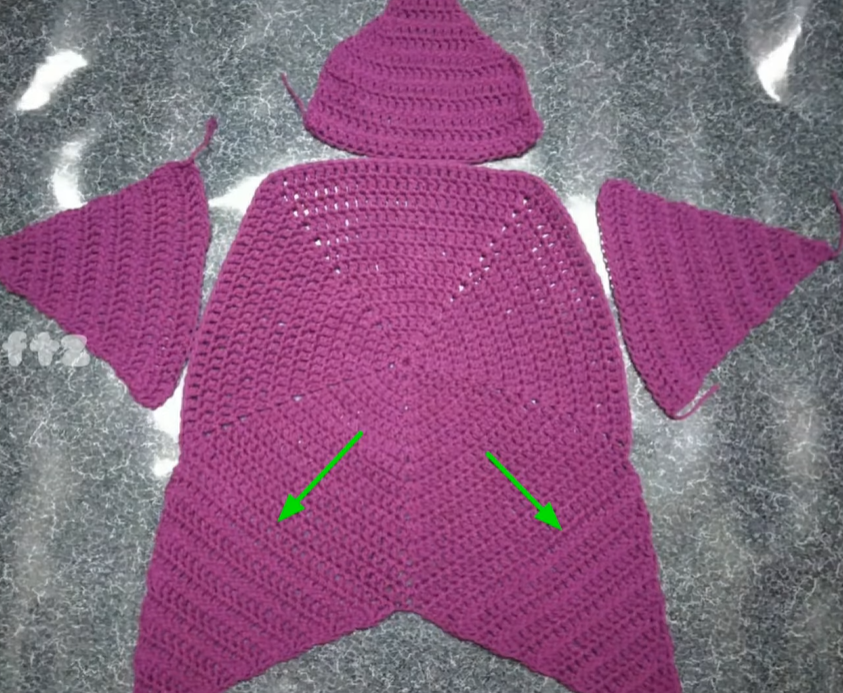
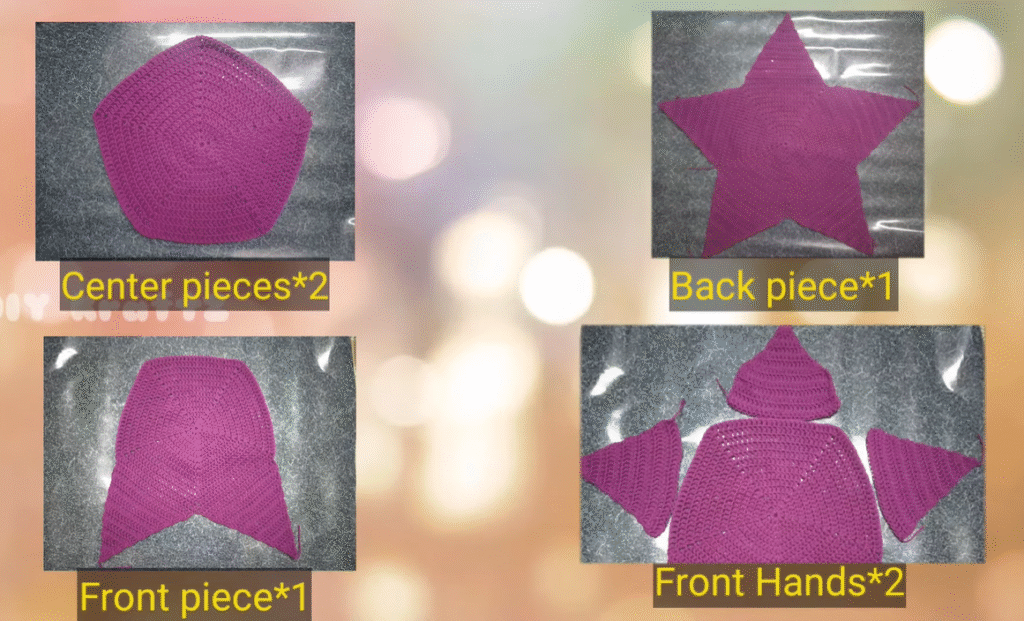
Now that you have your star base, fold two adjacent points together to create the cocoon’s front and back. You’ll work in the round to build walls around the inner body of the star to form a sleeping pouch.
- Identify Star Valley (Between Points)
Use stitch markers to identify the five valleys between the star points. You’ll now crochet around the inner pentagon formed inside the star. - Join Yarn at Any Valley Point
Attach yarn with a sl st. - Round 1 (Inner Cocoon Base): Ch 1, sc evenly across each side (approx. 10–12 sts per side depending on your earlier rounds), placing 1 sc in each valley. Join with sl st.
You should now have a rough pentagon base. - Round 2–12 (or more for length): Ch 2 (counts as hdc), hdc in each st around. Join.
Repeat until the cocoon reaches about 15 inches in depth for a newborn.
For a looser or drawstring look at the top, you can switch to dc or even use a shell stitch.
Optional: Hooded Star Cocoon Topper
If you’d like to add a little hood, here’s how:
- From the top edge of the cocoon (inner edge of one star point), count 10–12 stitches and attach yarn.
- Ch 1, sc in each of the next 10–12 stitches (row 1).
- Turn, ch 1, sc in each st across. Repeat for 12–15 rows or until hood measures 6 inches high.
- Fold in half and sl st or sc seam the top of the hood.
- Optionally, edge the hood with sc or picot stitches for a clean look.
Button Closure (Optional)
For an open-front cocoon with button-up style:
- After building the cocoon base, leave one edge open.
- Add sc borders along each side of the opening.
- Sew buttons down one edge and make chain-loop holes along the other.
Customization Notes for Sizes
Infant Size (3–6 months):
- Continue star rounds to 13–14 rounds (approximately 14–16 inches from center to point).
- Cocoon depth: 16–18 inches.
- Add 2–3 extra hdc rounds to increase depth.
Toddler Size (6–18 months):
- Build to 15–17 star rounds (17–20 inches from center to point).
- Cocoon depth: 18–22 inches.
- Add shaping stitches if needed for snug fit, or widen opening and use a drawstring closure.
Colorwork & Striping Tips
To make your cocoon pop with color and look “new style” as mentioned, try these ideas:
- Striped Points: Change color every round during the star base phase.
- Rainbow Fade: Use a cake yarn with long color changes for a dreamy gradient.
- Contrasting Edge: Work the final 2 rounds of star tips and cocoon border in a bold contrasting shade.
- Embroidered Details: After finishing, embroider little stars, clouds, hearts, or initials on the cocoon using surface crochet or duplicate stitch.
To change color seamlessly:
- In the final yarn over of the last stitch before the color change, pull through with the new color.
Final Assembly & Finishing
- Weave in all loose ends using a yarn needle.
- Block the cocoon if desired for shape consistency (especially for gift-giving).
- Add decorative features like:
- Crochet stars
- Tiny clouds
- Tassels
- Pom-poms (secure tightly!)
- Fold neatly and tie with a ribbon for gifting, or display in a nursery for photos.
Styling, Safety, and Creative Uses for Your Crochet Star Baby Cocoon
Crocheting a baby cocoon is about more than yarn and stitches—it’s a love letter in fiber. With the body of your star cocoon complete, you now have the freedom to bring it to life in imaginative ways. Whether you’re crafting for your own little one, creating a heartfelt baby shower gift, or offering handmade treasures for sale, the styling and finishing touches matter just as much as the craftsmanship itself.
Let’s explore how to elevate your creation with warmth, safety, beauty, and purpose.
Baby Styling Tips for the Perfect Photoshoot
Your Star Baby Cocoon is an adorable handmade accent perfect for photography. If you’re planning a baby photoshoot, here are some ideas to enhance the moment:
Color Themes:
- Use soft pastel yarn for a dreamy look—pale pinks, mint greens, sky blues.
- Try bold and whimsical themes like rainbow stripes, space galaxy yarns, or sunflower yellow.
- Go gender-neutral with creams, oatmeals, or light grays for modern boho vibes.
Accessories to Add:
- Crochet a matching hat or bonnet to pair with the cocoon.
- Create tiny booties or mittens in the same yarn.
- Use a delicate lace or floral headband if preferred for girls.
Backdrop Ideas:
- Place the cocoon on a faux fur rug for cozy texture.
- Lay it over a rustic wooden background with fairy lights.
- Use a soft baby blanket with cloud or moon patterns to match the star theme.
Props to Consider:
- Small plush stars or moons
- A little crochet teddy bear or amigurumi animal tucked inside
- Wooden signs with the baby’s name or birth date
Lighting Suggestions:
- Natural daylight from a nearby window works best.
- Use soft, diffused light to highlight textures without harsh shadows.
Pose Ideas:
- Gently wrap the baby inside the cocoon with arms tucked in.
- Leave it slightly open at the top to show a sleepy face.
- Try angled overhead shots to showcase the star shape beautifully.
Safety First: Best Practices for Using Baby Cocoons
While star cocoons are adorable, safety is absolutely critical. Always prioritize the well-being of the baby when using or gifting your crochet creation.
Key Safety Guidelines:
- Supervised Use Only: The cocoon is intended for photo sessions or lounging, not for unattended sleep.
- Avoid Tight Fits: Ensure the cocoon is not too snug or restricting movement.
- Choose Baby-Safe Yarn: Only use hypoallergenic, soft, and washable yarns labeled safe for infants.
- Secure All Attachments: Any decorative items—like buttons, bows, or appliqués—must be firmly sewn on or avoided altogether.
- No Drawstrings Near Head Area: If you add a hood or drawstring top, avoid any cord or closure that could pose a strangulation risk.
- Temperature Control: Wool cocoons can be very warm—use seasonally and monitor baby’s comfort.
- Wash Before Use: Always wash the cocoon before gifting or using on a newborn to remove dust or residue.
Gifting Ideas: Make It Special
A Star Baby Cocoon makes an unforgettable handmade gift for new parents. It’s unique, personal, and functional—all the qualities of a memorable present.
Presentation Tips:
- Fold the cocoon neatly and tie it with a satin ribbon.
- Add a handwritten tag with a washing guide and care instructions.
- Include a matching baby hat or small toy inside as a surprise.
- Place it in a gift box with tissue paper and a sprig of dried lavender for a sweet scent.
When to Gift It:
- Baby showers
- Birth celebrations
- First-month milestones
- Winter holidays (especially for Christmas themes)
Selling Your Star Cocoon: Tips for Makers and Online Shops
This cozy project is not only lovable but also sellable. Many crochet entrepreneurs find that themed baby items like cocoons perform well on Etsy, Instagram shops, and craft markets.
Product Photography Tips:
- Show the cocoon flat to highlight the star shape.
- Include at least one styled photo with props (but not necessarily with a baby for privacy).
- Use bright, neutral lighting and natural textures in your background.
Pricing Suggestions:
- Consider your yarn cost, time (hours spent), and design uniqueness.
- For handmade star cocoons with good yarn, a price range of $40–$75 is reasonable.
- Add extra for bundled sets (hat + cocoon) or premium yarn.
Marketing Phrases You Can Use:
- “Handmade with love—stellar comfort for your little star.”
- “The perfect baby shower gift—soft, safe, and starry.”
- “Adorable newborn photography prop—wrap your baby in the cosmos.”
Customer Care:
- Include care instructions in every package.
- Offer optional personalization (such as initials or color customization).
- Encourage repeat customers with discount codes or handwritten thank-you notes.
Video Tutorial:
Conclusion: Wrap Your Little Star in Magic
The Crochet Star Baby Cocoon is more than just a cozy wrap—it’s a magical, whimsical creation that brings joy to every stitch. From its twinkling star shape to the softness of each row, it captures the essence of handmade love. Whether you’re preparing for your baby’s first photo session, gifting a meaningful handmade treasure, or building your crochet business, this pattern offers something beautiful, functional, and truly heartwarming.
With the flexibility to adjust the size, the freedom to play with colors, and the option to add hoods, buttons, and embellishments, your star cocoon becomes a canvas of comfort and creativity.
So pick up your hook, gather your yarn, and start stitching your very own starry cocoon. Let each loop be filled with dreams, warmth, and love.
Have you tried this pattern? Share your creations and tag them with #StarBabyCocoon or drop your photos in the comments—let the crochet constellation grow!
Happy hooking!


